Meet the Blogger: Kirsten Krason of 6th Street Design School

January 31, 2011


Q: Which came first- blog or business?
A: My blog came first. But I always knew a business would follow. I started my blog about 6 months before I graduated from school so I already had clients ready once my business started after graduation. It was seriously great. My blog has been my biggest form of advertising and I’ve never had a shortage of great clients. 

Q: What has been the best aspect of blogging for you?
A: The best aspect of blogging is the feeling I get from great comments. It means so so so much to have someone say, “wow, great job!” or “we love your blog!”. It’s hard when you’re starting out a blog to know if anyone is listening or if anyone cares. The fact that I’ve been able to grow my readership and write about things people actually care about is astonishing to me. I love it! 
Where do you turn for design inspiration?


Q: Where do you turn for design inspiration?
A: I always turn to blogs for design inspiration. My favorite blogs to read are fellow designers like me. I love reading about their sources or recent projects. There are so many talented people out there! 
Where would you like your business to be in 5 years?
In 5 years I’ll probably have two kids total. Maybe 3??? So I’m really not sure how the business will run. Hopefully I figure out how to balance it all! I learn so much with each new client and project so hopefully in 5 years my business will run more efficiently and who knows I might even have an assistant. 


Just for fun- what are top must haves for designers?
– a supportive family
– great clients
– a good attitude and personality
– some great fabrics
– a space to work. Somewhere that inspires you. 
Thank you so much Kristen for being a guest here, and sharing a little more about you and the work you do! She is a fabulous chica so make sure and say hello! 
 6th Street Design  School
Blog | Twitter

*images via Kirsten on her lovely blog!!

Style Files – Neutrals

January 28, 2011

(via)
(via)
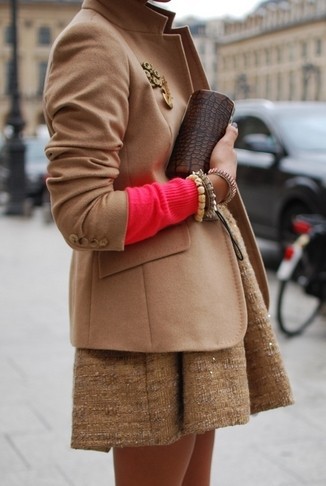
Two examples of neutrals worn well:) Layered with a pop of color or accessorized with just the right printed scarf. I love layering:)
A few fun things to share for your weekend:
The perfect illustrations for the Audrey fans.
Make all your favorite Girl Scout Cookies?! Yes please.
THE CUTEST T-shirt for Valentine’s Day!
I love discovering new fun blogs. Here is my fave this week! And guess what?! Its her birthday today so go say hello!
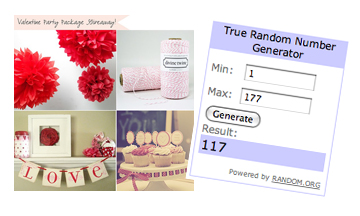
P.S. Don’t forget to enter to win the Ultimate Valentine Party Package Giveaway!
Happy Weekend:)

Tips 2 Take With You: Product Pricing with Ashley Pahl

January 27, 2011


Ashley has a fantastic blog- Indie Pretty Projects dedicated to Indie Businesses and has a very helpful series with many more topics you may find helpful! I am so grateful for her being here today to share her tips with us!

When I first started selling my work online, I was drastically under-pricing my work. I was trying to be competitive with my pricing, thinking that people would be more likely to spring for a good deal; however, it didn’t take long for me to realize that handmade shoppers will pay more for a nice, unique handmade product. A crafter’s time is valuable, and they should pay themselves what they are worth.

 For handmade business owners, there seems to be a little bit of a struggle with pricing. They want to make their craft affordable to shoppers, but they want to pay themselves for their time. First, let’s look at the top reasons for buying handmade: Handmade is quality, Handmade is unique, Buying handmade is important for supporting independent businesses. People shopping handmade usually aren’t doing so because they think they can score a deal. Some handmade businesses will offer bargains, but that is the exception, not the rule.


Handmade business owners are trying to turn a profit, and they must price their products accordingly. Indie businesses must consider the following factors when pricing a product:
  • cost of materials
  • website fees
  • time it takes to make that item and an hourly wage
  • packaging
  • any other unique costs

Sometimes handmade business owners do not pay themselves for their time because they want to keep prices affordable for shoppers. Crafters fear that if they charge too much, no one will buy their creations. The truth is, handmade items will sell if:

  • there is a market for it
  • no one else is making it
  • it is the best product among the competition
  • if the products are effectively marketed to the target audience
  • if people trust the artist or business
  • if the indie business has a great reputation

Many of those examples go hand-in-hand and cannot exist without another.


Indie businesses who have a product that people want, and who have found their niche market, should never need to sell their products at a discounted rate. A simple way to make sure all of your bases are covered is to create a pricing formula unique to your own business.

  1. determine the hourly rate you want to pay yourself
  2. determine the cost of materials to make one item
A basic formula for pricing items is as follows:
  • (hourly rate x time to make the item + cost of materials ) x 2 = wholesale price
  • Retail price = wholesale price x 2

Multiplying by two to get the wholesale price is necessary to make sure all overhead, packaging, and website fees are covered. Wholesale is almost always half of retail price.
For example, let’s say you want to pay yourself $18 an hour, you can make one necklace in 15 minutes and it costs $4 to make one necklace. Your pricing formula would look like:

($18 x .25 + $4) x 2 = $17 wholesale price
$17 x 2 = $34 retail price


*Remember: different crafters might require different formulas. This is a basic guideline, and it may need to be tweaked to your own specifications.


When a shopper is comparing two products, they look at the pictures, the description, the price, and the cost of shipping. They might look at feedback, too. An item that is priced much lower than the other might be perceived as being made with lower quality materials, or put together hastily. When someone is looking for a quality, unique gift, there’s a good chance they could go with the higher priced item, based on the perceived value. If you take a look at some of the top sellers on Etsy, you will see that their items are not low-priced; they are charging what those items are really worth to make.


Here’s the snag: if you know you are already paying yourself for your time and your items are priced fairly, this idea might not be for you. Shoppers can also recognize when an item is overpriced. If you are a crafter or artisan, do you use a formula to price your items? How do you balance paying yourself and making your items affordable to shoppers? What are your thoughts on raising prices when sales are stagnant?

Lets Have a Party, Shall We? Shocking Pink + Neon Green

January 26, 2011

Since we were young my sister and I were always thinking about the next party we would plan.  Themes, details, color schemes, and of course what to eat! …all the fun aspects of throwing a party. Since we are currently in a smaller rental home, I cannot host parties and it just about kills me! So I am going to just start throwing some virtual parties here on IHOD!! Why not?!
What to Eat: Cupcakes and cream (with large quantities of sprinkles on top), and Champagne
Reasons to Celebrate:  a) I have a new niece and nephew!  b) About to launch my Spring Accessory Line. c) Prayers answered for one of my families intentions. 😀

Take 3: Apothecary Jars in the Home

January 24, 2011

(via1, 2, 3 )
My love for jars in the home continues:) I have several in the work room and in my kitchen, and just added these to my inspiration list. 
How was your weekend? Mine went a little too fast as always. Hubby and I had a fun date night Friday and saw the movie True Grit. Have you seen it? What did you think? I actually really enjoyed it. The characters were fantastic.

Oh, and I cannot forget-there are a few bloggers I want to thank! Thank you Charlotta for the fabulous award on her lovely blog, Space for Inspiration. Thank you to my new chum Glocal Girl for including me in her list of 7 blogs she <3. You ladies make me smile!

Happy Monday friends:)

P.S. Last day to enter the giveaway for the Sienna Bag! Tomorrow I will be announcing the new giveaway that I put together in time for Valentine’s Day. Oh yes, very fun, because I <3 my readers:D

Color File: Honeysuckle

January 21, 2011

This color was Pantone’s color choice of 2011:) I am not one to wear a lot of pink but I love elements of it worked into a wardrobe, or a good pink nail polish. This is such a fun color to see on the runway this year! What about you? Are you a pink girl?

P.S. Don’t forget to enter to win the amazing Sienna Handbag from Mimi Boutique!

HAPPY WEEKEND!!

Small Business Guide: Product Photography Tips

January 20, 2011

Hi friends! Ready for the new series here on IHOD? I am working with some experienced entrepreneurs I admire to bring you some fantastic Tips 2 Take With You! I know starting out my business venture, I would have LOVED to have a guru tell me all the ins and outs and ups and downs. I had some help from the blogosphere, and some I had to figure out all on my own.  So, my thought is, if I can help some you starting entrepreneurs in a small way, this will be worth it for me! I have been asked many questions about starting a business, and hope to address some of those questions. If you think of anything you would like to learn more about, leave a comment or shoot me an email! 
To start, here is a topic I believe every etsy artist, retailer, and shop owner has researched at least a few times. HOW TO GET OUSTANDING PHOTOS for your products! I recently asked Megan of Lilac Saloon how she got her gorgeous wallflowers so picture perfect and she so kindly typed out the info step by step for me! She is a sweetheart! I knew I had to have her as the first guest to share her wisdom with us!


White Backgrounds Made Simple – Instructions for Photoshop
Layer, New Adjustment Layer, Brightness/Contrast
(check box: use previous layer to create clipping mask)
  -Crank the brightness up all the way to make your background completely white
  – If NEEDED: With the Adjustment Layer selected, paint with black over the product using the soft edged brush (preserve a bit of the shadow below the product).
  – Paint brush with white over areas that may have too much shadow, to erase it. Click on the “Background” layer and add another adjustment Layer for Brightness/ Contrast
  -Bring up the contrast a bit if necessary to give the product a bit more saturation (works great for making the black look more rich and the white look more white).
White Backgrounds Made Simple – Instructions for Lightroom 3

-In the Develop Module, change the background to white by right clicking in the blank space that surrounds the photo and select White.  With the background white, it will help us see that the white space we’re correcting in the photo is in fact pure white.
– Choose the Adjustment Brush (paintbrush) and choose Brightness as the Effect.  Slide the brightness up all the way to the right and slide Saturation all the way to the left (this will give us grey shadows).  
– Increase the size of your brush so that it’s very large because you’re going to quickly paint over the entire image with the brush – so, the bigger the better.  Paint over the whole image which will whiten that background but also make your image completely greyscale.  
– Now, choose the “Erase” brush while you are still in the toolbar for the Brightness Adjustment Brush.  Slide the Feather up all the way to the right and reduce the size of your brush so that it’s small enough to color over your product in pretty good detail and around your edges.  With Feather, it gives the brush a very soft edge and so you will not need to be perfect or worry about sharp contrast from the background to the product.  
– Zoom in on your product and begin ‘erasing’ over your product.  It will look like you are coloring in with color, over your product.  Erase over your entire product!  
– Lastly, you can bring the brightness down just a touch if you need to reveal the shadows a bit more but just watch the white of the background so it doesn’t start to get grey.
This is only ONE way of creating this effect, but it works for me!  Experiment with it and fine tune it so that it works for your products and your photos.  I hope it helps give your photos a boost!  ~ Megan

If you would like to download these steps in a Word Document you can do so here:
Copyright © 2025 In Honor Of Design powered by chloédigital