Gabe is writing today’s post (on his birthday no less) to break down the step by step process of how to install a board and batten wall!
At first glance this may seem long and complicated, but it is not as bad as what it appears! In case you missed the powder room renovation reveal, you can check there for the steps leading up to this point. I have written this with a first timer in mind, and therefore try to give some tips and details to make the project go over smoothly, and not simply how to accomplish it. Some steps you may even be able to skip. Hopefully the video can give you a quick idea as well as what to expect for a day of DIY Board and Batten.
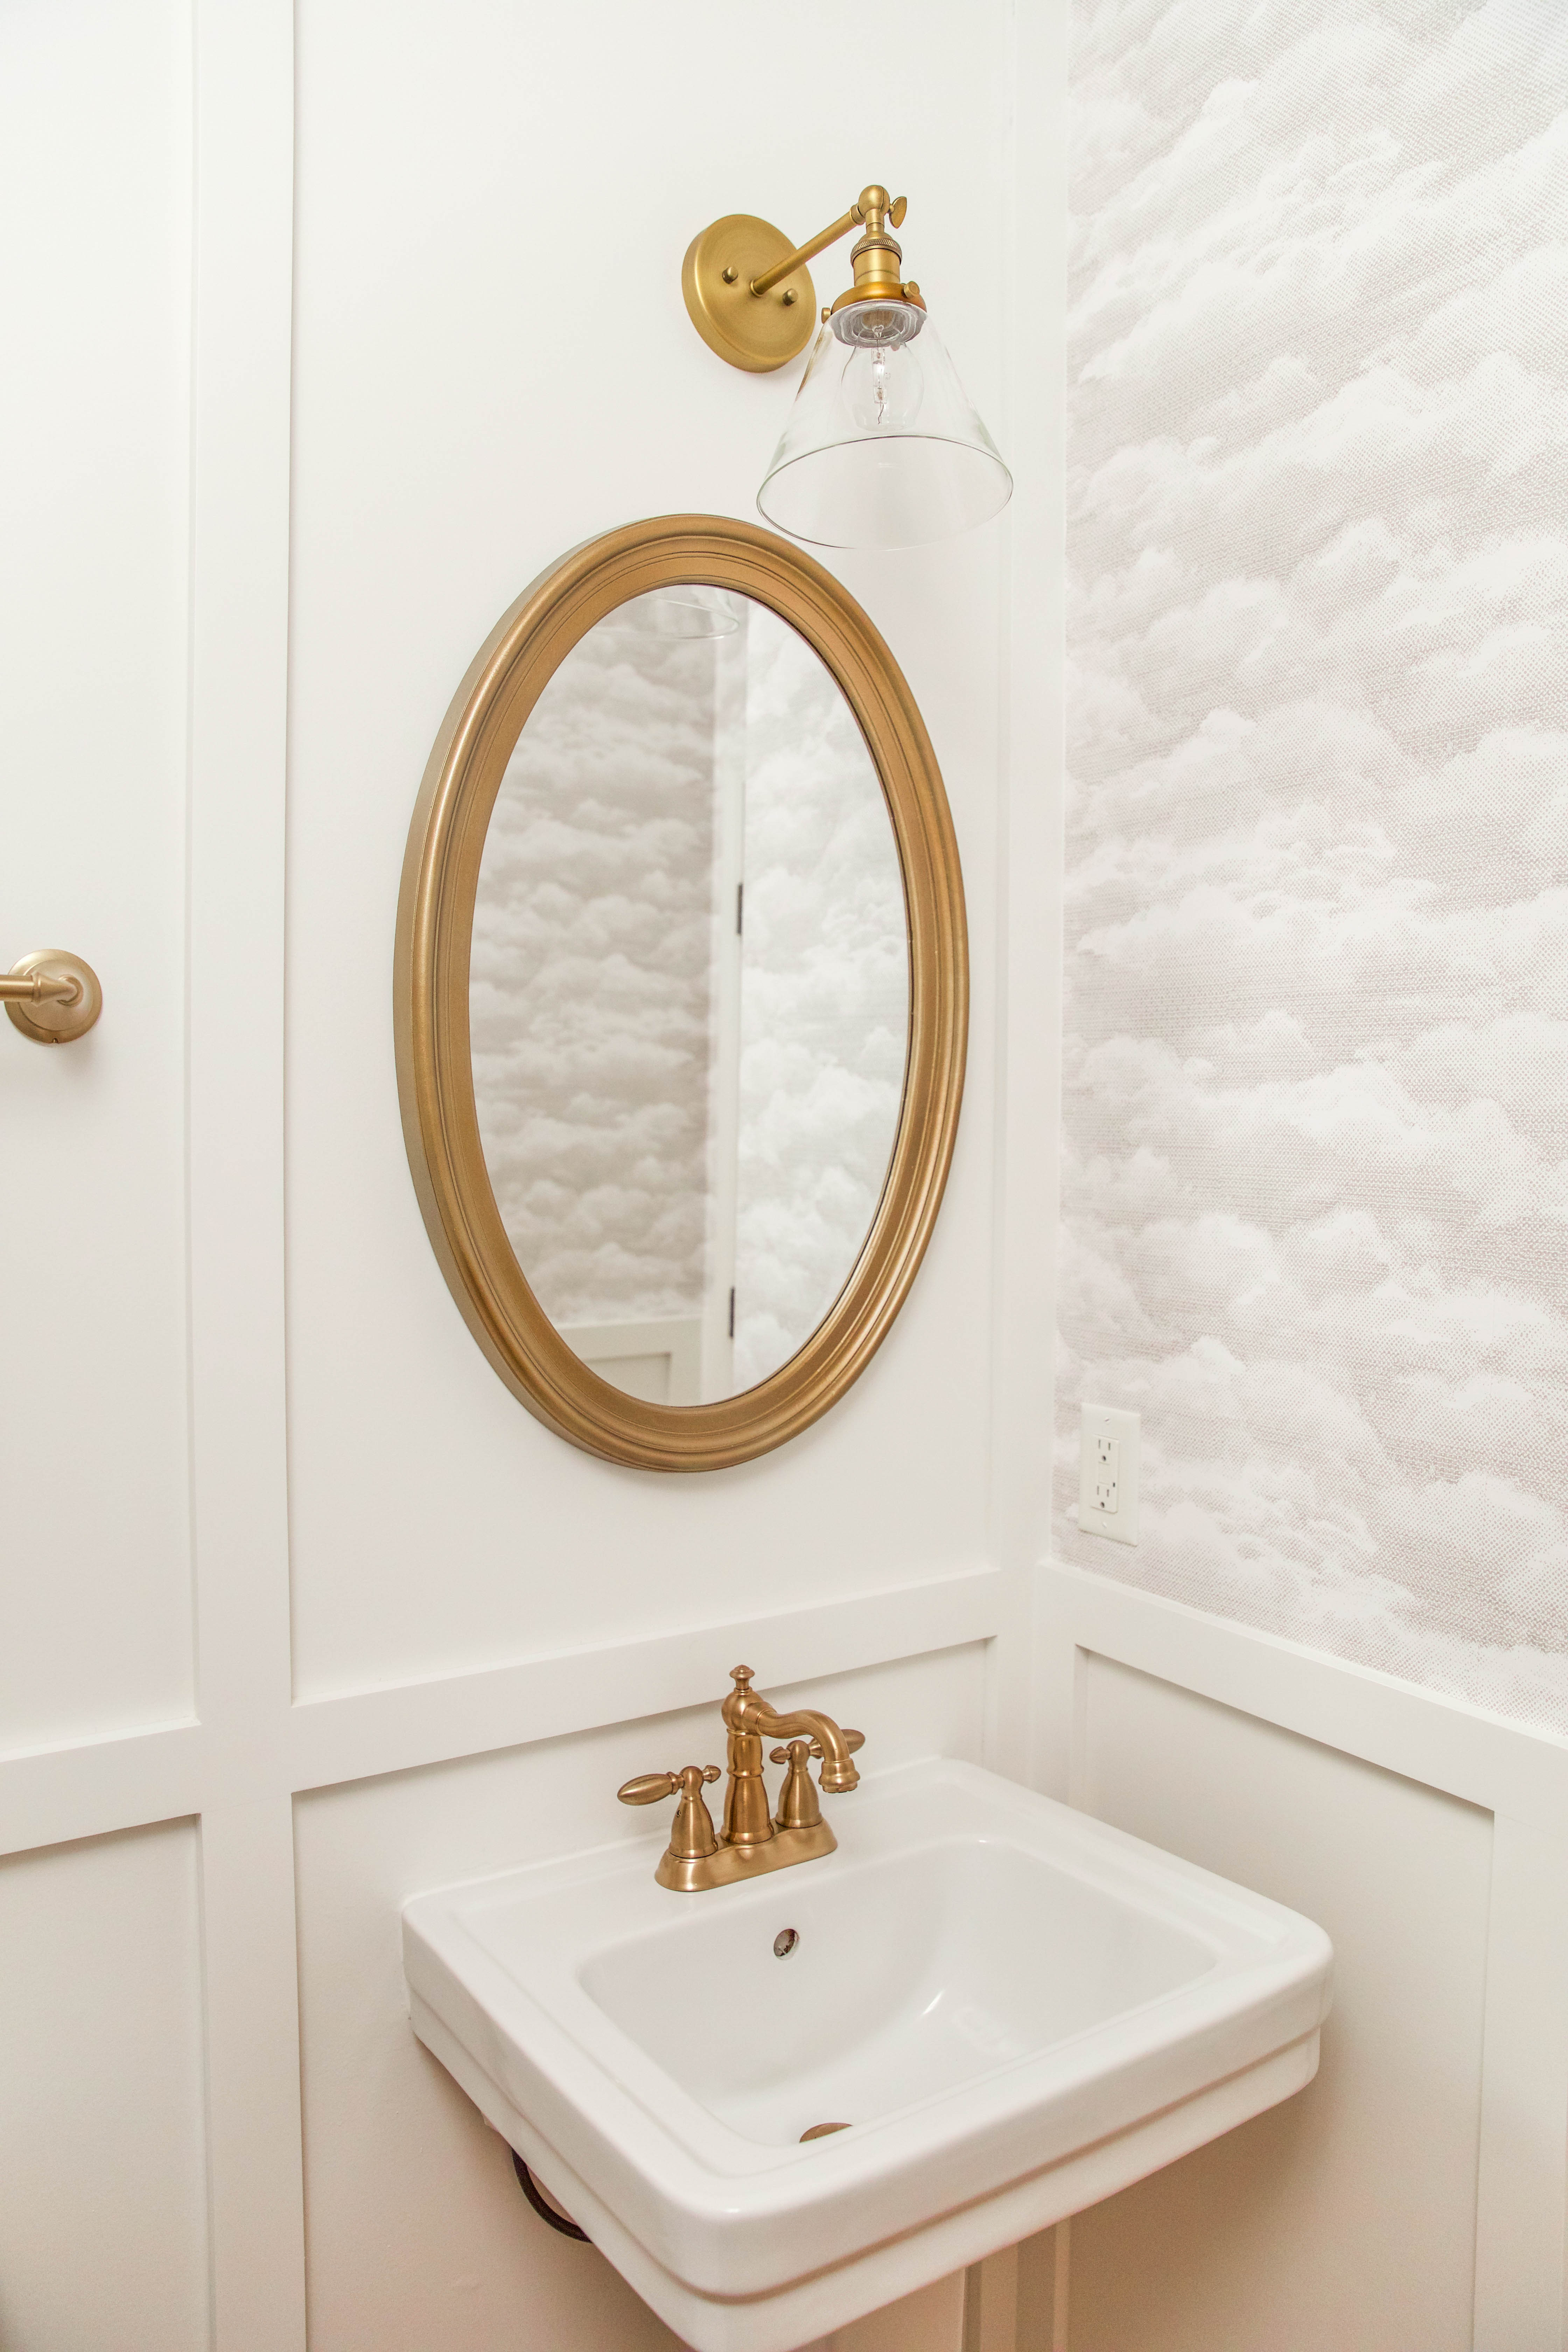
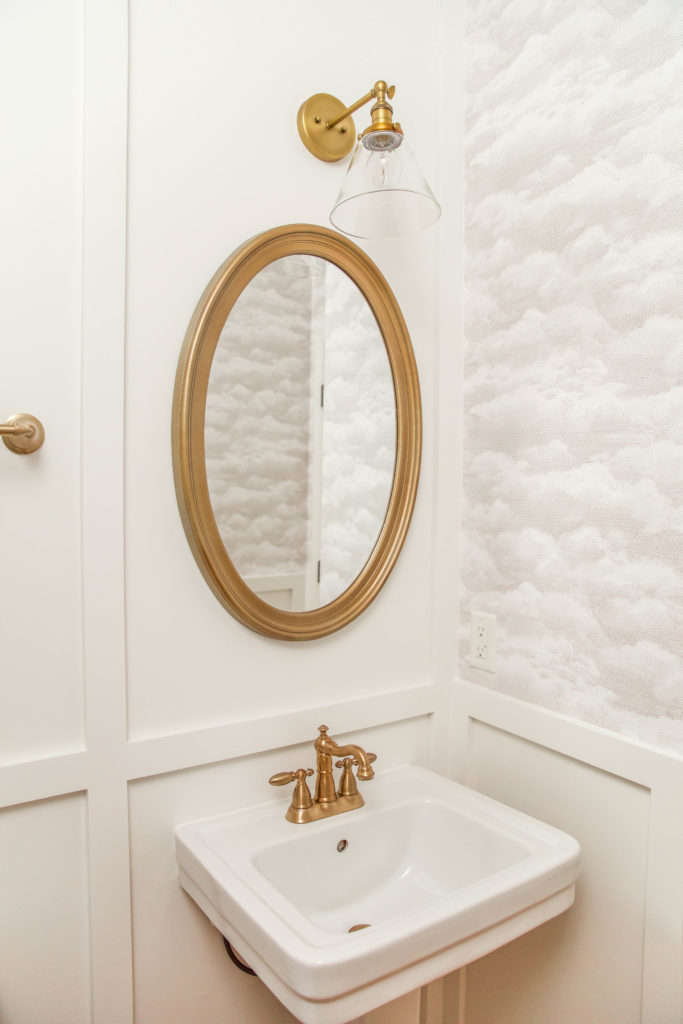
Board and Batten (also known to some as wainscoting) is a great way to add some charm to a space without breaking the bank, or your back. Generally the “board” of the board a batten is some type of wide, thin paneling, such as a sheet of quality 1/4in plywood, affixed to the wall with the vertical “battens”, or narrow strips of slats or trim, aligned over it. This gives the paneling a nice smooth appearance once painted with a higher gloss paint. If your walls are untextured and good shape many people choose to skip the “board” portion of the wallcovering and go right to the “batten” portion. Unfortunately for us we could not simply add the backing board directly to the wall due to the sink and toilet positioning, but my walls were in rough shape. So, if we wanted to have that nice smooth look mentioned above, I needed to give the walls a bit of TLC. No, not The Learning Channel, I mean tender love and care….
Materials
Cordless finish nailer or brad nailer (hammer and nails can be used, but it will increase your workload.)
1 ¾ nails for nail gun
Pre-primed 1×3 pine boards (for top and vertical)
Pre-primed 1×4 pine boards (one piece cut to length for each internal corner)Pre-primed 1×6 pine boards (for baseboards)
Pre-primed quarter round (for shoe molding)
Molding/trim caulk
Caulk gun
Liquid nails (does not need to be the heavy duty version)
Wood filler (Elmer’s Carpenter’s Wood Filler is my personal choice)
Sand paper and (or) palm sander
Wall spackle or joint compound (if walls need to be repaired or smoothed) Semi gloss or gloss paint
Painting supplies (roller, roller pads, brush, painter’s tape, etc)
Stud finder
Level
Miter saw
Hammer
Nail set
Flexible putty knife
Flexible taping knife (only if walls need to be smoothed or if large areas of the wall need to be repaired)
INSTRUCTIONS
Step 1: Give your walls some love!
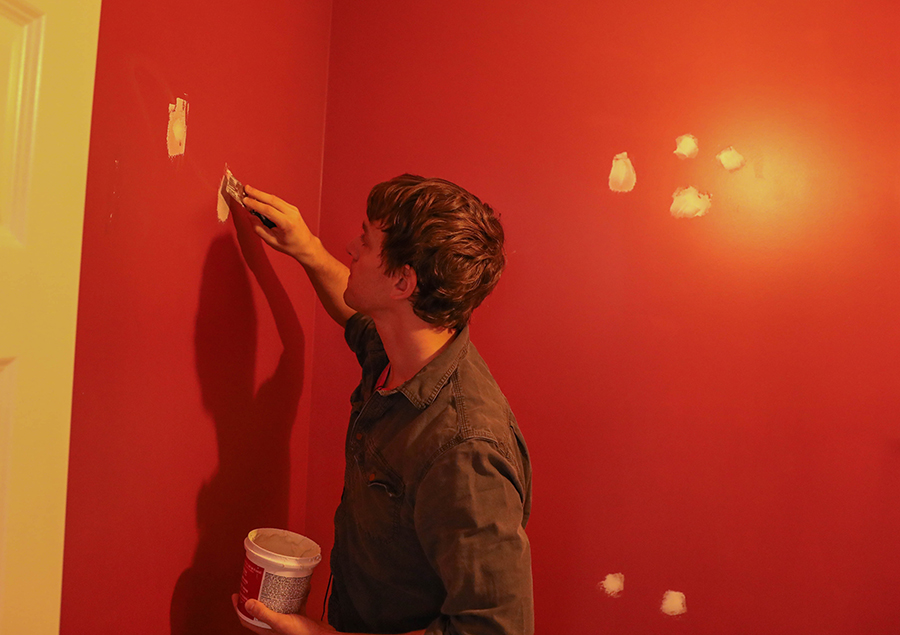
First, I filled in all medium and large pot-marks, gouges, holes (one of which was nearly the size of a racquetball), and divots found on the wall surfaces with a flexible putty knife or taping knife and spackling compound or joint compound (often times called drywall mud). I personally do not like most lightweight spackle and prefer to use joint compound when repairing walls. Allow to dry and sand smooth. If the damage is extra wide or deep, it may require multiple coats of compound to fix. If you are lucky, and your walls are nice and smooth, ignore step 1.
Step 2: Give your walls a mud mask (You may be able to skip this step)
Next, move on to the the smaller wall imperfections. We had a lot, so I opted to apply a thin layer of joint compound over the entire surface area of the walls where the board and batten would be installed. This is much easier and quicker than it may sound, especially if you have a wide taping knife (which only cost a few dollars). Let the joint compound dry and then give it a quick sand to smooth it out. Remember that if your walls are already in good shape this step is likely unnecessary.
Once smooth, wipe down your walls with a damp rag to remove dust and give it a quick coat of paint primer with a short nap (1/4in or less) roller pad and roller. I opted with a short nap roller because I wanted the wall extra smooth, and the longer the roller pad’s nap the more textured the wall becomes as paint is applied. (I ended up adding a layer of primer the entire wall, not just the area where I smoothed the wall, because I wanted to be sure the red color of the old paint would not bleed through the wallpaper that we were going to install above the board and batten.)

Step 3: Pre-paint the walls.
You will save yourself time if you paint the walls your desired finish color before adding the battens to the walls. I once again used 1/4in nap roller pad on my paint roller because I wanted the surface to be nice a smooth.
Step 4: Draw on your walls!
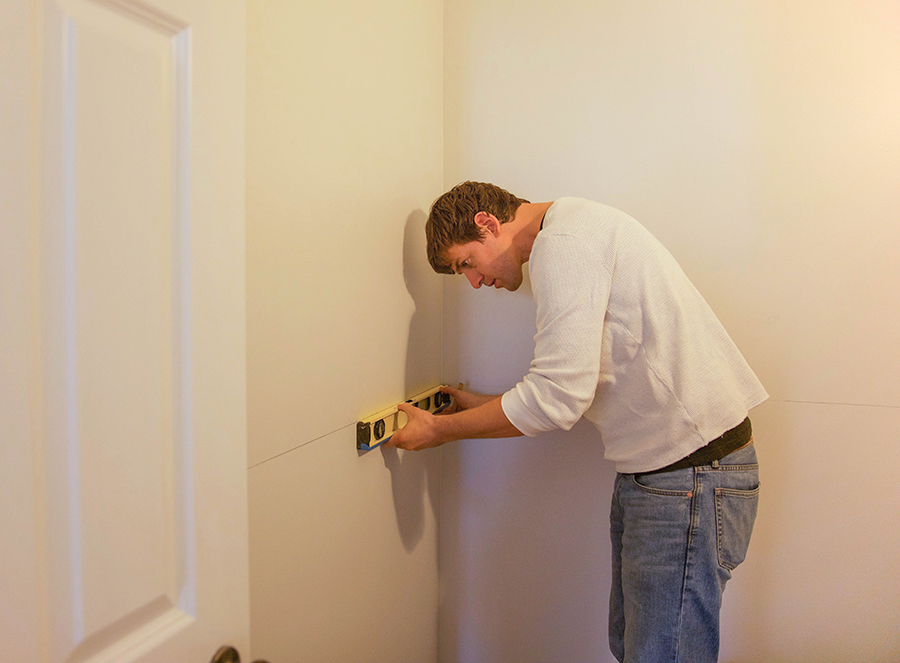
At one of the back corners of your wall, measure and mark where the top of your board and batten will end. Using this mark as a starting point, draw a straight line around the entire room. Be sure to use a level to ensure your line is straight. This is important because your floors may not be level. I found that I had a 1/2in drop in my floor. Had I not found my level line, but instead simply measured from the floor for each wall I would have had a 1/2in drop in my board and batten and could have complicated my assembly process when it came time to adhere it to the wall.
Step 5: Cut your battens, top rail, and baseboards to length.
I pre cut all of my pieces before assembly so that I can dry-fit all pieces in place before assembly. Don’t be surprised if you have to do a little extra trimming due to uneven walls.
Step 6: Install your top rail.
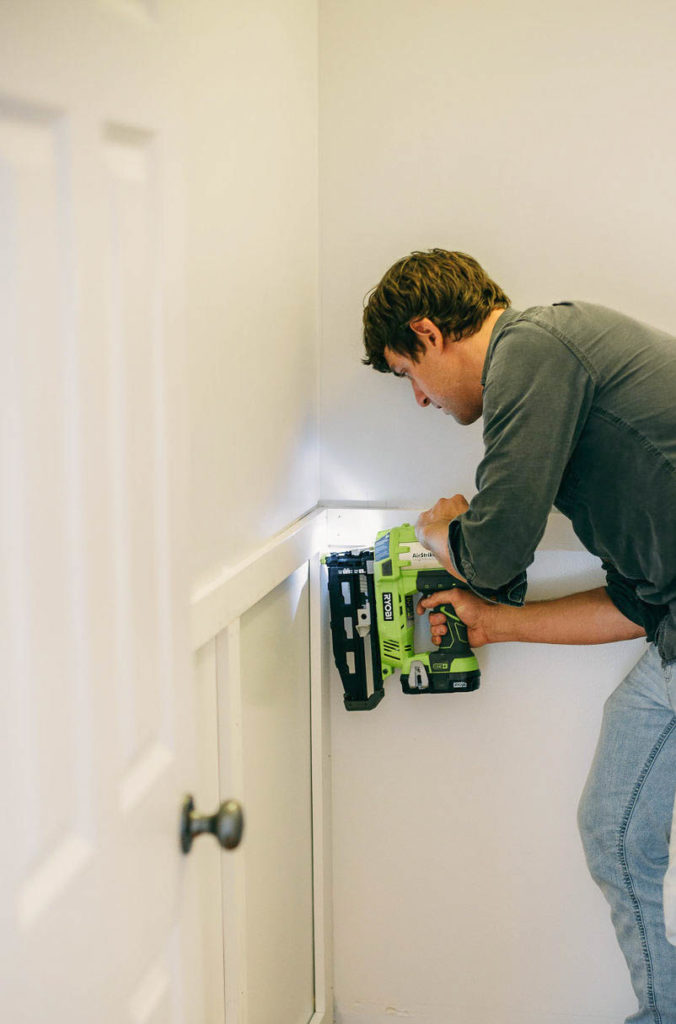
First, using a stud finder, mark the location of all your wall studs. Then position your top rail against your level line and nail it to the studs using your nail gun. I like to drive one nail into the board at the closest corner first, then move half way down the wall, double check that it is still properly level and nail it to a stud near the center of the wall. This will hold the top rail nice and level against the wall as you nail it to the rest of the wall studs. Continue this process to install the rest of the top rail. If any nail heads remain above the surface of the wood, tap down with a nail set and hammer.
Step 7: Install your baseboards.
To install your baseboards you will first want to create a guideline which will help you position the baseboard. First hold one of your battens to the bottom of your top rail. Using a level, adjust the batten so it is evenly vertical, then trace along the wall at the bottom edge of the batten. Repeat this one or two other times further down the wall. (This line can also be created using your level in a similar manner as your top rail guideline) Next align your baseboard along the guidelines and nail in place in the same way as the top rail. You may have a small gap in between the top of the floor and the bottom of the baseboard, but don’t worry. This will be covered by shoe molding at the end of the install. If any nail heads remain above the surface of the wood, tap down with a nailset and hammer.
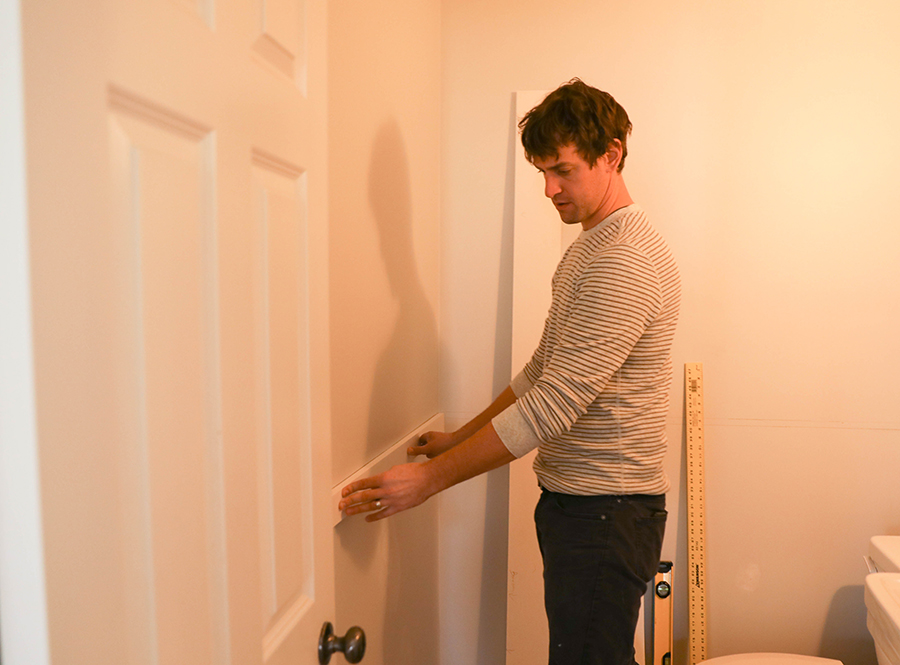
Step 8: Install vertical battens.
For center battens, use a pencil to mark on the wall where each batten will be placed, then use your level to create a vertical guide line to help you properly align each batten. Chances are your vertical battens will not align with the studs, which means they will need something a little extra to stay in place. Using your caulk gun, apply the liquid nails in circles on the back side of your board and batten (Using circles helps to create a suction effect that helps to hold the batten in place.) Use your guidelines and firmly press to the wall and nail in place with your nail gun.
For corner battens you can simply nail in place at the stud. I generally install corner battens in the order of left wall, right wall, front wall, and back wall in relation to the door. The reason for this is because the left and right side corner battens should be slightly wider than the other battens as they will form a “butt joint” with the battens on the front and back walls. (The video gives a deeper explanation with visual diagram.)
If your battens are not aligning flush with your top rails and baseboards, I recommend using wood shims to level it out. This will greatly improve how it looks once painted.
Step 9: Install quarter round
Cut and nail quarter round shoe molding into your baseboards where the baseboard and floor meet.
Step 10: Give it some BOTOX (Jk just fill in the gaps and holes)
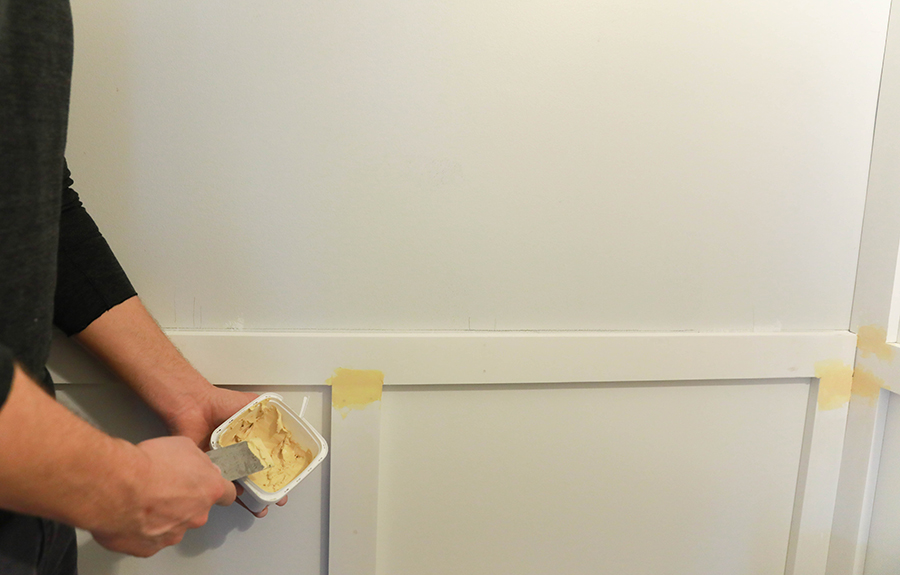
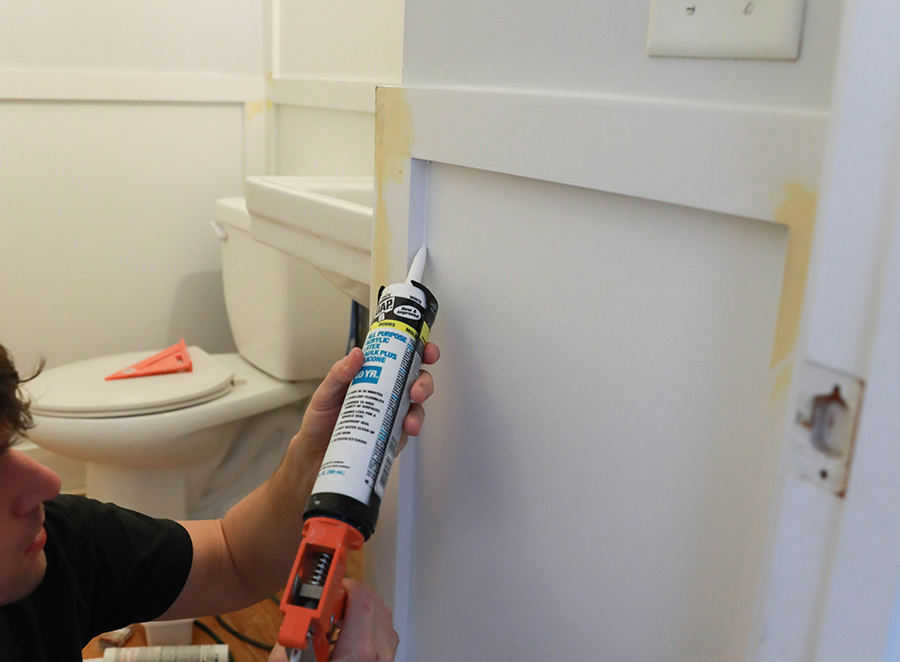
Use wood filler and a flexible putty knife to fill in all nail holes and gaps where wood meets wood. Once dry sand smooth. Use a trim/molding caulk (Such as DAP Alex Plus) to fill in all gaps found where wood meets the wall, even if it is a very thin gap, such as where the quarter round meets the baseboard. Doing so will greatly enhance the finished look. Use a wet finger to gently smooth over caulk for a professional clean appearance. Larger gaps may need more than one pass with caulk because the caulk will shrink some as it dries.
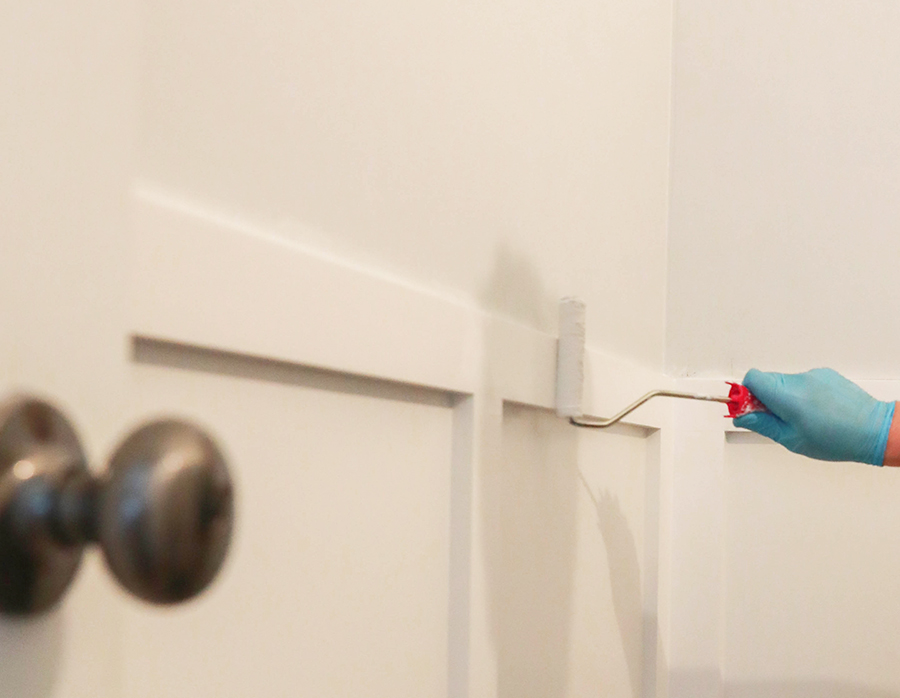
Step 11: Make it shine!
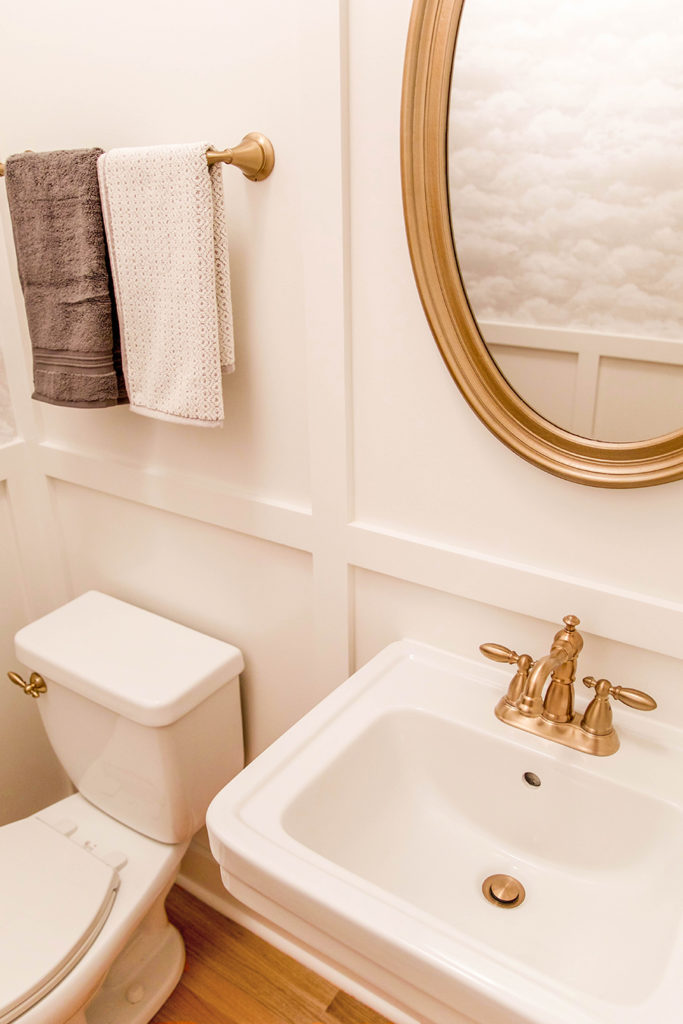
Last up, paint. Because I spent a little more on quality pre primed boards I did not have to add a layer of paint primer to the boards. If you are using a semi-gloss or high gloss paint, don’t try to save a couple extra bucks on cheap roller pads and brushes. Spending a couple extra dollars will help you lay down a much more even layer of paint. I used a 3in micro roller with 3/16 woven nap roller pad on the open areas of the batten, and a quality foam brush for the corners and edges. I also added an inexpensive paint additive called M-1 to the paint which helps with application, leveling and dry time of latex paints. Having done lots of painting I highly recommend it. Apply two coats of paint and admire your handy work.
Note regarding boards: The pre-primed pine boards we used are more expensive, but are also of much higher quality than many other options. We went with the higher quality due to the proximity of water in the bathroom, especially around the toilet, because we have little boys… MDF is a less expensive and may cut this cost in half, but can swell rapidly with moisture and is not as durable. Also when choosing any boards perform your own quality control by examining each board closely to ensure it is as straight and flat as possible. It will save you lots of frustration later on.
Please let me know if you have any questions about this process below! Also, be sure to share your project with us if you give it a try. We love seeing different ideas, and ways that board and batten is used.


