It may have taken a few weeks longer than expected, and quite a few more unforseen hiccups, but it’s finished! Today we are breaking down this $500 Powder Room renovation challenge including before and afters, sources, and tips!
When we moved in, this powder room was a dark red hue, with a basic grade toilet and sink. It was so dark, but it was a working bathroom, and served it’s purpose! I love a good renovation challenge though, and it was only a matter of time before we gave it a makeover. We decided to give ourselves the challenge of a $500 budget, and make this a project that most of you could attempt as well in your own homes with the right tools (and a good deal of patience)! Did we stay in budget? Well, almost!

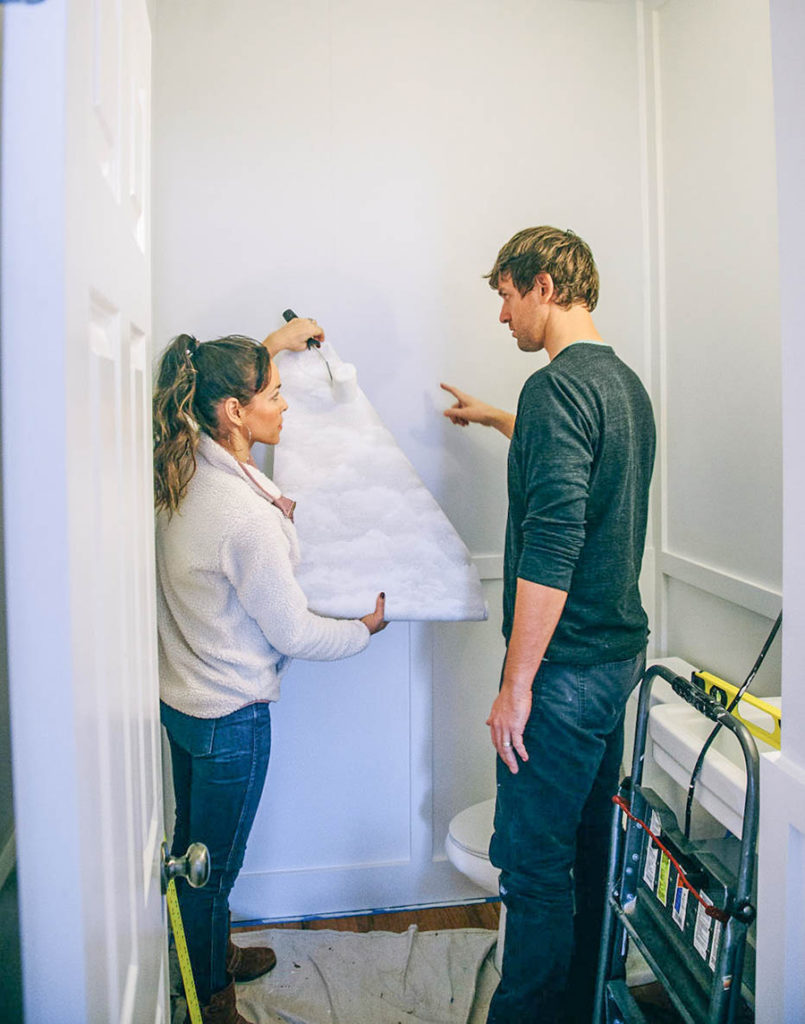
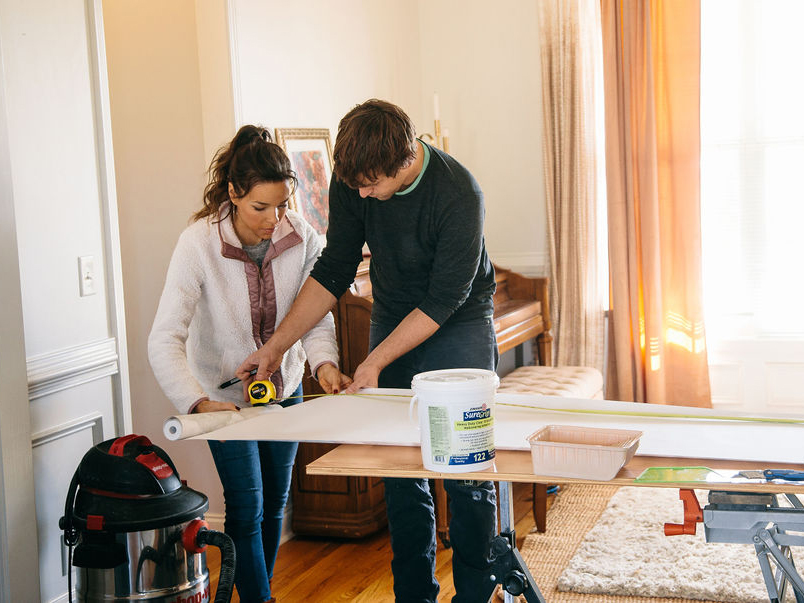
We wrote a more detailed tutorial the DIY wainscoating (board and batten) in this post! We do want to talk about some of the hurdles we faced, because it may save you a headache or two when doing similar projects on your own! Here is part 1 of the steps we did in the renovation before painting!
Gabe is really good at solving problems as we go, and I don’t think we would attempt projects together otherwise! 😉 Here are a few inital problems we faced to give you a better idea of what you may come across if attempting your own renovation:

Uneven walls with a rough face We are realizing how common it is for walls to be uneven either in corners or on the surfaces. I think it’s more common in quick build homes, but nonetheless it was a problem when it came to installing wallpaper as well as board and batten. A good level will be your best friend when installing wallpaper and the board and batton. Gabe also smoothed out the surfaces with standard dry wall compound before we painted. You can use a thin coat of dry wall spackle with a flexible putty and taping knife. This will create a more even surface before installing board and batten and wallpaper. This is especially important when painting with a semi-gloss or gloss paint.
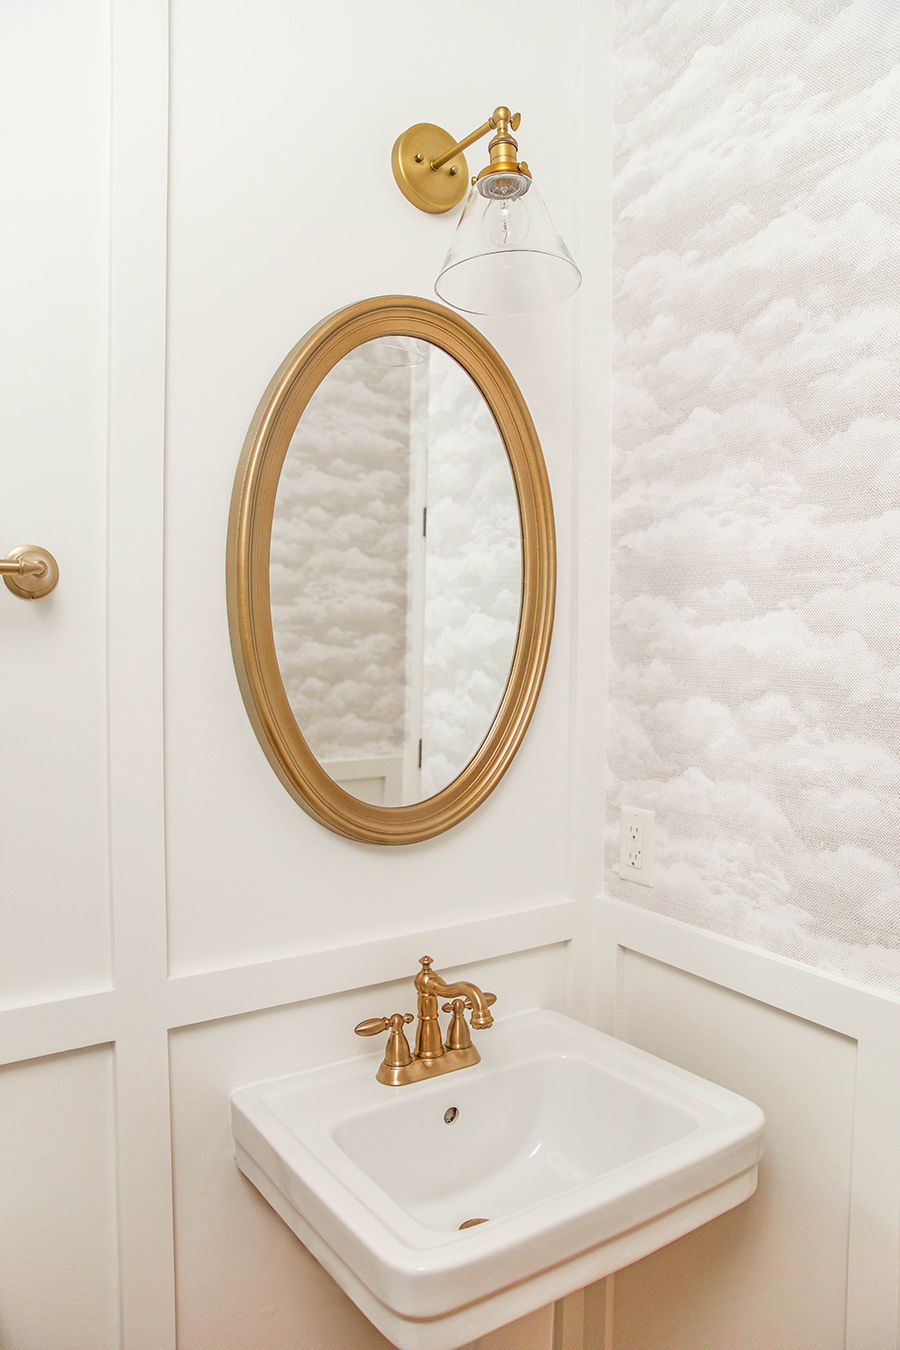
Off centered light fixture – After installing the board and batten on the right wall we quickly realized how off center the previous light fixture hole was. The light should be aligned with the sink faucet. There isn’t much you can do about that without moving the light’s electrical box and re-dry wall the area, so we worked with it as is to stay in budget.
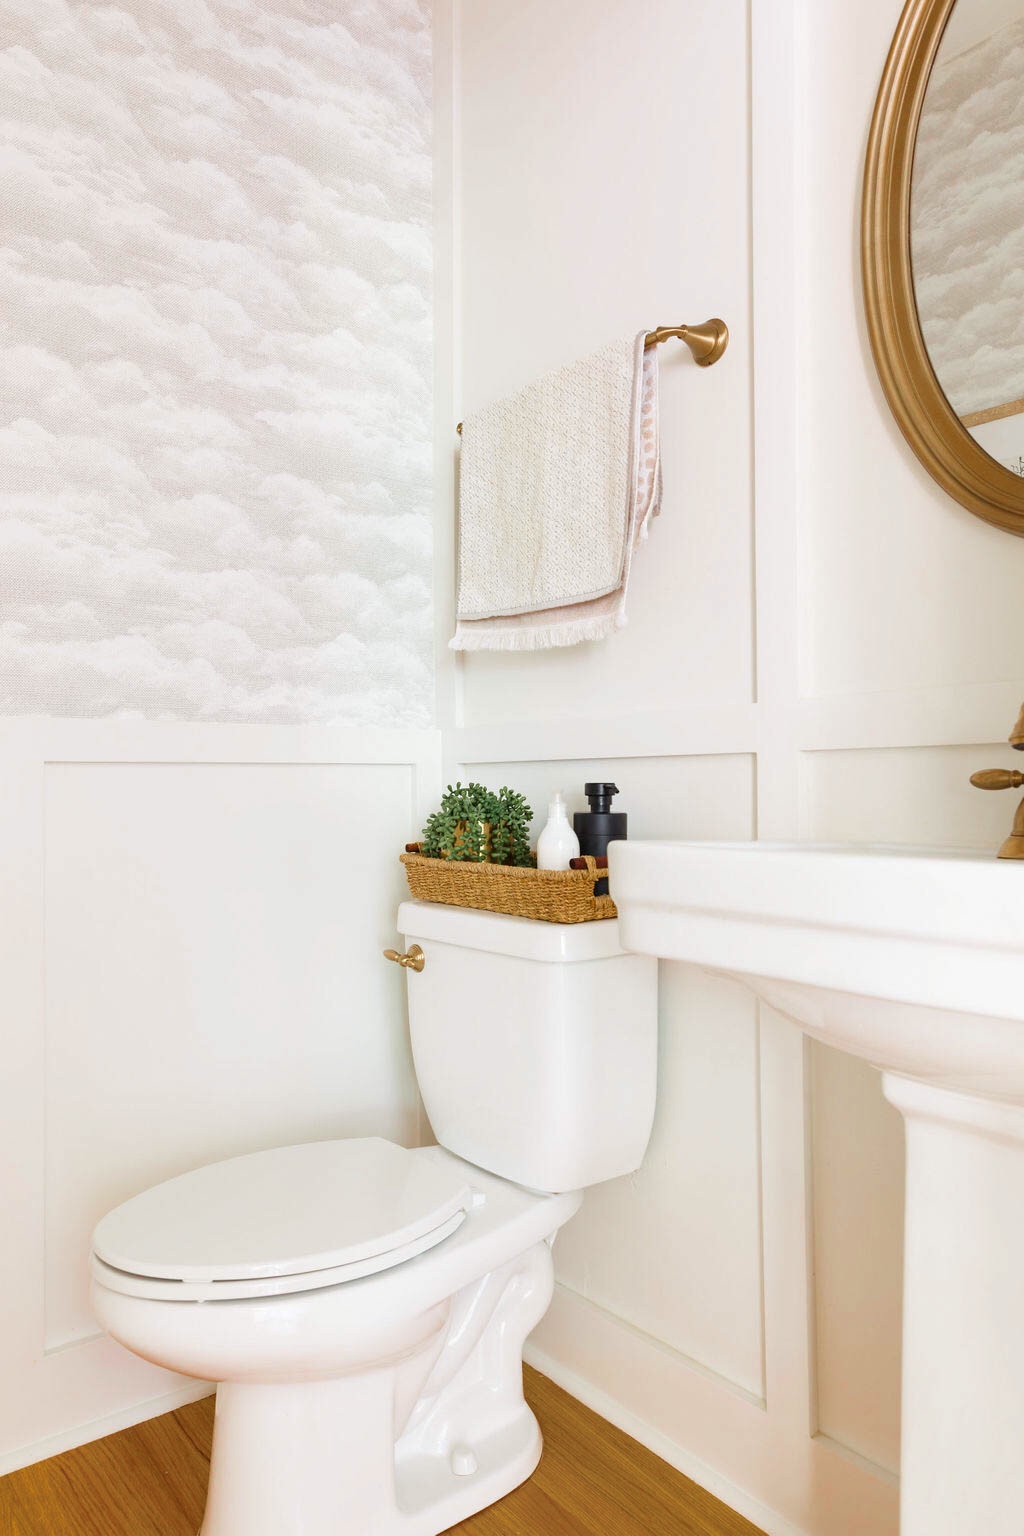
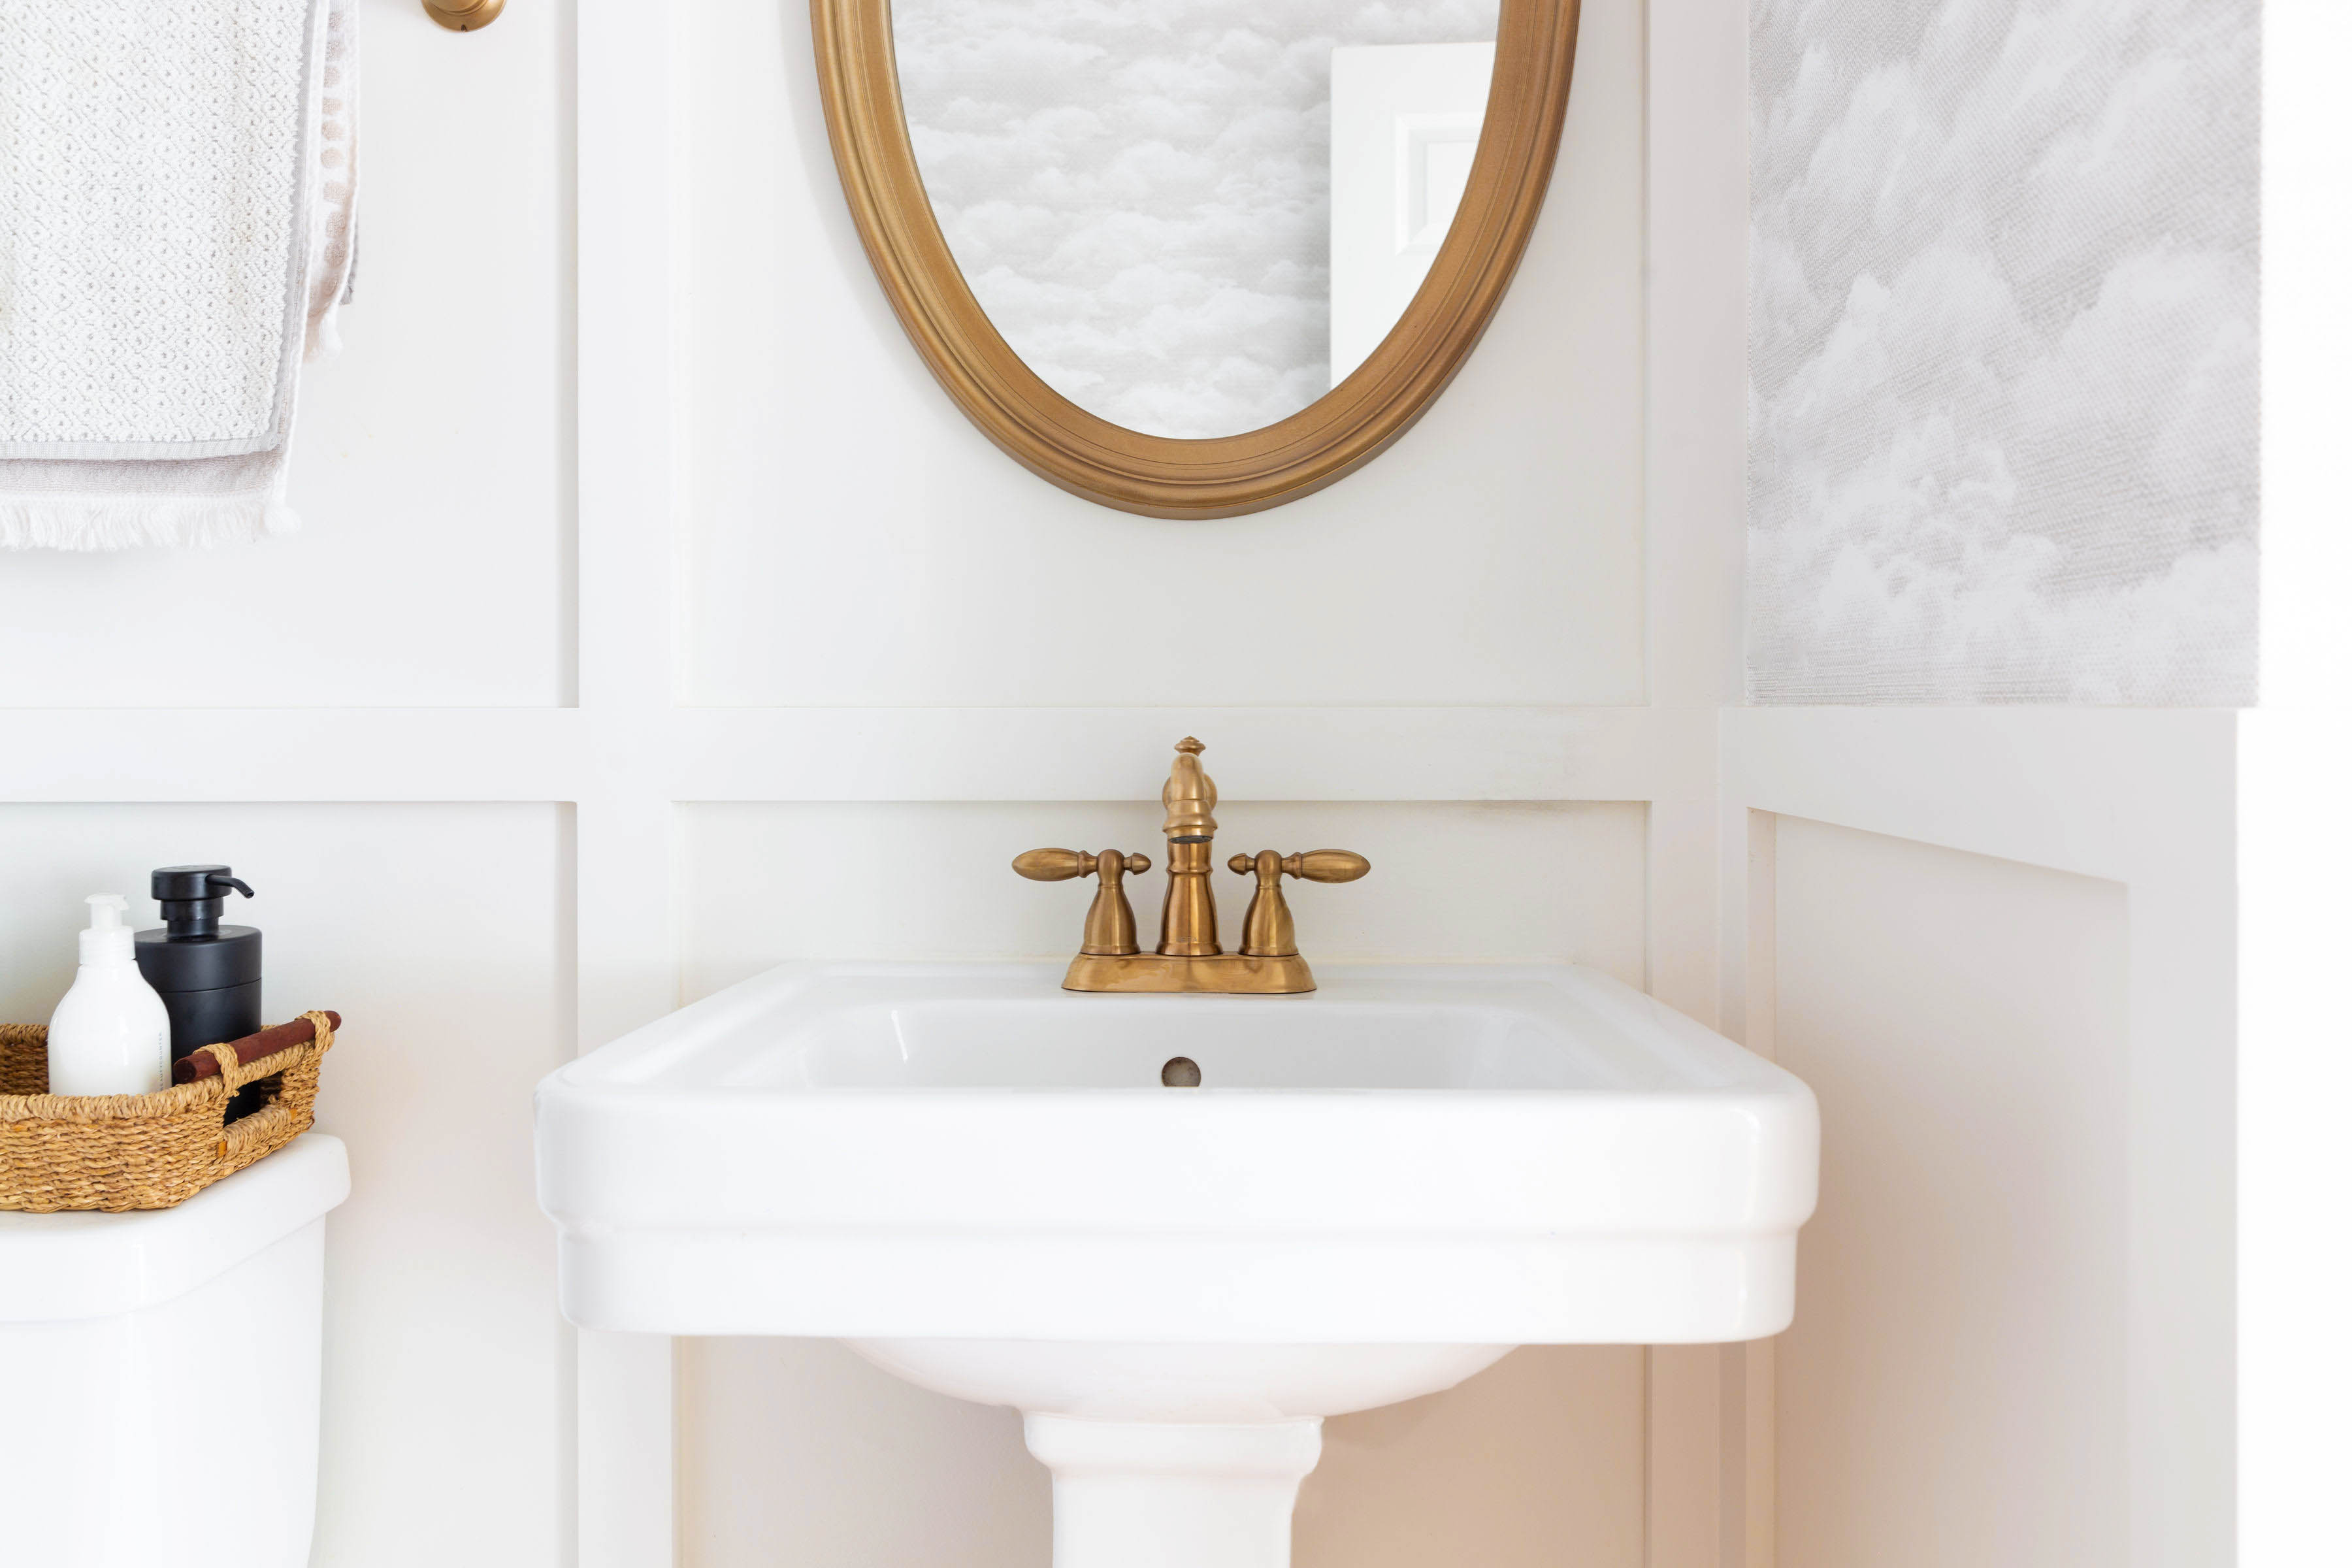
Off kilter sink. The pedestal sink was installed slightly tilted. It was pretty obvious once we installed the board and batten, and we could have left as is, but it was a little glaring to the project perfectionists that Gabe and I tend to be. To adjust, Gabe loosened it from the wall by removing the caulk and loosening bolts under the sink. He used a level on top of the sink to find the proper hight, cut a piece of scrap wood to fit that hight and used the scrap wood to support the sink, keeping it level as he retightened the bolts. Re-caulked.
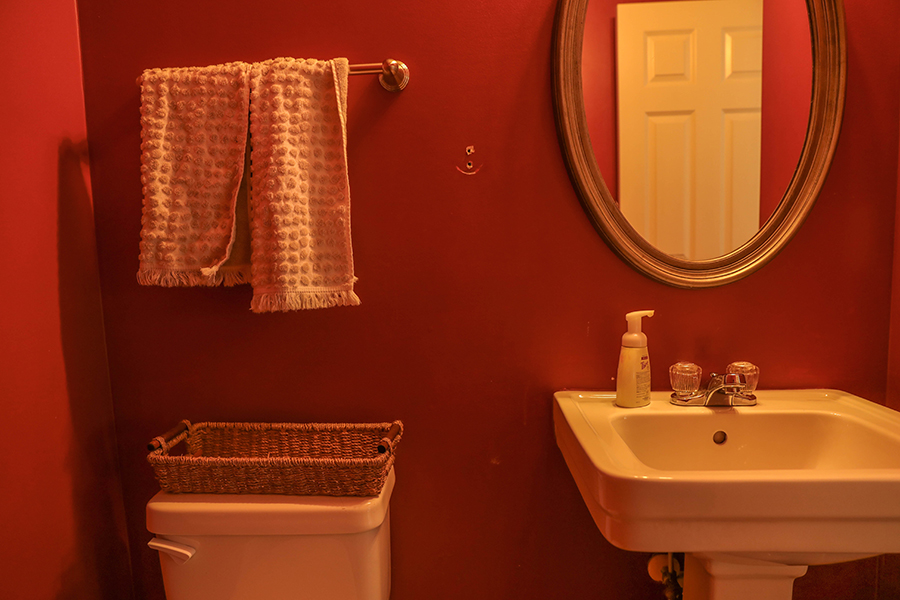
Before
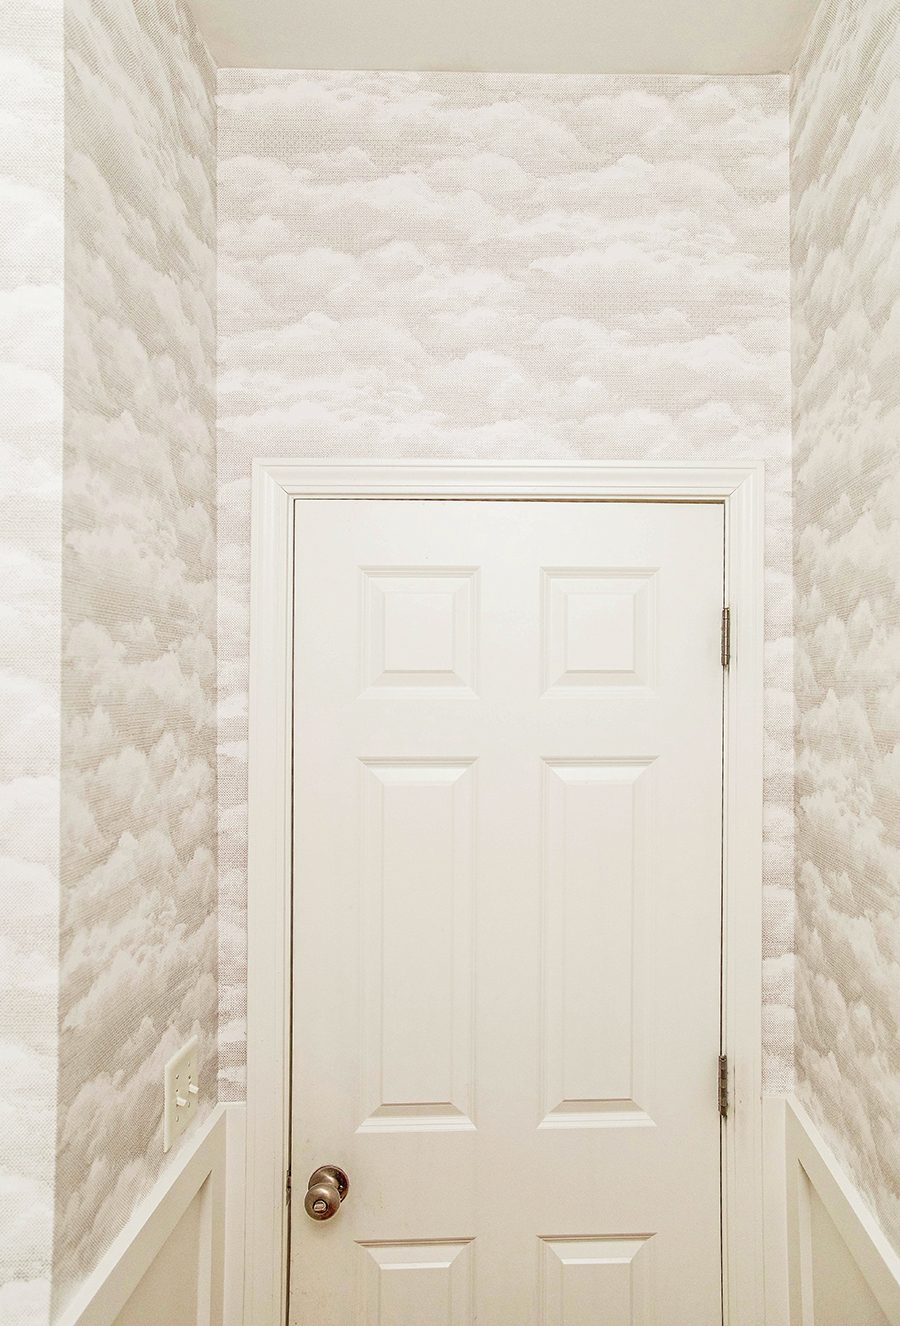
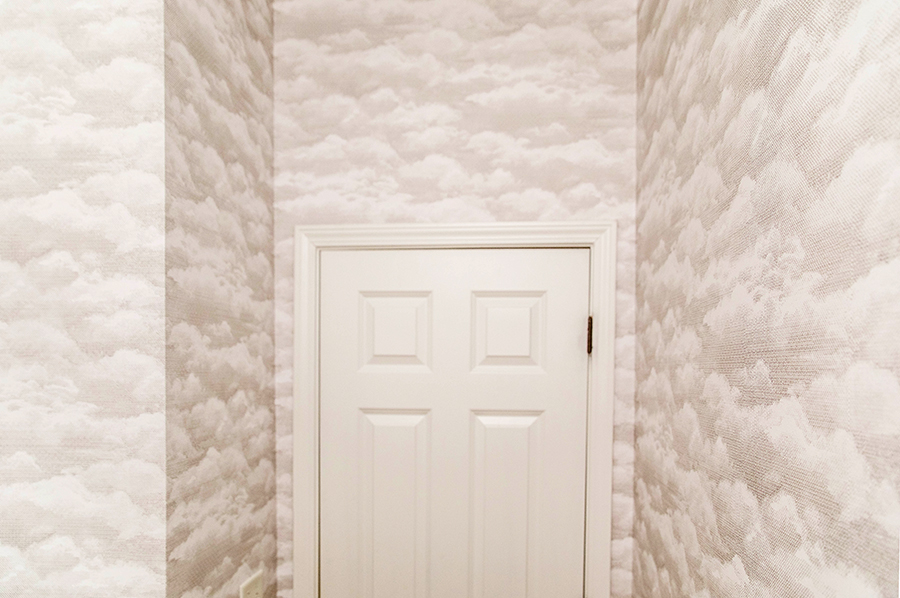
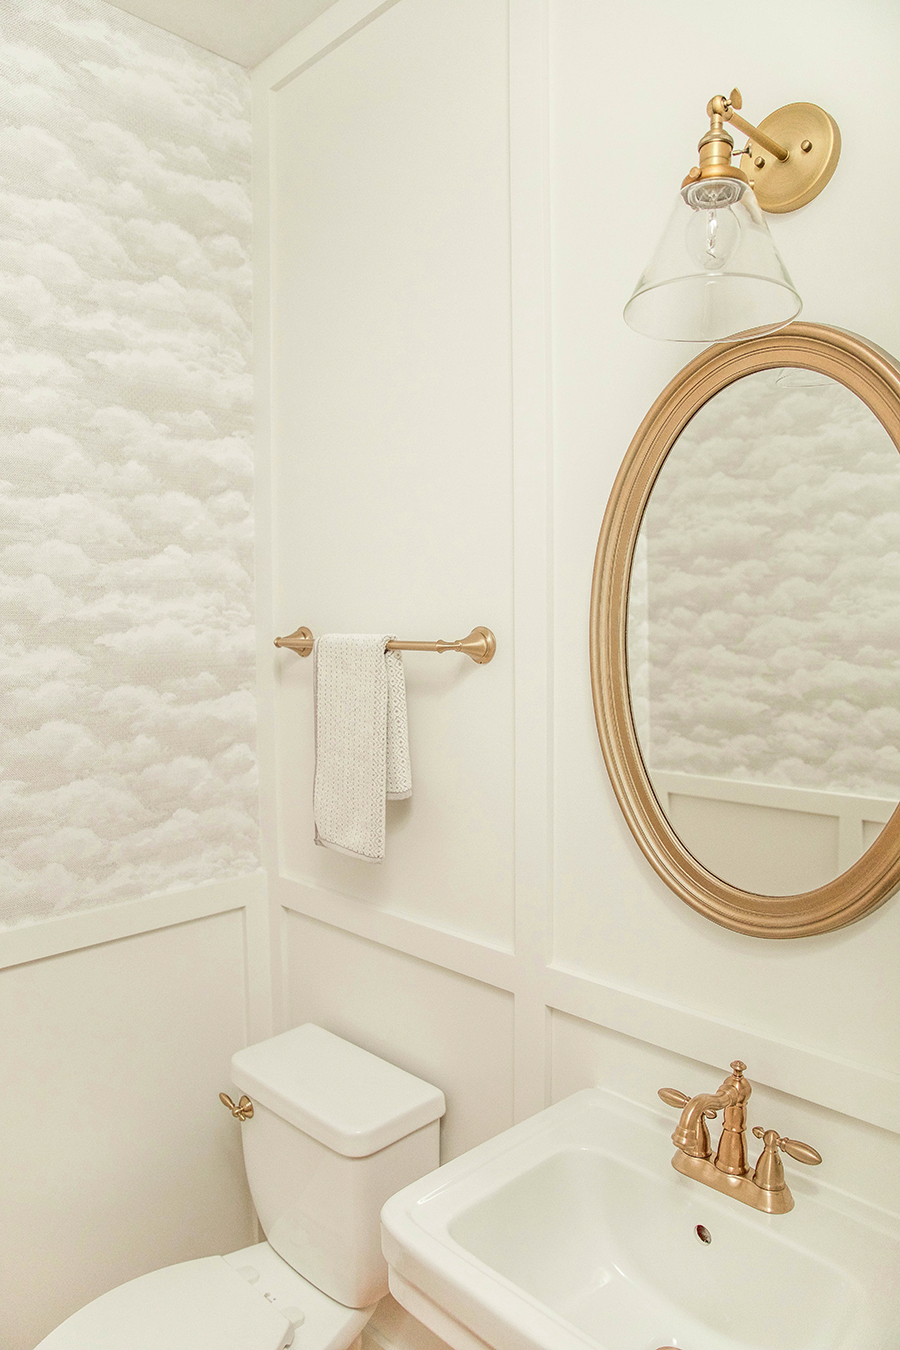
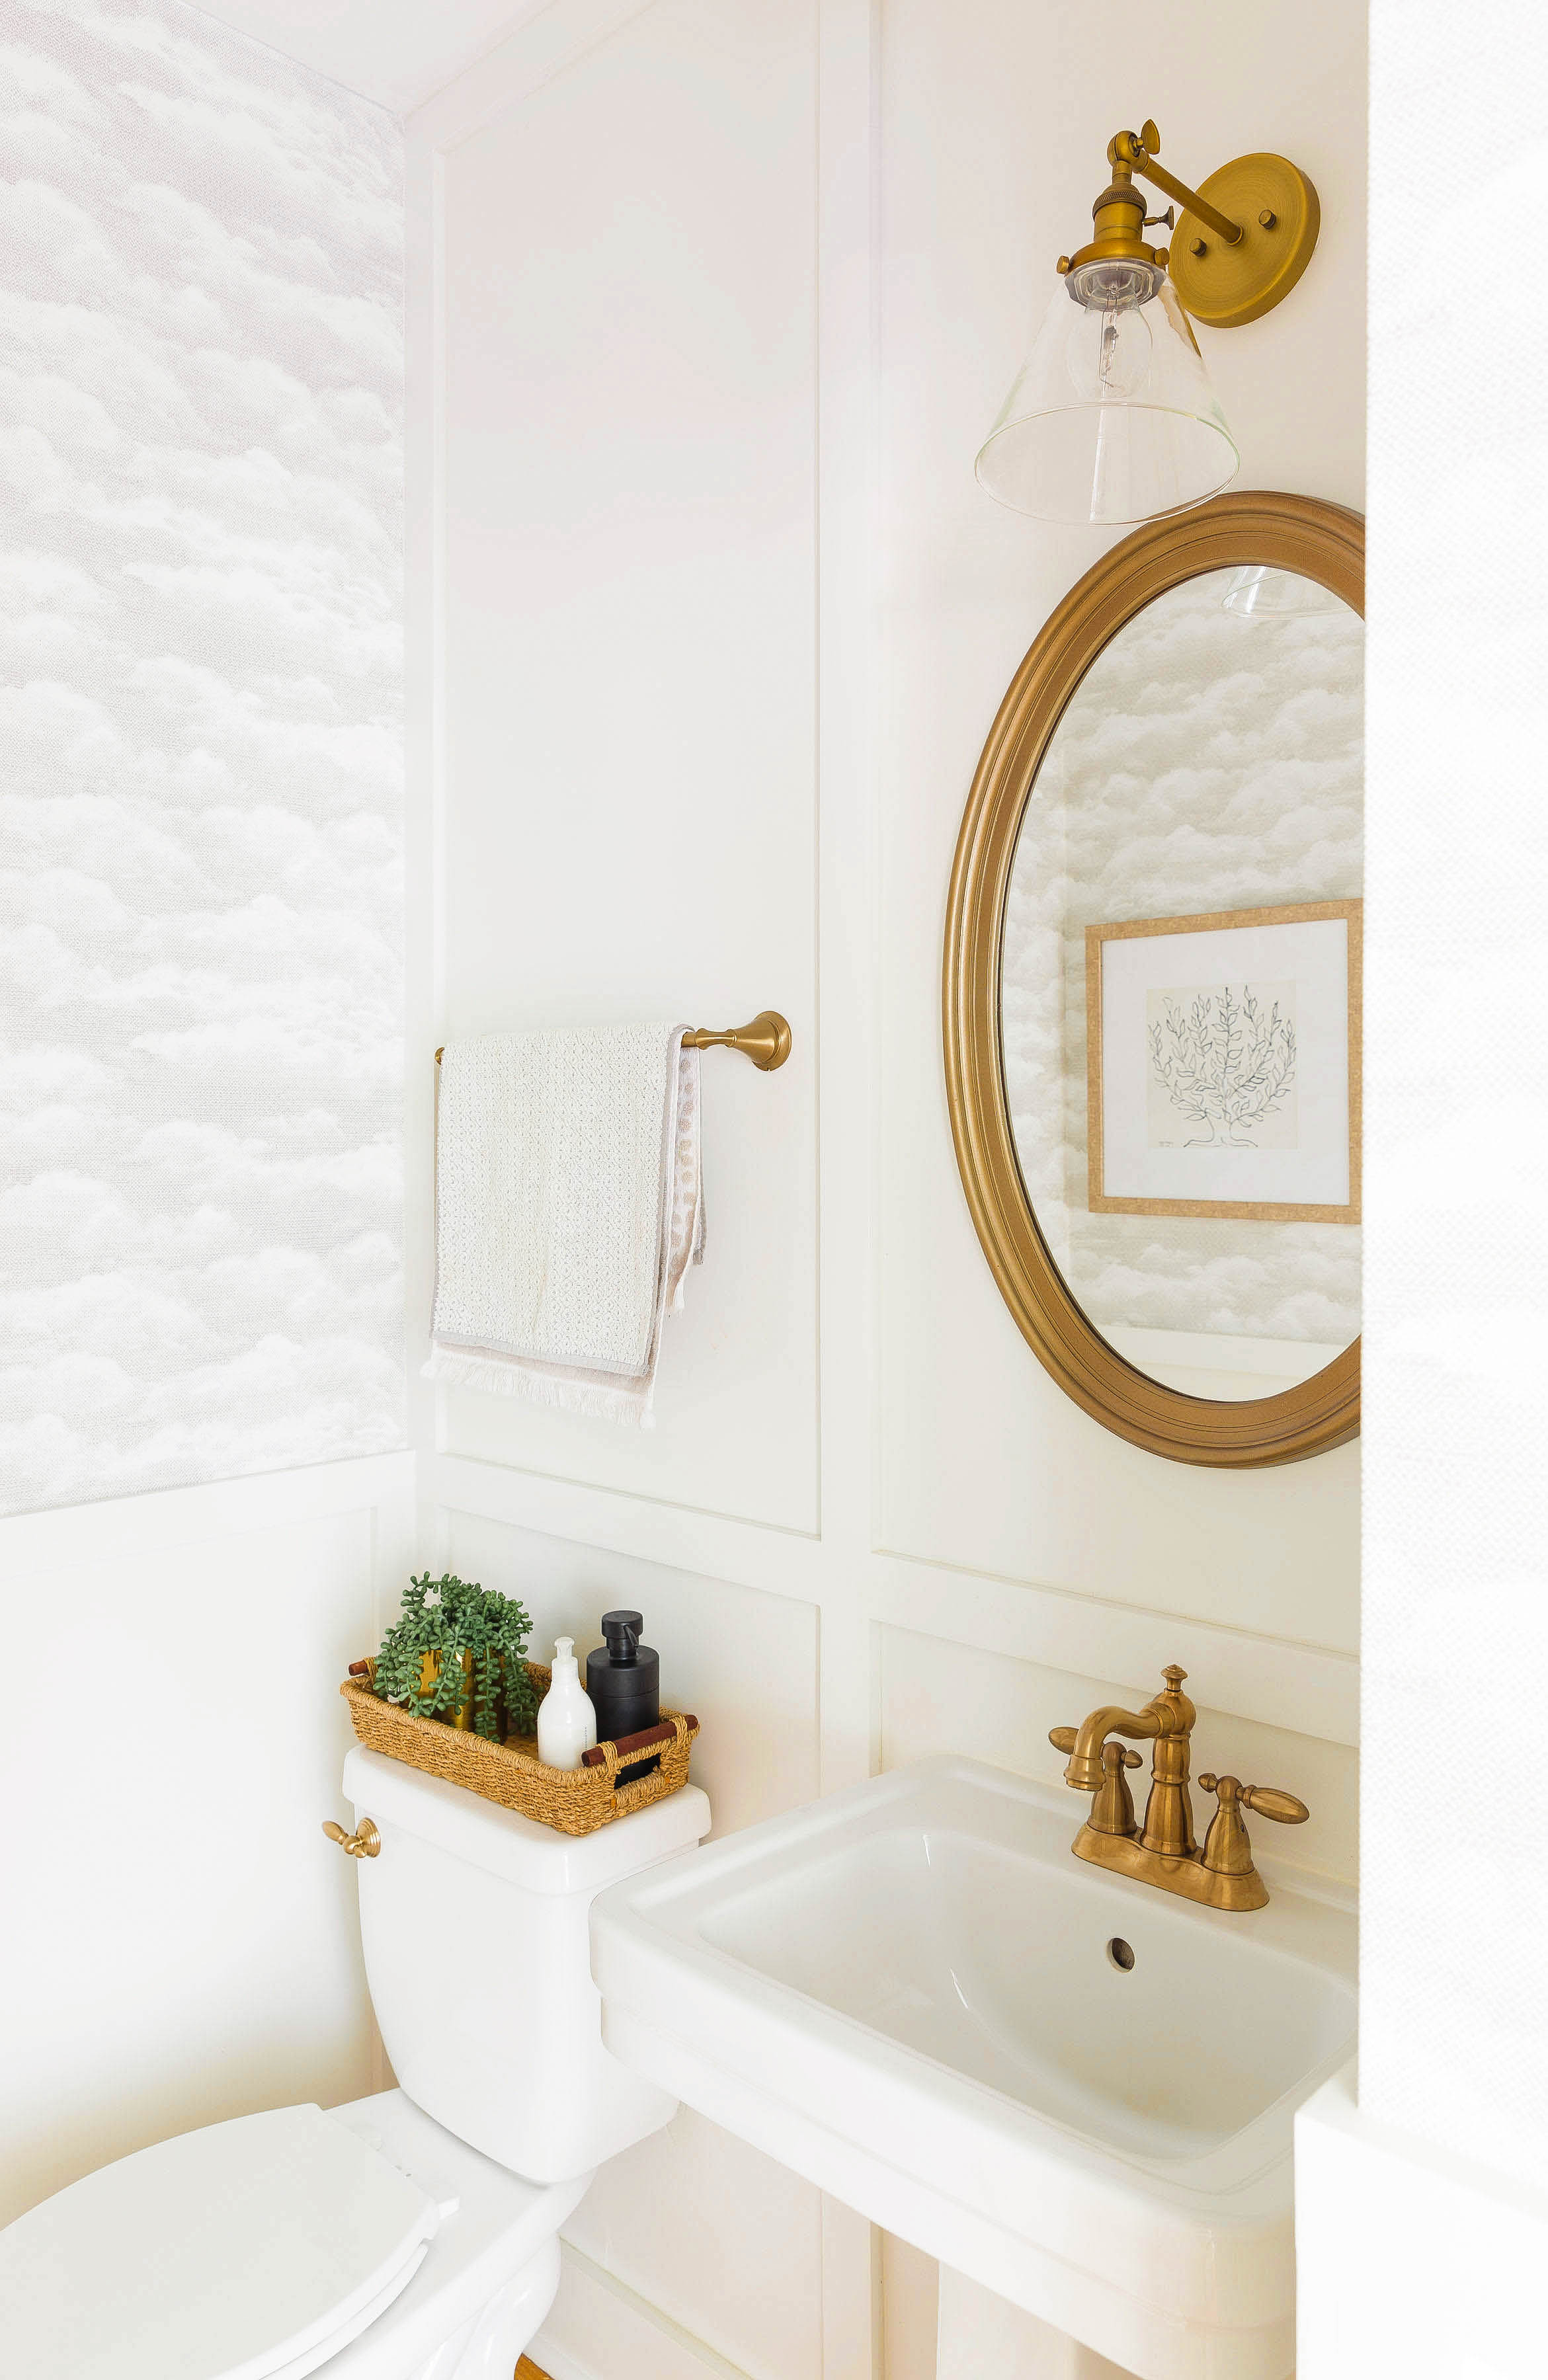
Wallpaper – I am pretty sure I browsed approximately 2147 wallpaper options before finding the one I was certain about. Any time I did find one I really loved, it would be $200+ per roll. Considering we needed 2-3 rolls, this would take our entire budget. I was beginning to doubt we would find an option to be honest. I fell in love with this wallpaper that ended up being the price of a mortgage, but after doing a similar image search on Pinterest of this wallpaper, it pulled up a much more affordable option that I actually liked just as much. I found it much easier to install this standard wallpaper than the DIY removable wallpaper. Highly recommend having a second person on hand to help you install. We might have to do a separate post on wallpaper tips soon.
SOURCES + FINAL COSTS:
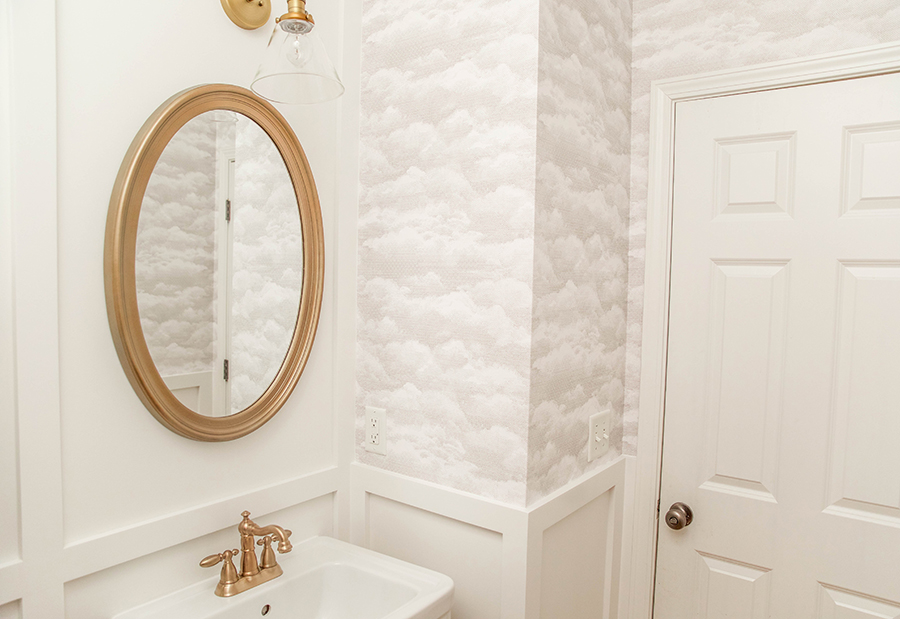
Cloud Wallpaper – $180 (We used 2 double rolls and got it on sale after Christmas!)
Board and Batten pre-primed wood planks and shoe molding- $130
Paint (Sherwin Williams acrylic enamel in semi-glossWhite Moderne ) – $40
Light fixture – $49
Faucet – $126 (found refurbished on amazon)
Towel Bar – $40
Toilet Paper Holder – $21
Toilet Handle – $30 (found on ebay)
The caulk, wood filler, and other paining supplies we already had on hand leftover from other projects.
The items we kept:
Sink
Toilet
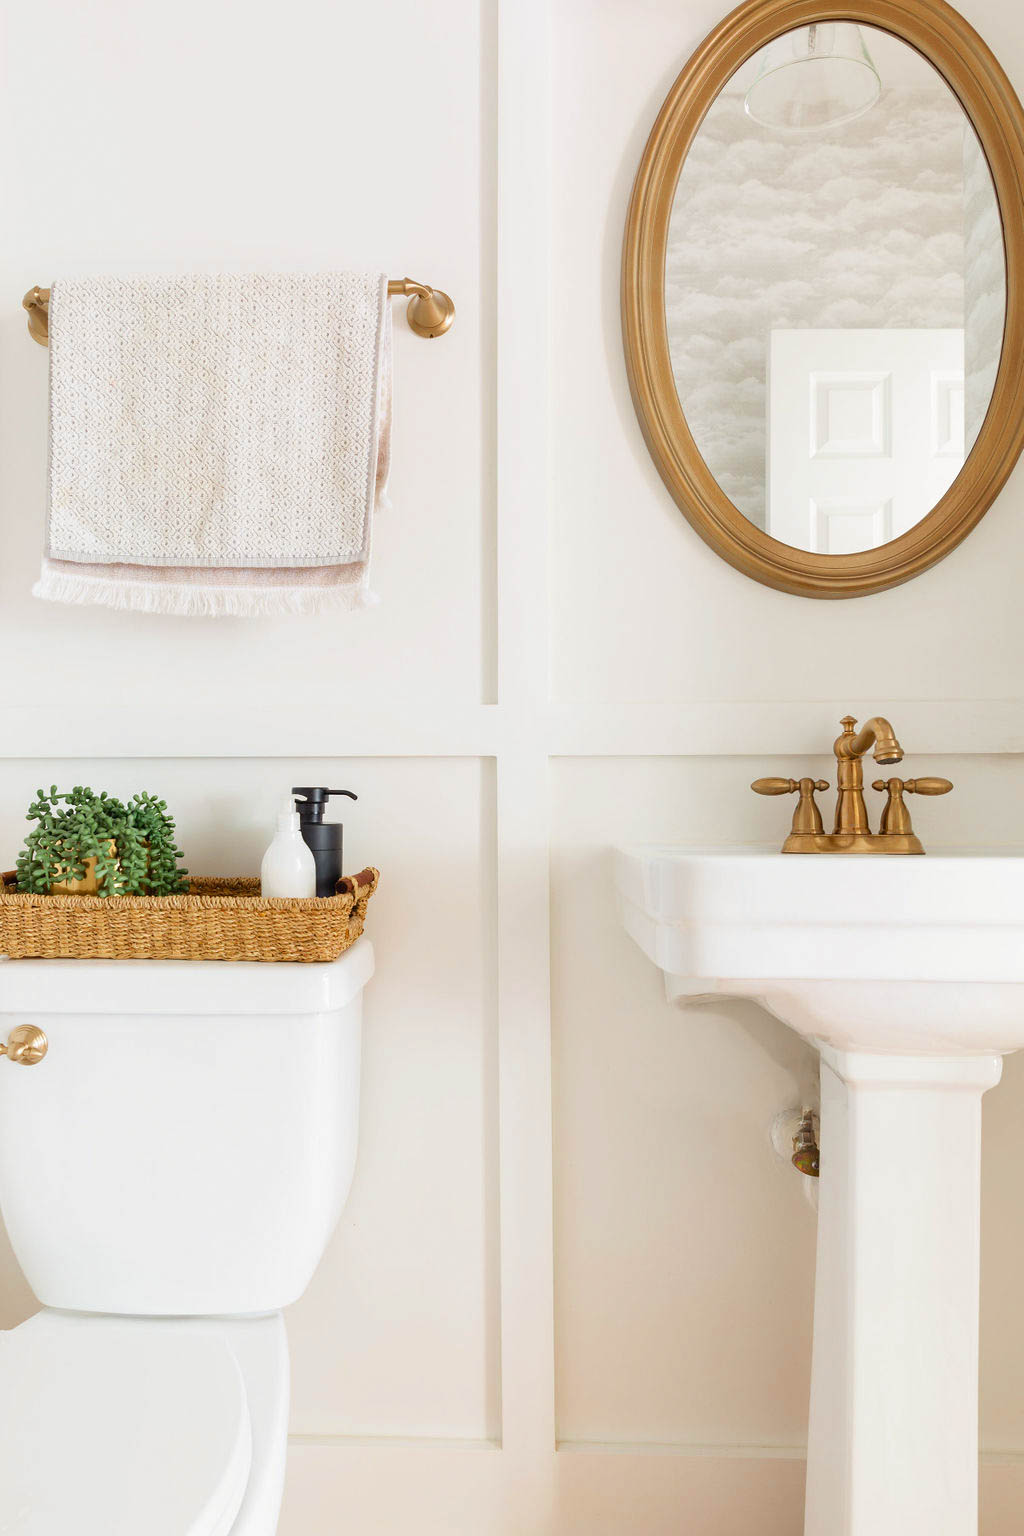
Mirror – Spray painted! We used rust-oleum antique brass spray paint which was a really good match to the Delta Champagne Bronze color.
_____________________________
Total Cost : $616
(If you choose to paint versus wallpaper, the total cost amounts to $436)
Home renovations don’t have to drain your savings account, but you do have to get creative, and spend some extra time on research! I was doubtful we would swing it with wallpaper, and it challenged us to get creative with price hunting. One of our readers gave us the tip that Amazon has a refurbished option so we were able to get the Delta faucet for quite a steal. Some things that aren’t worth going poor quality on is faucets as you end up paying for it down the road. Delta is good quality, and on more of the affordable end. I was ready to toss the old mirror, but it’s incredible what a good spray paint coat can do!
Please let us know if you have any questions about this process below, and we would be happy to answer! This was such a fun project, but I am pretty sure Gabe was starting to really feel like he had his head in the clouds (wink) after working in such a small space for so long! Time to celebrate with a toilet paper cutting before we move onto the next renovation. Cheers!
Thank you Tara Carter Photography for the bathroom images, and Chelsey Heidorn for the process photos.


