Today’s post is written by Gabe
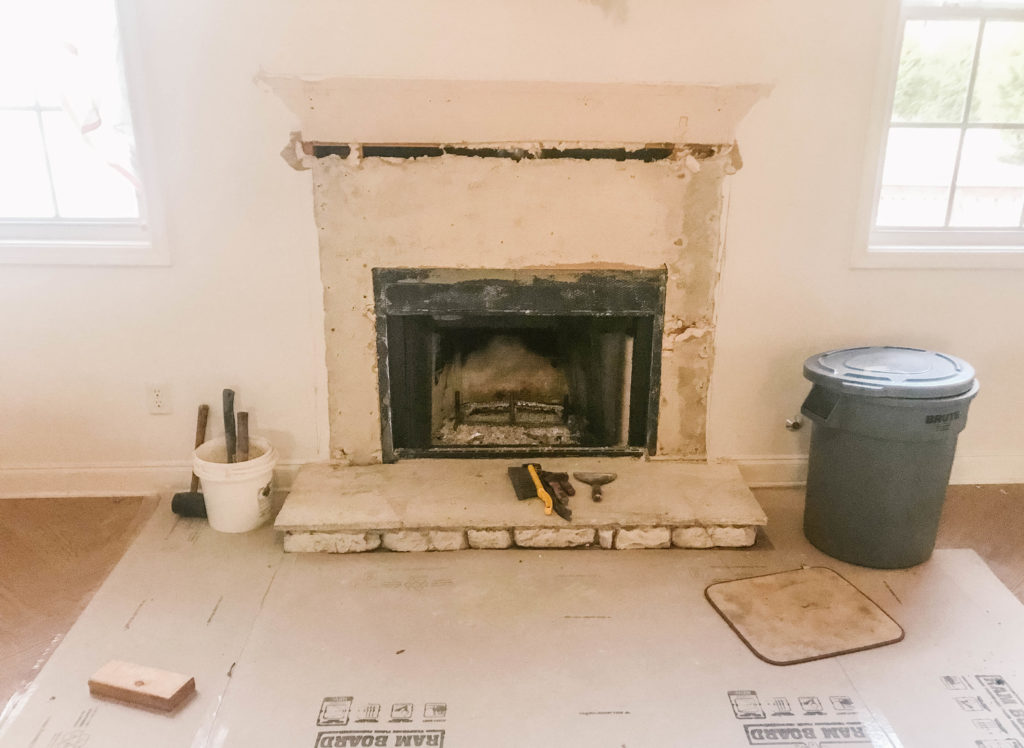
We are hoping to break down the process of our fireplace design to answer any questions you may have if you want to give this a try in your own home! When looking into revamping a fireplace surround, it is really important to research, and make sure you check out both national fire code and local fire code before you begin! We consulted multiple fireplace/chimney companies in the area, and spoke with a member of our local fire department just to make sure we were on track. Below is the process, materials, and total cost!
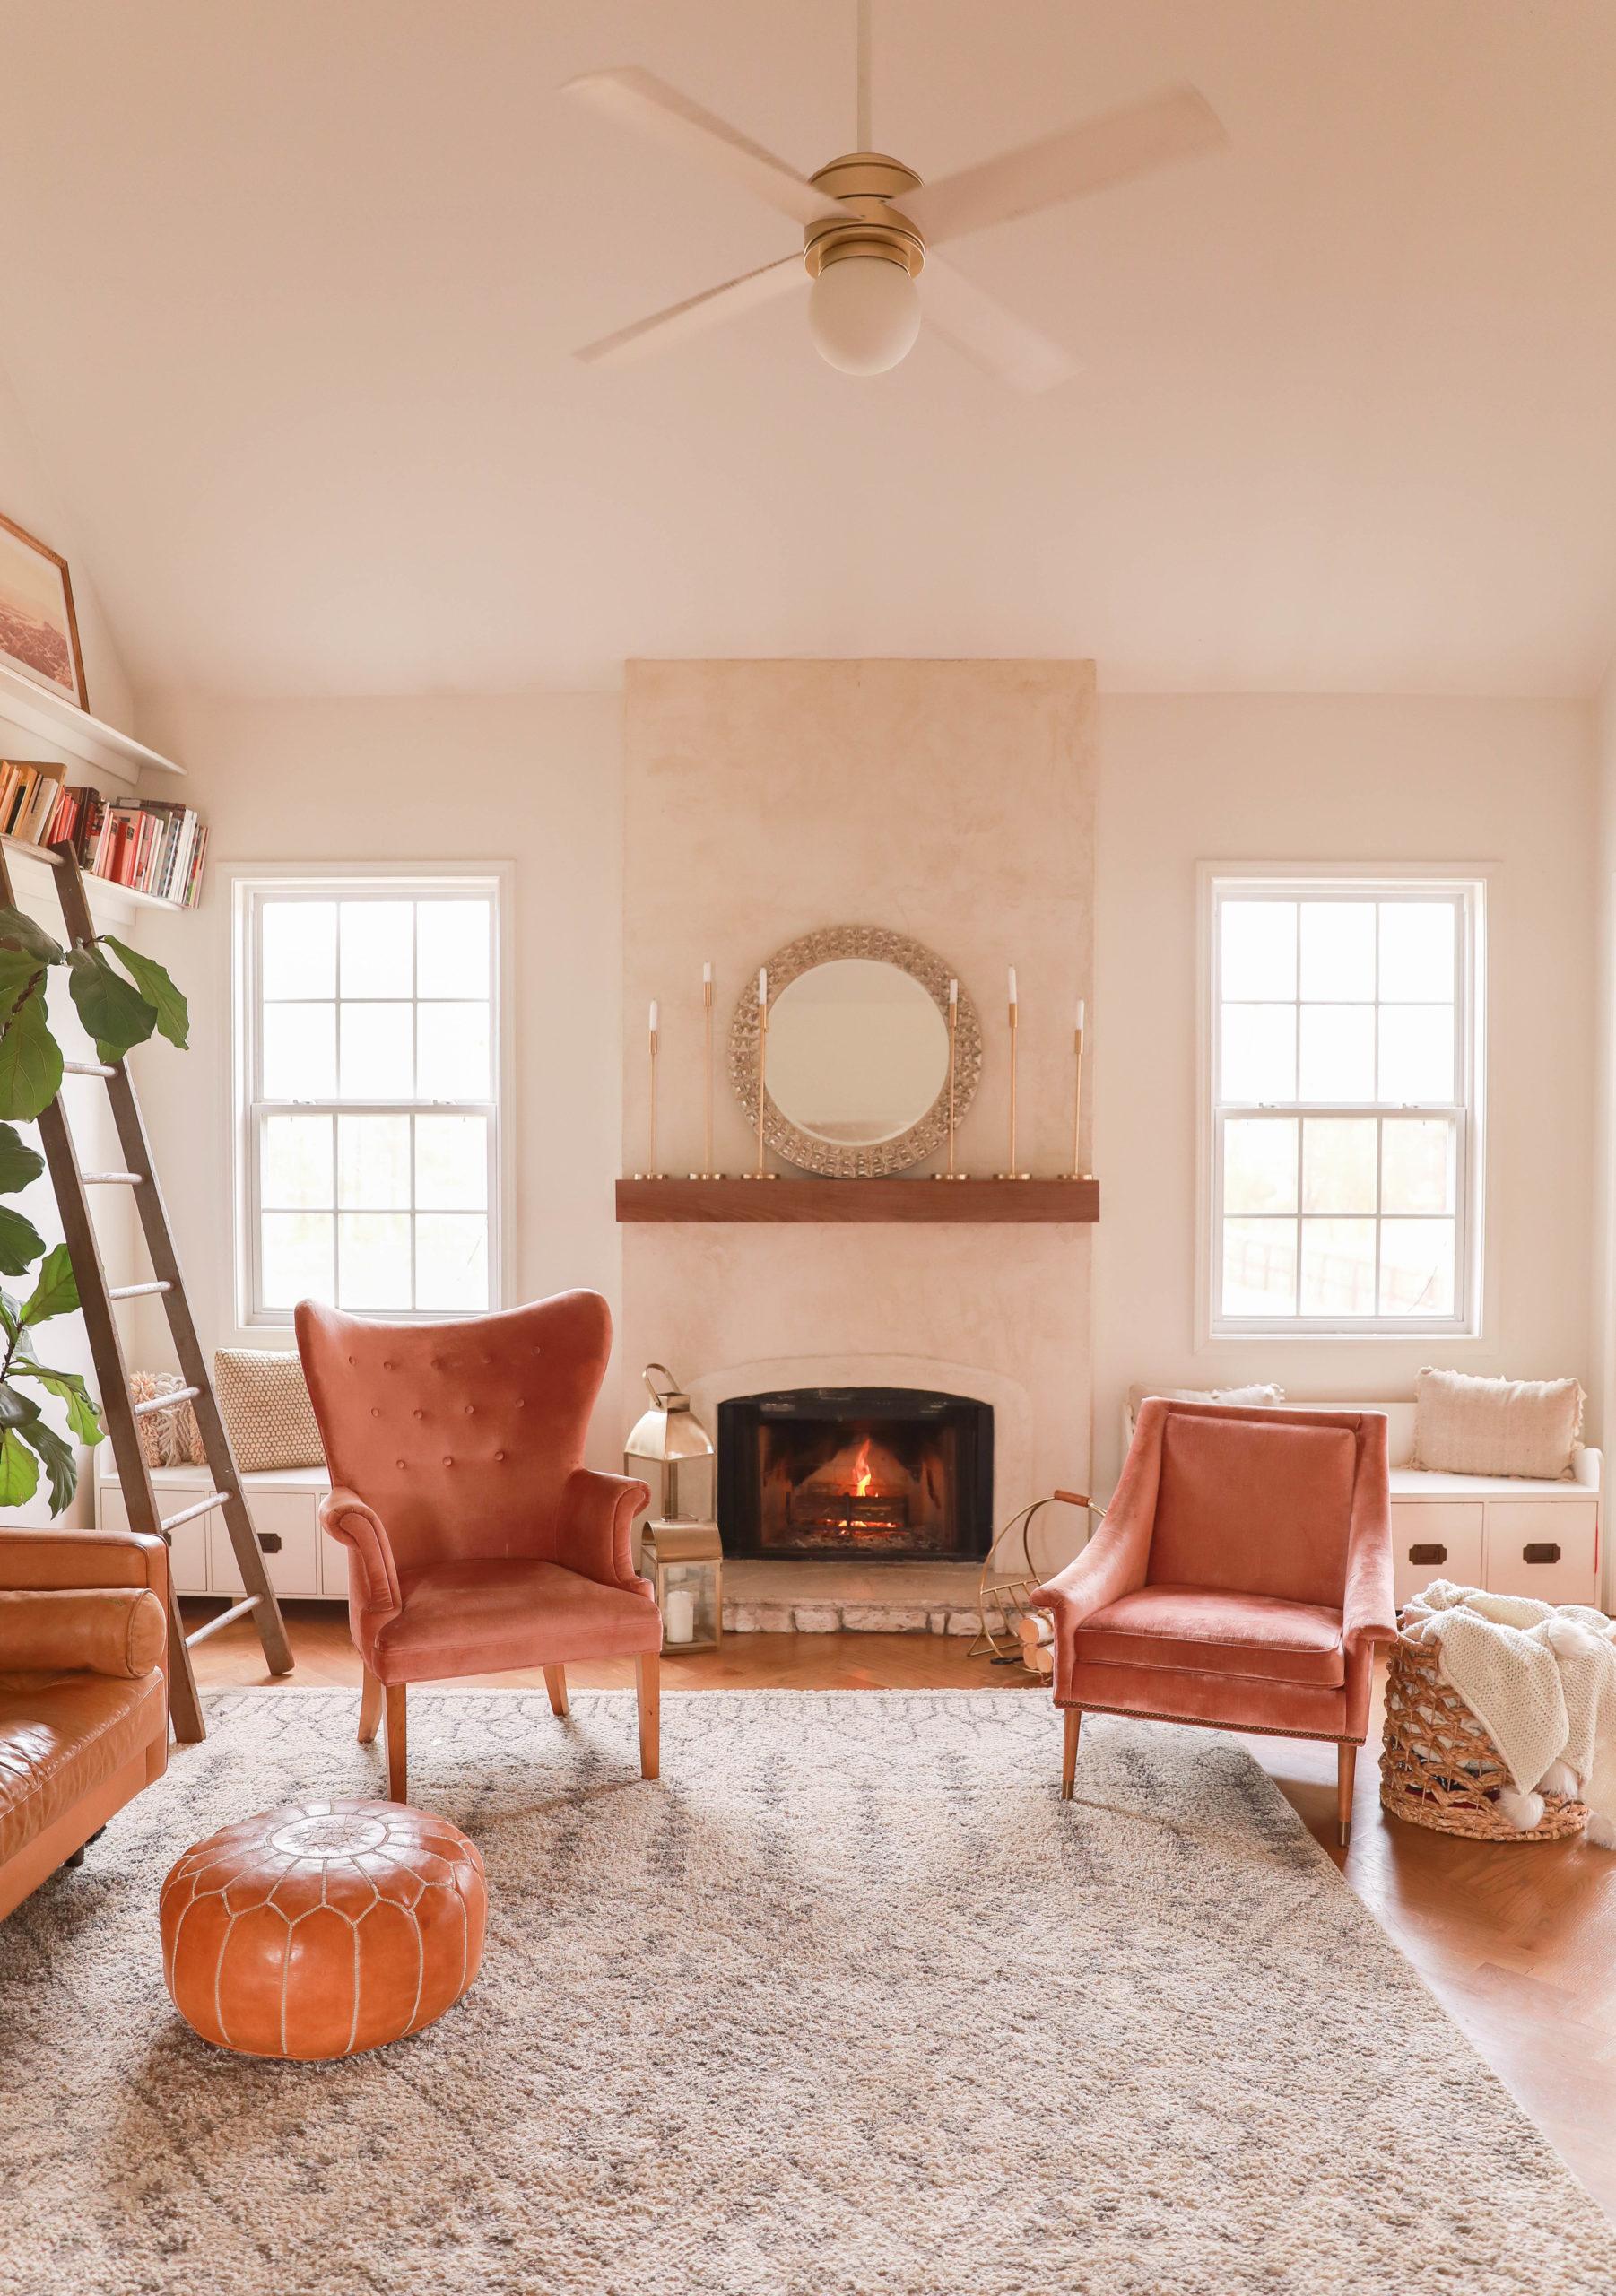
Anna’s vision for the new look of our fireplace surround was heavily influenced by the look of classic Southwest and Spanish stucco fireplaces. We came up with a design with a similar look that also worked with fire code!
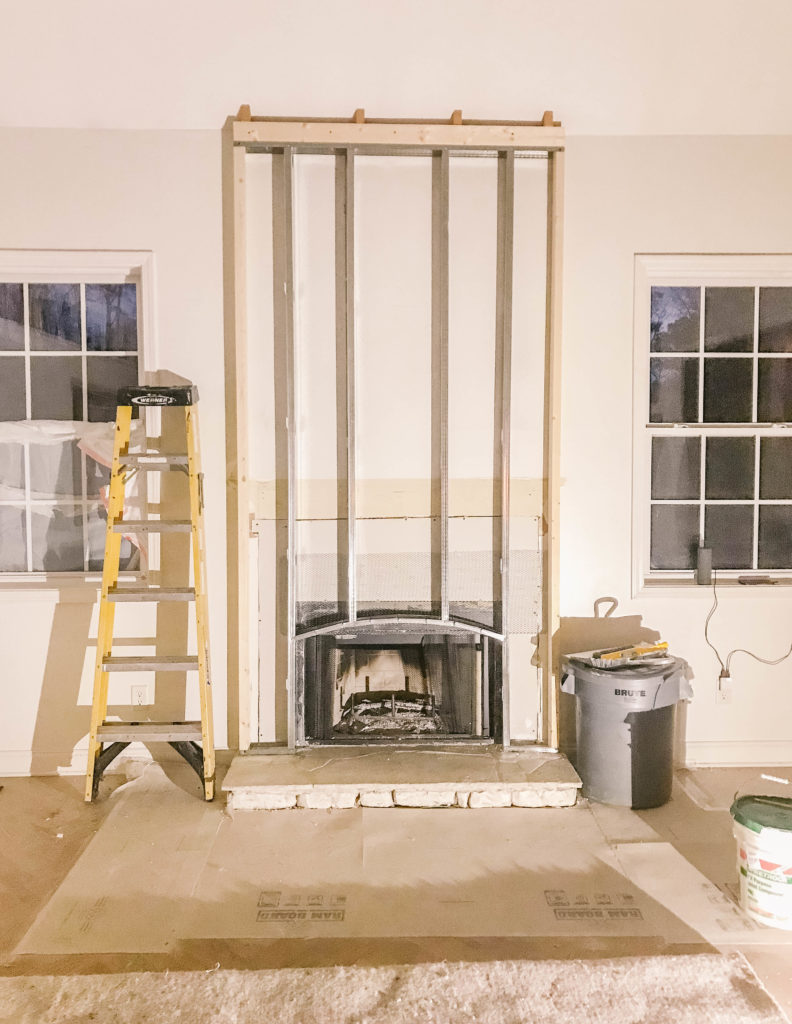
The key is to keep all combustible materials away from the fireplace opening. Our entire surround is built out of non combustible cement products, brick and steel, except for the outermost studs of the frame.
Framework Process:
We started out by building a 2×4 frame that extended to the ceiling. Knowing I had a short deadline to work with, we worked with some friends who have a handyman business to help me with the frame. To ensure the proper clearance of combustible material, we only used wood 2x4s on the outermost frame supports, with all remaining portions of the frame constructed with steel studs. The arch located at the top of the fireplace opening was made of a steel stud as well which had the side supports trimmed to allow the stud to be bent into a curve. (When working with steel studs you have to make sure to use fasteners that are designed for metal to properly connect the metal studs together.) We then attached the frame to existing studs in the wall where possible.
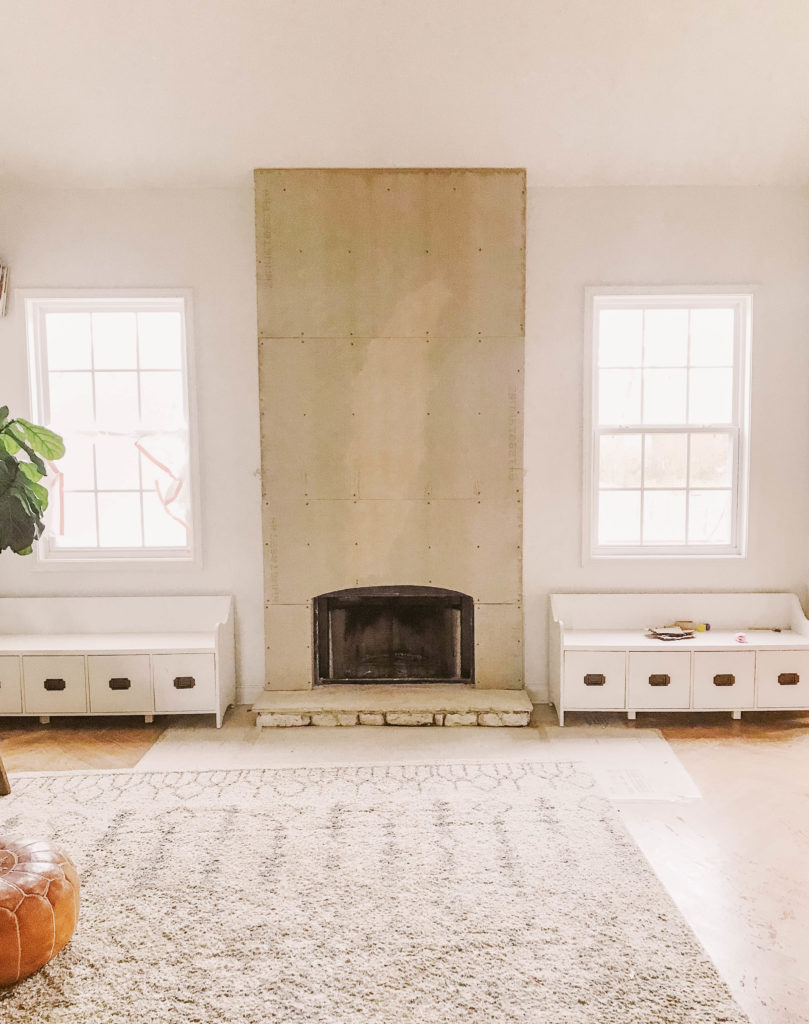
Concrete boards:
Once the frame was up and secured, we installed concrete board to the front, sides and interior opening of the fireplace surround. We used Hardibacker brand cement board. When using concrete board be sure to use specific screws designed to work with concrete board, not standard drywall screws. Due to the alkaline nature of the concrete board, standard screws can rust over time. I then installed some corner bead to the exterior corners. Vinyl or galvanized corner bead is recommended.
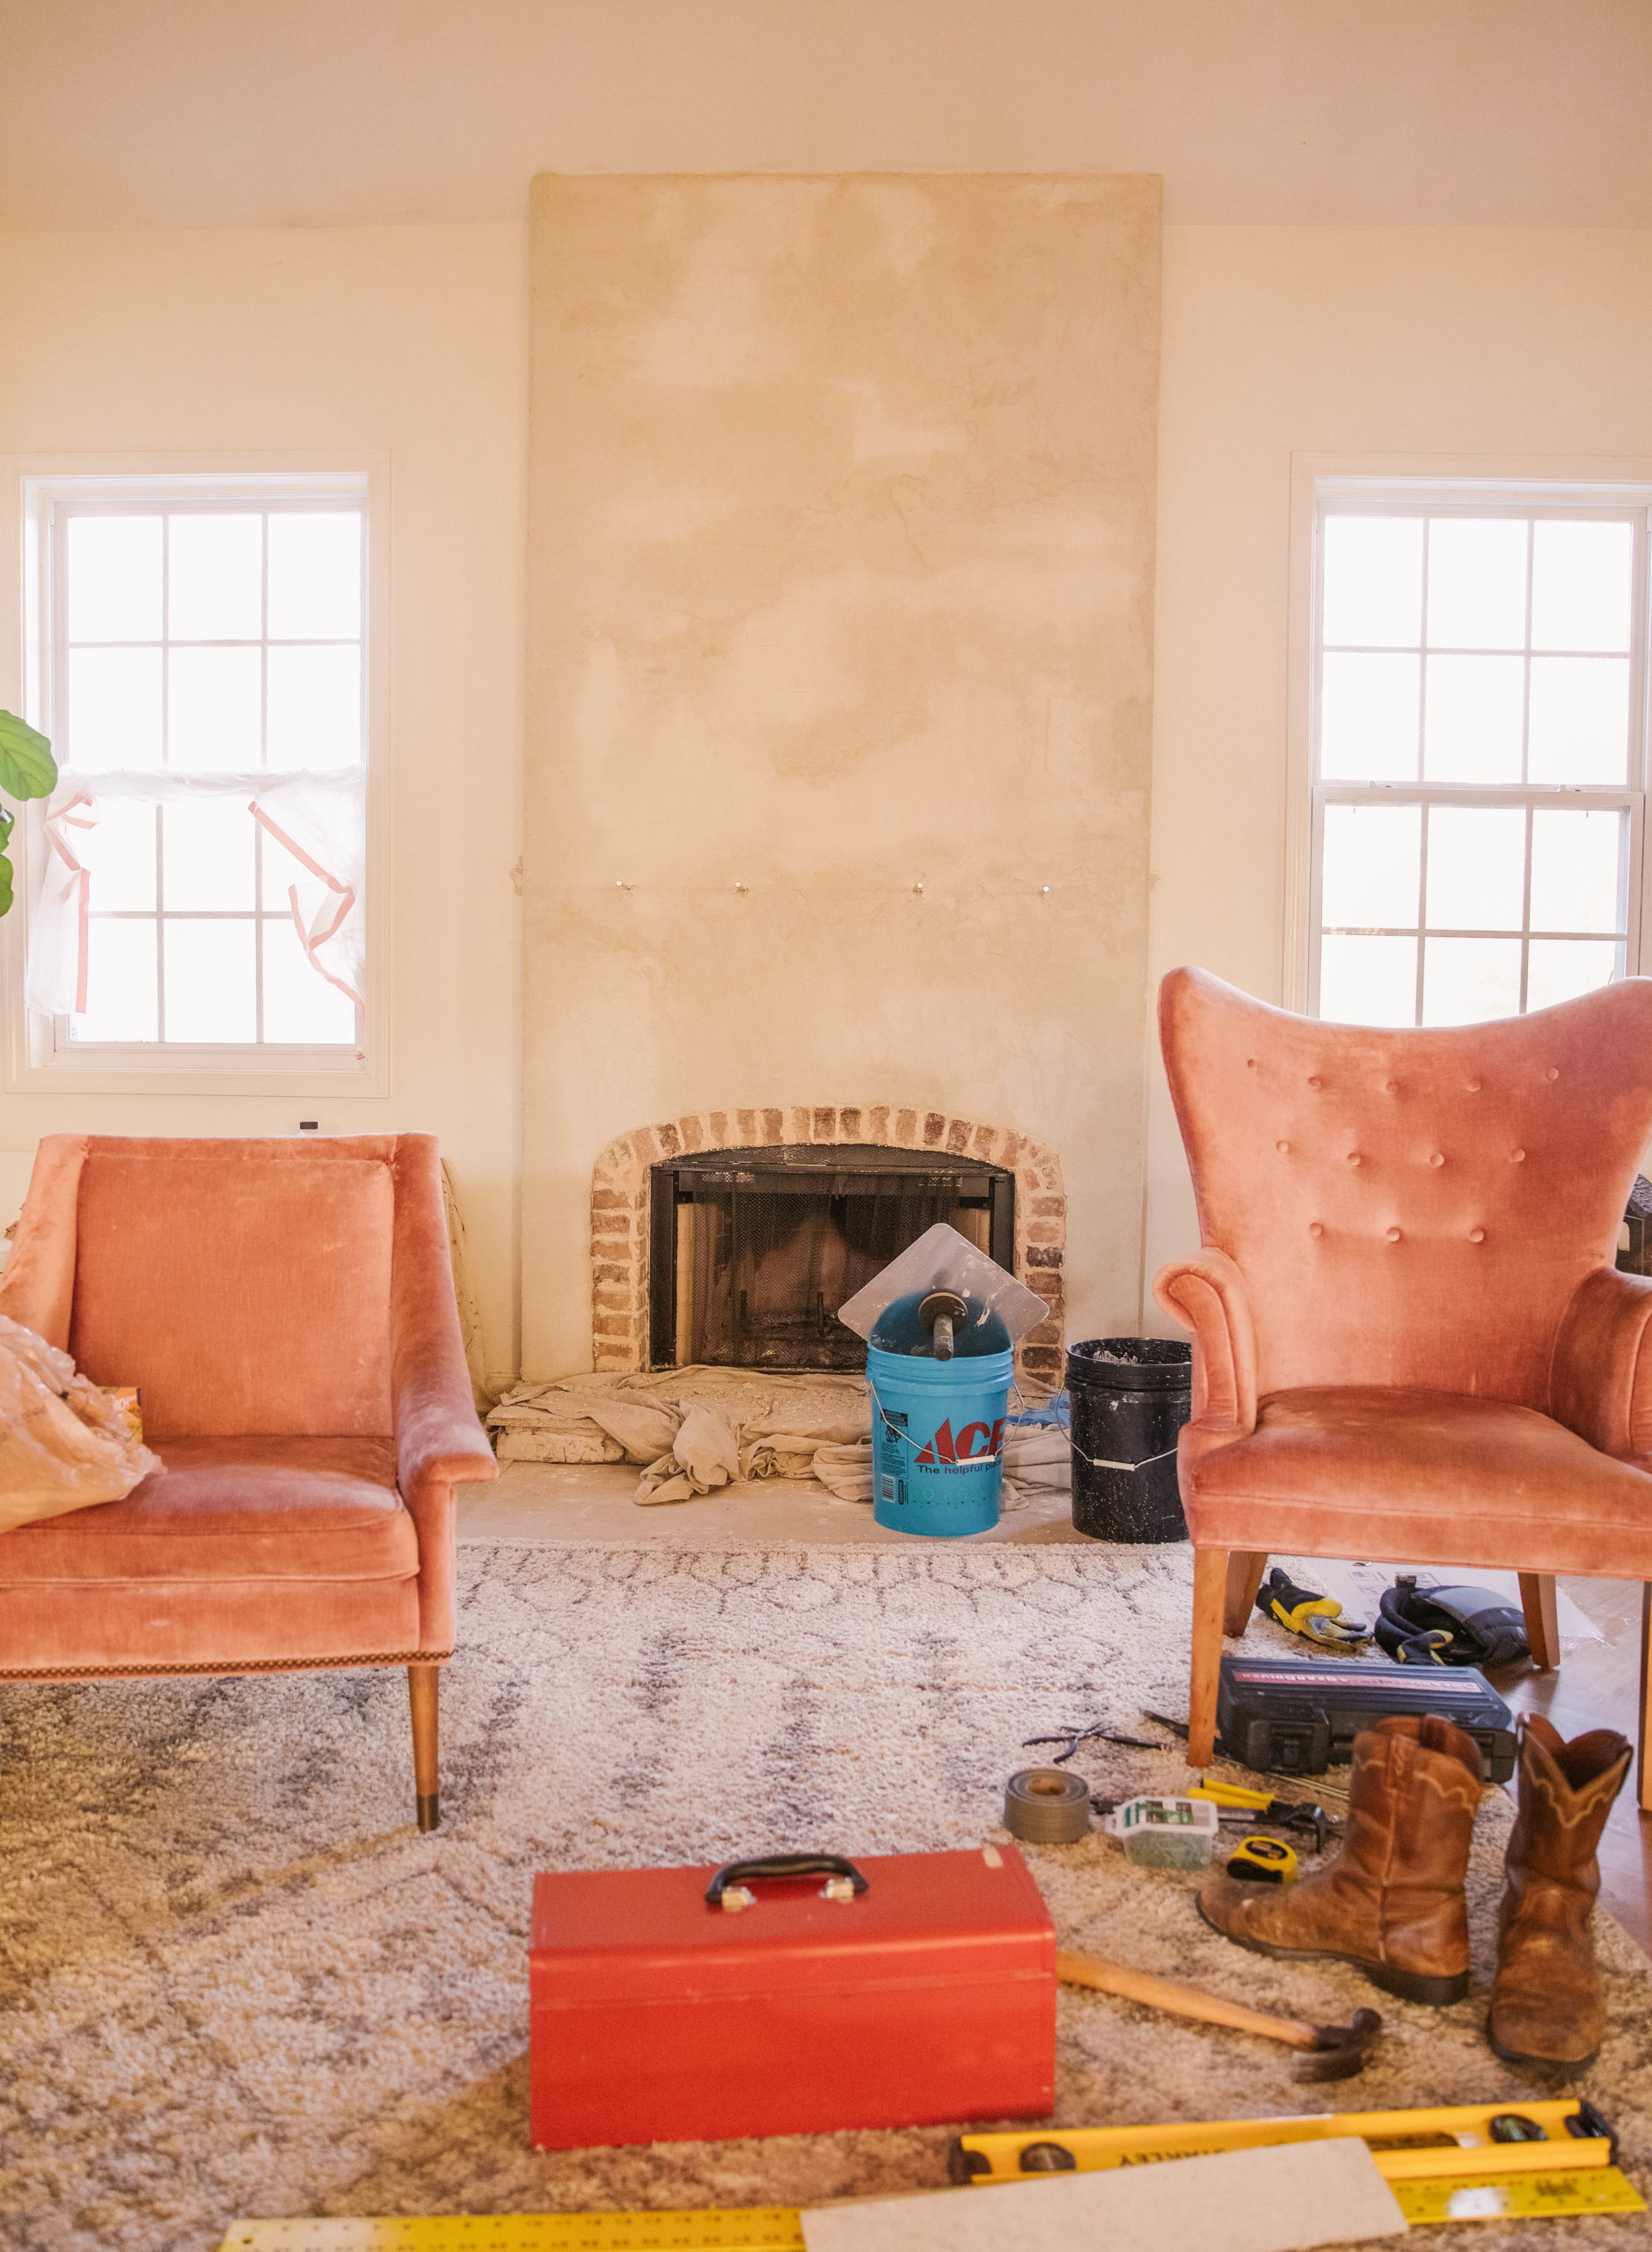
From there I covered the seams with Backerboard Seam Tape, but to be honest, I wish I would have used a wider fiberglass mesh. I developed slight cracks over some seams, and I believe a wider mesh would have prevented the cracks. These cracks are easily fixed with a little more stucco though.

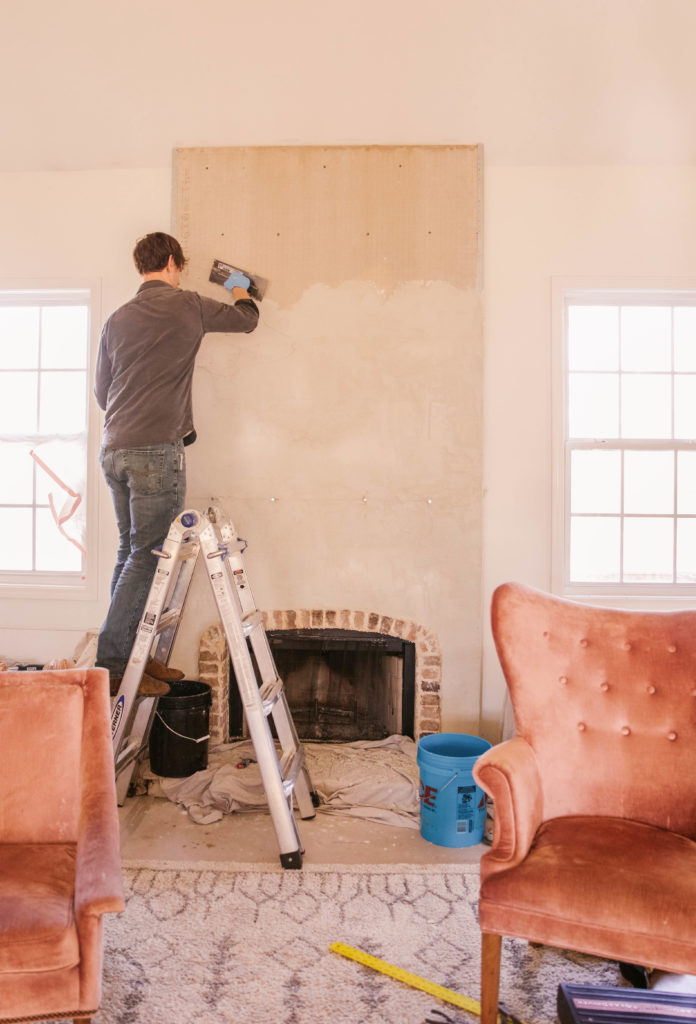
STUCCO PROCESS:
The last step was to apply the stucco of choice. Standard stucco is usually a grey color when dry. This can be painted once the stucco is fully cured, but a painted look is not exactly what we were hoping for. We found an Atlanta based supplier though that carried a white stucco produced by A.W. Cook. You might be able to find the same in your area!
This was my first time stuccoing, so I did not know exactly what to expect, but I must say that it was easier than expected. There is a learning curve, so I highly recommend a little practice an a scrap board to help get a feel for how to work with the stucco material and tools. You can catch the video process in our instagram story highlights!
Tools neede for stucco:
– 5gal bucket to mix the stucco in
– a scoop to get the stucco out of the bucket
– aluminum hawk,
– finishing trowel – I also experimented with a pool trowel and found it a little easier to work with than the finishing trowel, but it is a little more expensive and just boils down to personal preference.
-Water filled spray bottle – mist the stucco when needed if the stucco stiffens too quickly. Start applying at the bottom of the wall and work your way up.
– There were a few areas, such as the sides, when I wish I had a mini trowel, but it isn’t necessary.
TIPS: Before applying the stucco apply a bonding adhesive to the concrete board, or add some acrylic fortifier directly to the stucco mix. This will help the stucco bond to the concrete board. I found that the concrete board quickly absorbed the water from the stucco causing the stucco to thicken quickly once applied. When stucco does this it becomes rather stiff and more difficult to work with.
The stucco was left to dry for a few days before I hung the mantle. I misted the new stucco twice a day for 4 days to help it dry/precure gradually as this can apparently help prevent hairline cracks from forming.
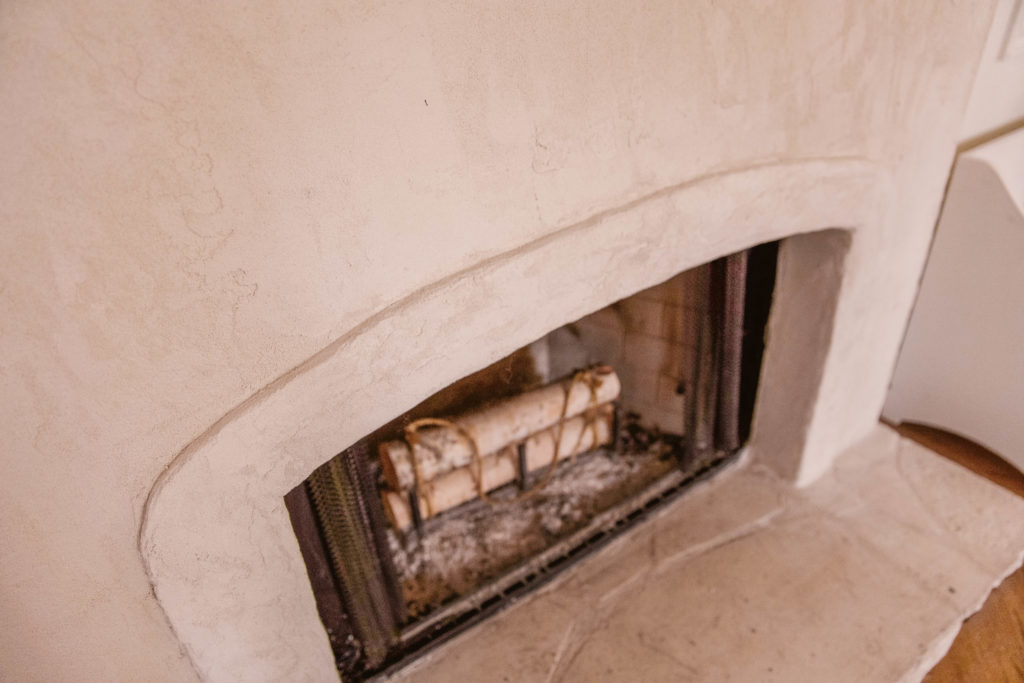
Brick edge:
Part of the goal design was a raised border around the opening. I used some Thinbrick and mortar left over from our basement wall project to create a raised boarder as well as line the sides of the opening. Using a concrete bonding agent such as Quikrete bonding adhesive, or an acrylic fortifier such as Quikrete acrylic fortifier will help the mortar bond to the Thinbrick and to the concrete board. Once the mortar set, I added some metal lath to the underside of the arch as it helps hold the stucco in place to the bottom of the arch.
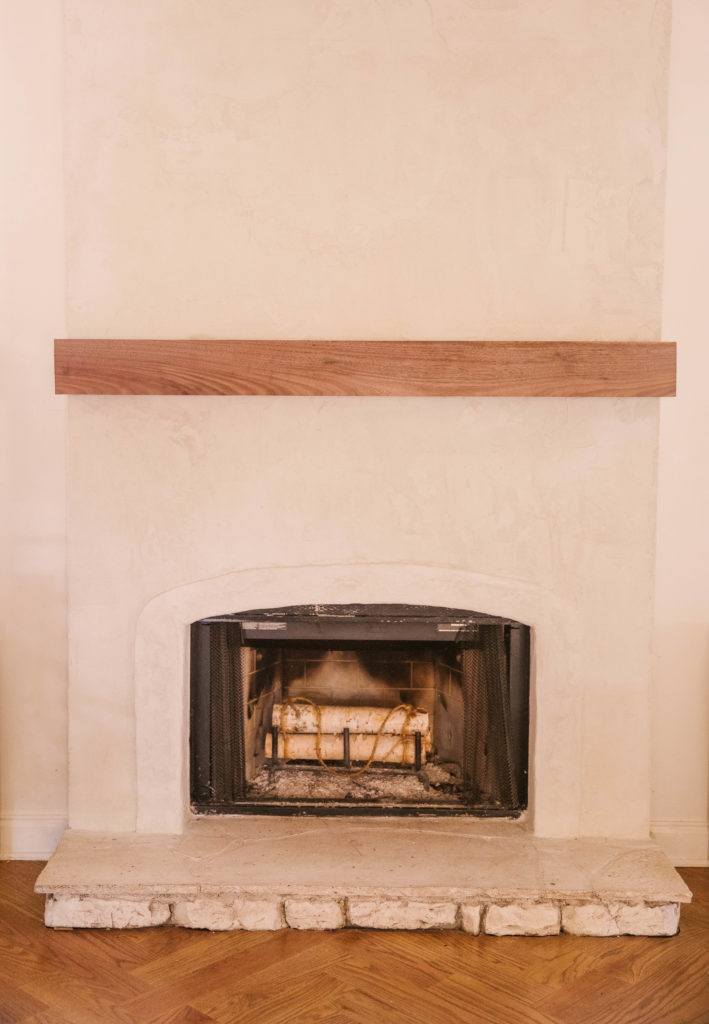
MANTLE:
We were able to find our wood piece for the mantle at a local lumberyard. They offer to plane the wood for free, so we didn’t even have to do much sanding once we brought it home.
Once the panels are fully dry, you can hang the mantle! To do so I sunk some ½ thick lag bolts into the surround’s wall studs, and cut the hex heads off the bolts. (If taking this on, I recommend installing the lag bolts into the studs before you stucco.) I then drilled corresponding holes in the mantle.
Finally I applied some construction adhesive to the back of the mantle as well as the top of the lag bolts and slid the mantle onto the lag bolts. After the adhesive set 24 hours later, the mantle was solid like a rock.
TOTAL COST:
It took a couple weeks to finish and under $400 in material costs. The most expensive portion of the material cost was the solid black walnut beam used for the mantle which was around $250. (This price does not factor in the labor for building the frame of the surround. If you hire a contractor for this portion, the cost will vary based upon your area.)
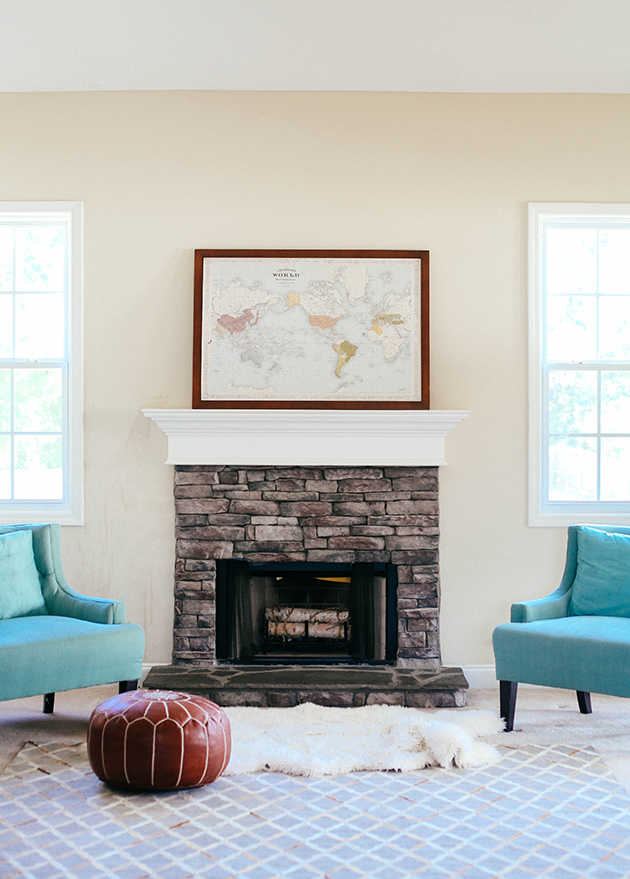
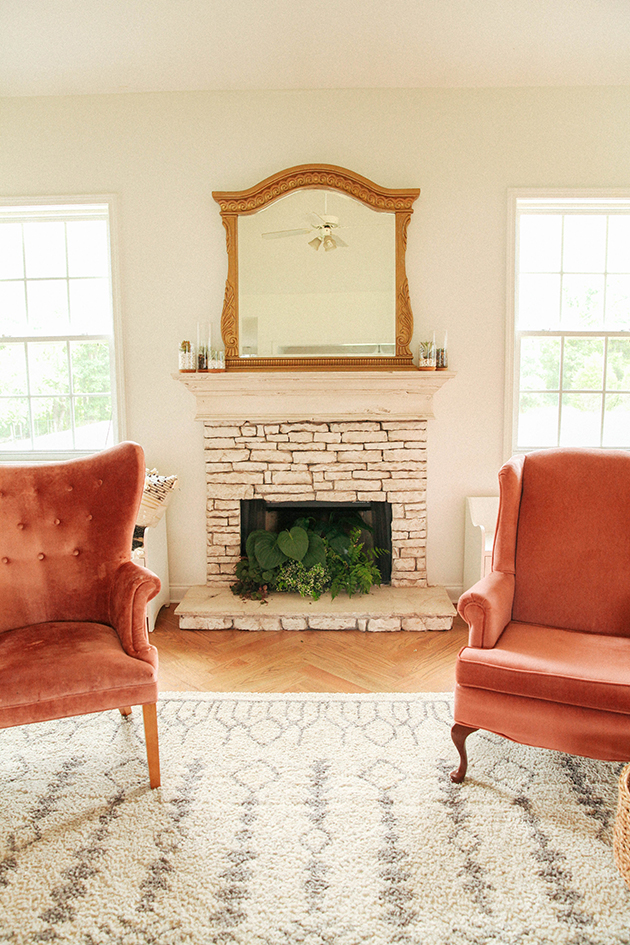
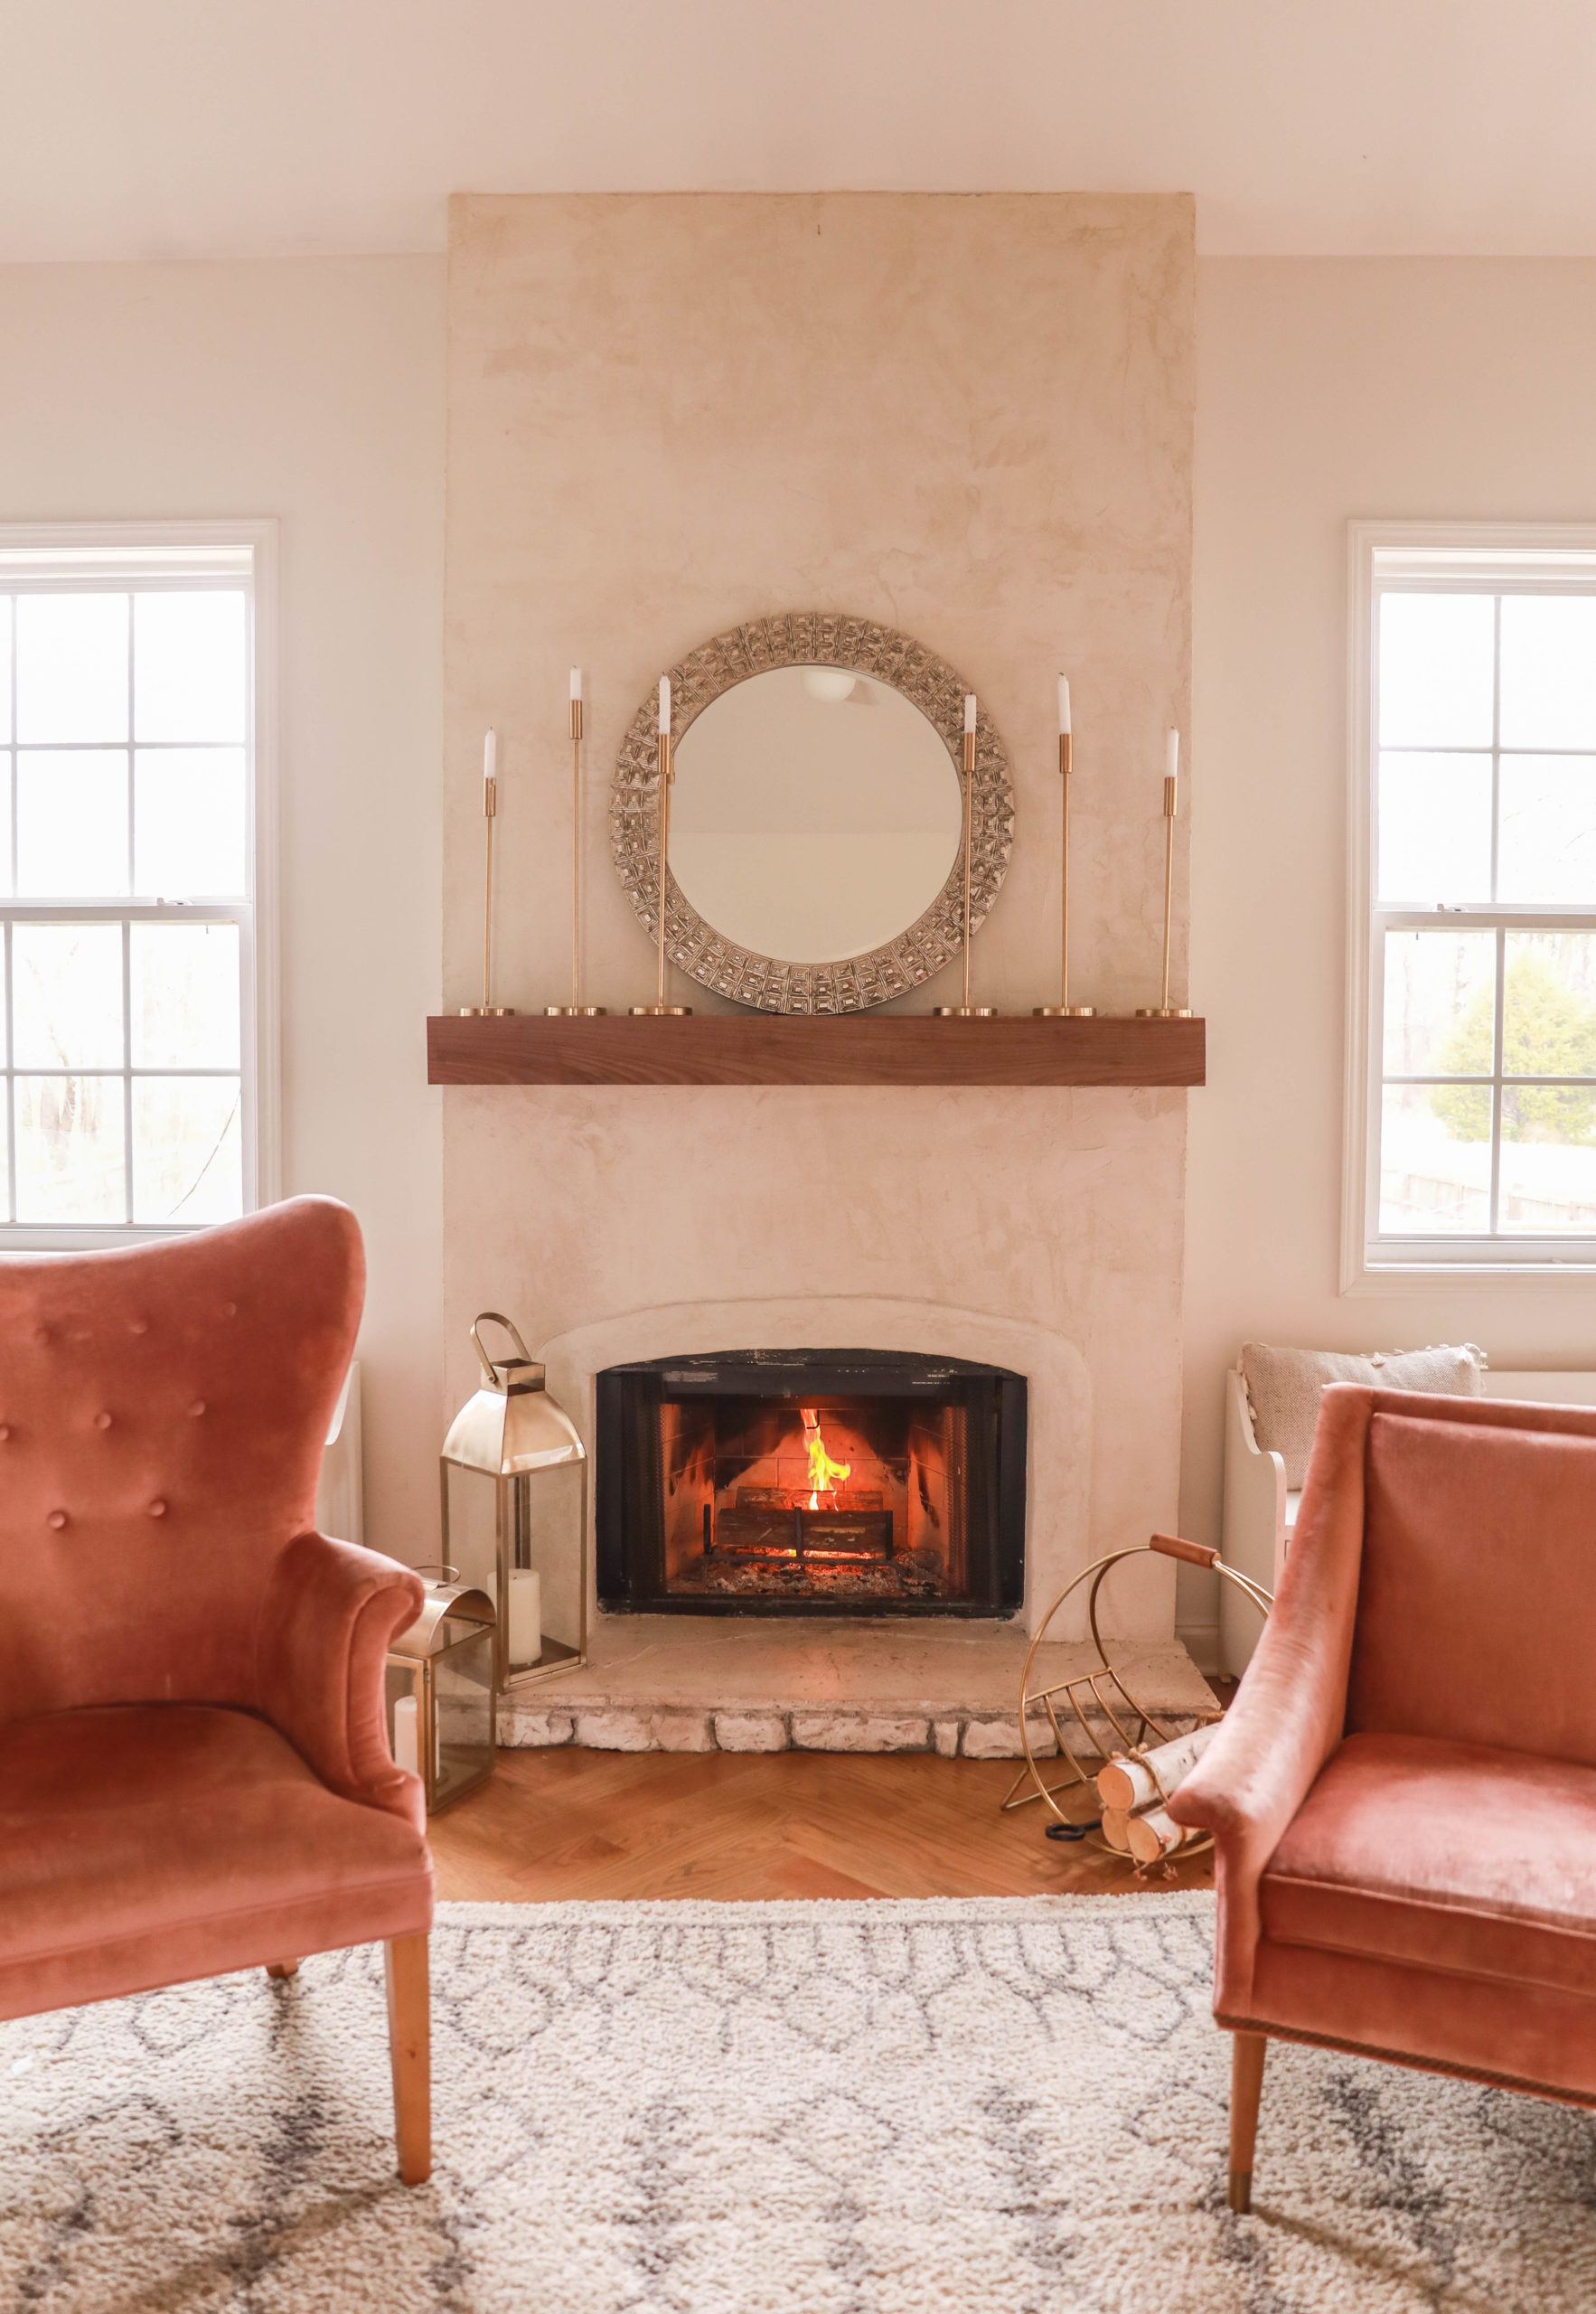
We can’t get over how much this greatly improved the look and feel of the living room. It fits the high ceilings well and seems like it was always supposed to be a part of the home. That was our main goal! Let us know if I missed anything, and we can answer questions below.


