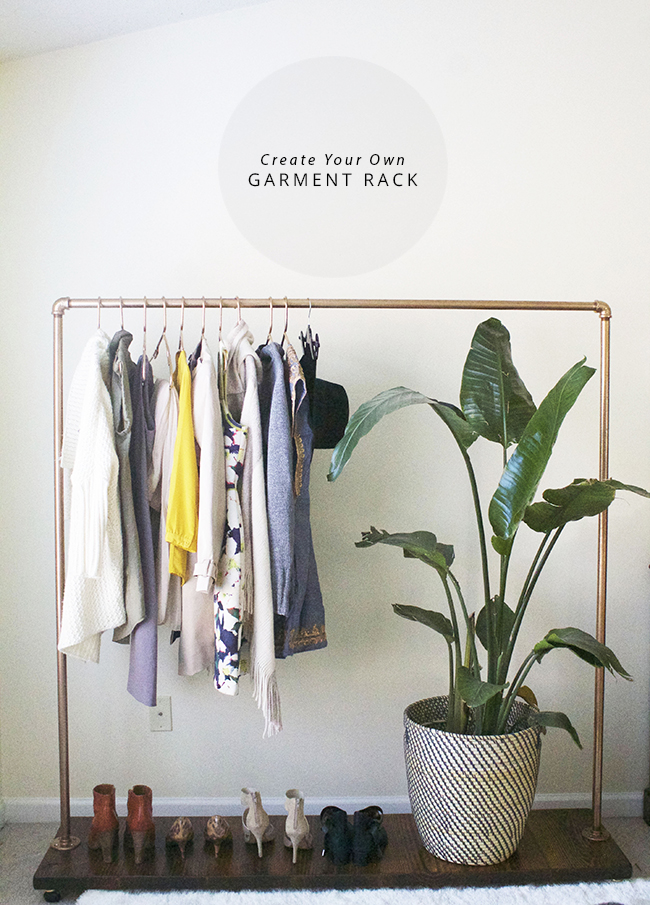
I was in sore need of a good garment rack for some upcoming shoots, so with a gentle nudge, I managed to lasso Gabe for another project to share with you all;) This is a DIY garment rack project that you can use in your own home, which might be a good option for you if you are short on closet space! I am learning how to use the power tools, but this beauty was made by Gabe alone (minus the spray paint finish;)), and so he is taking over today to share step by step instructions. Feel free to leave your questions in the comment section for us to answer or shoot us an email!
DIY Garment Clothing Rack
Supplies
Wood for your base (Please see below regarding base)
2 – 2x2x8 (or 2x4x6) for extra support under the base.
3 – 3/4in x 5ft black pipe
2 – 3/4in 90 degree black pipe elbow
2 – 3/4in threaded floor flange
1 – box of screws (The length depends on the thickness of the wood chosen for the base.)
4 – wheels (I used hooded ball swivel plate casters.)
2 – spray paint (Anna chose a Rustoleum in copper. Be sure that the paint is designed for metal)
Stain and varnish or finishing oil of your choice
Power drill
Note regarding the base – You can use just about any wood of your choice for the base. It all depends on your price point, desired looks, and amount of time you wish to sink in. It is easy to find your desired width of board at your local lumber yard or large hardware store. Simply cut to your desired length. If you are looking for a thicker look, you will need to use 2×10 boards and bind them together length wise using pocket screws or a biscuit jointer, and fill the crack with wood filler. Don’t be intimidated by that last part it is very easy. I used scraps of 2×10’s jointed together because that is what I had on hand and like the look of it. If you want to join multiple boards together I highly recommend the biscuit joint method. You can pick up a biscuit jointer for about $100 dollars and is well worth the investment if you are a DIYer, especially due to their ease of use.
Step 1 – Cut the wood.
Your base needs to be a minimum of 5′ 4″ in length because the elbows and floor flanges will add a bit of extra length to your pipe. I recommend going slightly longer to leave a little room for mistakes. Your base supports should be a few inches shorter than the base itself so that they will be unnoticeable when looking at the rack from a normal standing position.
Step 2 – Construct/prep the base for finishing.
Depending on what you chose for your base, you may need to join boards together or sand them down a bit, especially if any wood filler was used. If you will be sanding always follow the grain of the wood. Add your base supports to the bottom of the base at this time also.
Step 3 – Attach the wheels to the bottom corners of the base.
Align and set each wheel plate side down on the underside of your base. Using a pencil mark the location of where each screw will be inserted. Drill pilot holes at each of the markings being careful that you do not drill though the base. Secure the wheels to the base.
Step 4 – Finish the base.
I like to use a wood conditioner before I stain wood. You do not have to, but it can help to avoid blotchy color. Choose and finish with your choice of products following the instructions found on the can. We used Varathane Dark Walnut stain and finished with three coats of a polyurethane finish.
Step 5 – Assemble and paint the pipes.
Assemble the pipes and and the floor flanges together. Then take any wood scraps (the longer the better) and screw them to the bottom of the assembled pipe frame. This will allow you to stand the frame upright and spray paint it without interference.
Step 6 – Attach the pipe frame to the base.
Once the paint is dry remove your scrap wood from the pipe frame and align it at your desired position in the base. Once again mark and drill pilot holes in preparation for attaching the piping to the base. Finally screw down the piping to the base and enjoy the finished product.
Check out the full step by step photos on the Steller app!


