
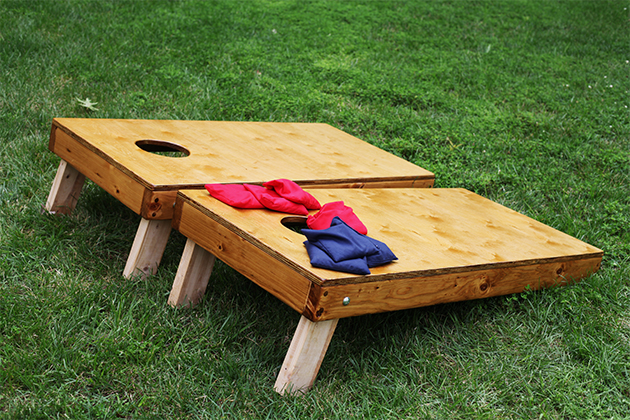
Somehow next weekend is 4th of July! I wanted to share some festive fun this week that my family will personally be putting to use! Today, I am handing this DIY wooden cornhole set over to my husband, Gabe. He kind of knows a little more about woodworking than I. But hey, I did take the pics! Teamwork folks..
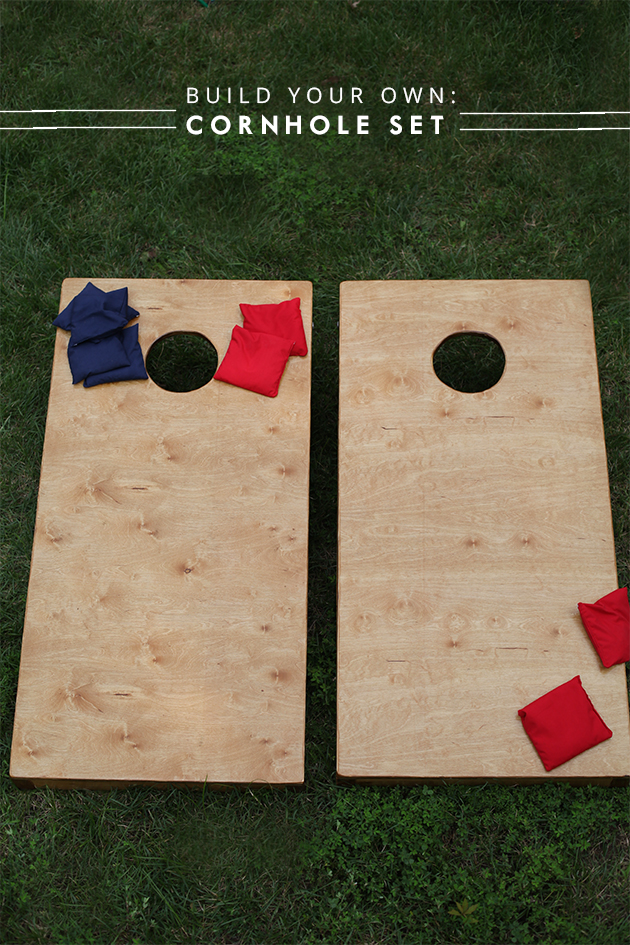
BUILD YOUR OWN CORNHOLE SET
(WEATHERPROOF and STORAGE FRIENDLY)
TOOLS you will need:
Jig Saw
Measuring Tape
Compass
Drill
1/2″ drill bits with wood heads
Clamps
Circular Saw
Sander
Optional:
Biscuit jointer (optional)
Biscuits
Wood Glue
MATERIALS
1/2 inch plywood, 24″ x 48″ pieces (2)
2 x 4 x 11-1/2″ (4)
1-5/8″ screws
4″ x 1/2″ Carriage Bolts (4)
Wing Nuts
Washers
Wood Putty
Minwax Stain (Golden Oak)
Spar Varnish
8 Beanbags (custom color options)
Anna’s two brothers and I recently teamed up to make this set as a gift for my father-in-law. We used the basic measurements from The American Cornhole Association (did you know there was such a thing?!) + instructions here, but we made a few tweaks to come up with a refined and easy to store look:
1) We chose to hide all screw heads with wood plugs when constructing the frame. To do this, you can use a 1/2in spade bit to drill a hole roughly ⅓ in. to ½ in. deep wherever you plan on using screws. Within these larger holes, drill your standard pilot holes and fully insert the screws. Once the frame is complete, insert ½ in. wood plugs to cover the screw holes. Simply place the plugs in the holes and gently tap the plugs into the hole until flush with the surface of your project.
2) We opted to attach the top to the frame using biscuit joinery as opposed to screws. It is very easy to do as long as you have a biscuit jointer of course (this is by far one of my most beloved project tools), wooden biscuits, glue and a few clamps. This provides a really clean look. Don’t worry, if you do not have a biscuit jointer, you can easily use screws which can be hidden using the plugs mentioned above.
3) The last change we made was instead of using paint, we stained and varnished the corn hole set using a Golden Oak color, and finished with multiple coats of spar varnish. The reason for spar varnish as opposed to a standard polyurethane is that it provides a UV and moisture protection. If you are planning on staining, be sure to use a pretreater on the wood so the stain is absorbed uniformly. This will help prevent streaks and blotches, giving a much nicer finished look. We are hoping to use a woodburner to custom engrave an image and name soon.
All and all we think it turned out pretty well and it was great teaching a thing or two to my younger brothers in law (wink wink, nudge nudge). Hit me up if you have any questions in the comment section and we will make sure to help if we can!
P.S. DIY Wood Headboard, and DIY Wooden Garment Rack


