
Today’s post is written by Gabe Liesemeyer.
As always, don’t be intimidated by the amount of words you see in front of you in this “how to”. I am a teacher at heart, so I explain things in depth in order to make the process as simple as possible. I have it broken down into two sections to make it easier to understand. If video format is more your thing, check out the how-to video here!
Tip: When purchasing wood, always search through the stock to find the straightest/cleanest boards you can find. This always makes things easier while making and installing.

Materials and tools for top shelf and clothing bar:
- 2x12x8 Pine board (Or whatever length fits your closet)
- Stain/Wood finish of your choice (I used OSMO clear satin hard wax oil with no stain. It is super easy to use!)
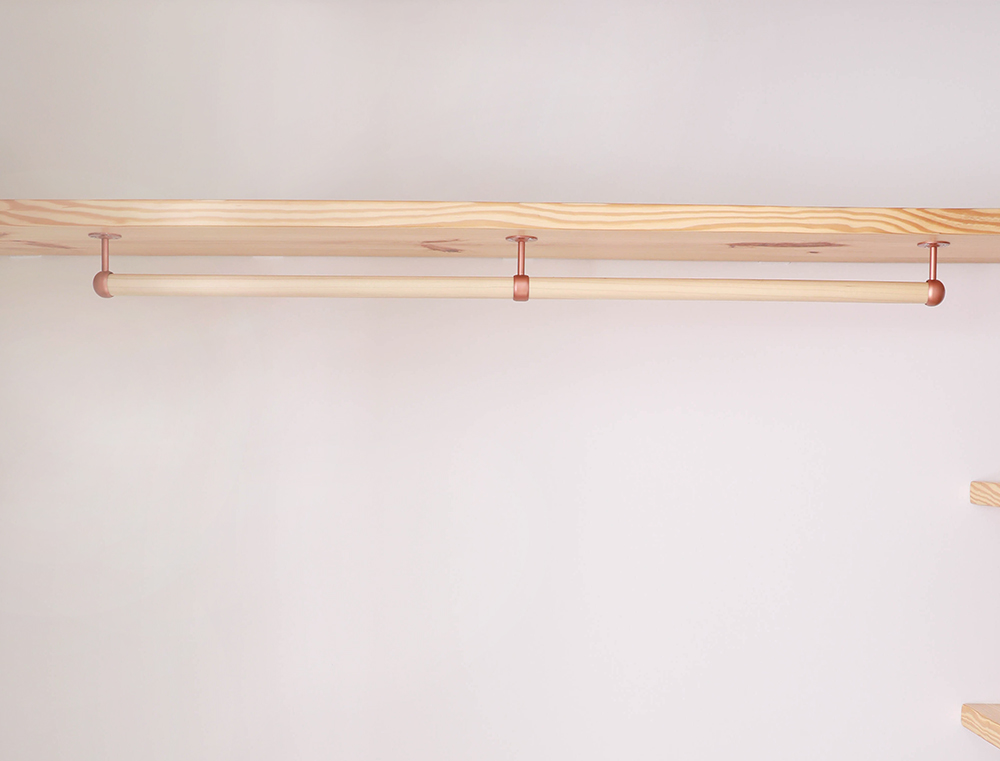
- 1 ¼ in wood hanger rod (I used a 6ft poplar rod cut to length)
- Closet rod end supports and closet rod center supports (I spray painted ours copper – If spray painting you will also need metal primer and possibly clear enamel. )
- 8in floating shelf brackets (I used 7 brackets to support our 8 ft shelf with a top length of 8in)
Here is a 6in floating shelf brackets option as well. - Sander and sanding disks (I did a quick and gentle pas will 80, then finished with 120 grit)
- 5/8in drill bit that can make a hole just over 8 in deep. or 6 in. deep if 6 in. brackets are used. (I used a 5/16in speed bore bit with 6in. hole depth attached to a 6in bit extender. A ½ in bit can also work.)
- Power Drill (Here are inexpensive options for a cordless and a corded drill.)
- Circular Saw or Miter Saw
- Level (The shelf brackets come with a 9in spirit level. Here is an affordable 24in level if needed)
- Stud Finder
- 2 pieces of scrap wood with a straight edge at least 8 in
Instructions for Top Shelf and Clothing Bar:
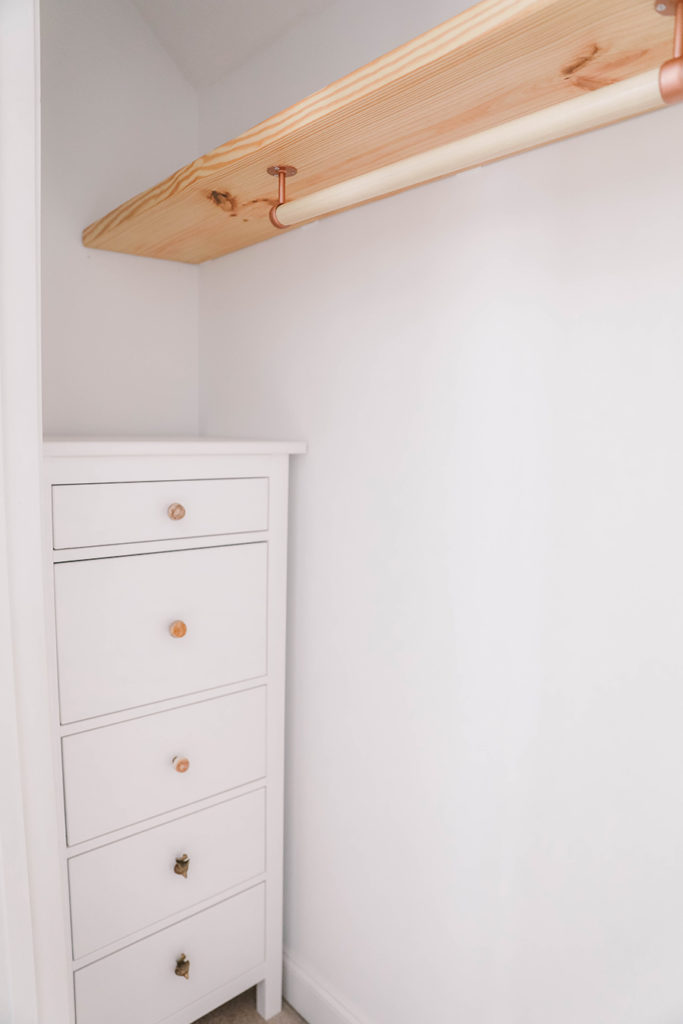
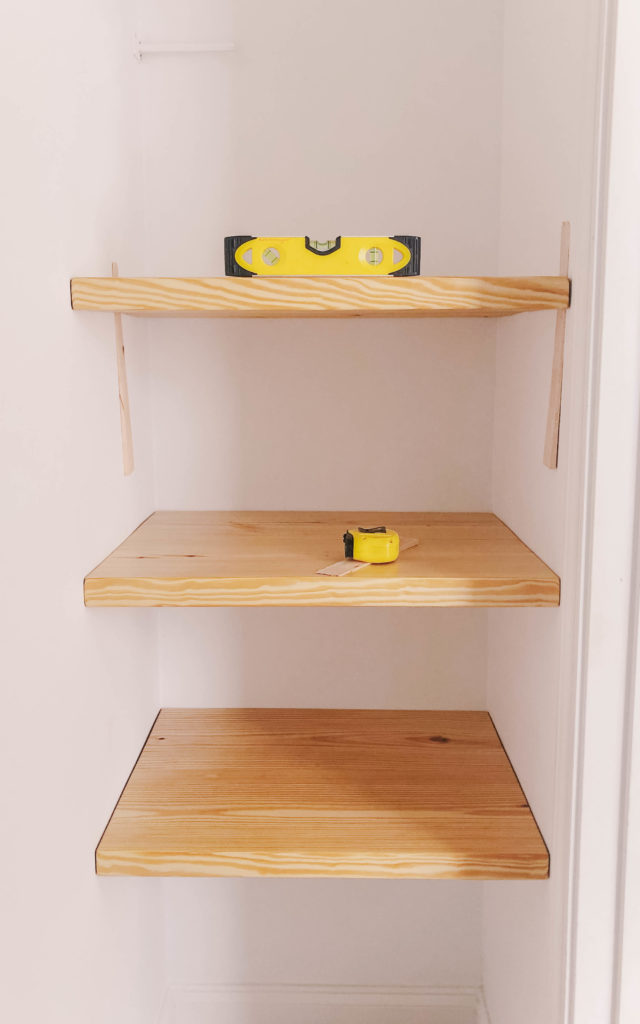
1. On one of the back corners or your closet, mark the height where the bottom of your shelf will sit. Ours is roughly 68in from the floor. Next, using a level, mark a straight line along the length of the back wall starting at your original mark. Last, using your level, extend your line along the adjacent walls about 10in.
2. Next take the straight edge of the scrap wood and line it up with the 10in straight lines drawn on the adjacent walls. Use screws to attach to the wall (studs are best but not necessary if you are careful). These will be used as temporary support for fitting and installing the long shelf. Although not fully necessary, this step will save you from putting your fist through the wall as you work with an awkwardly weighted thick board.
3. Cut your 2x12x8 to length. I cut mine roughly ⅜ in shorter than the length of the back wall knowing my corners were not square. Once cut, dry fit the board into place by resting it on your temporary supports from step #2. If it does not fit, gradually shorten your board by small increments until it slides into place.
4. Now that your shelf properly fits and is resting on the temporary supports, trace the top of the shelf along the back wall. Next, using a stud finder, mark each stud near the top of your shelf line. If possible mark your closest estimation of where both sides of each stud are found both along the wall as well as the corresponding location on your shelf. You should now have the sides of each stud marked on your shelf as well as on the wall just above your shelf.
5. Remove the shelf and mount the floating shelf brackets directly into the studs using the lines you just drew as guide. Be sure that the top of the bracket plates are lined up with the line marking the top of your shelf.

6. Next find the stud location marks that you drew on the top of your shelf and extend them to the back side of the shelf. These are your guides to locate where to drill your 5/16in holes for the floating shelf brackets to slide into. I found that drilling 3/16in below center was the best positioning. Be sure to drill your holes as straight as possible, as too much of an angle can prevent the shelf from fitting on your brackets. I highly recommend practicing on scrap wood a couple times before drilling into the shelf. (You can also pick up a Milescraft Drillmate to use as a guide for perfectly straight drilling if need be.)
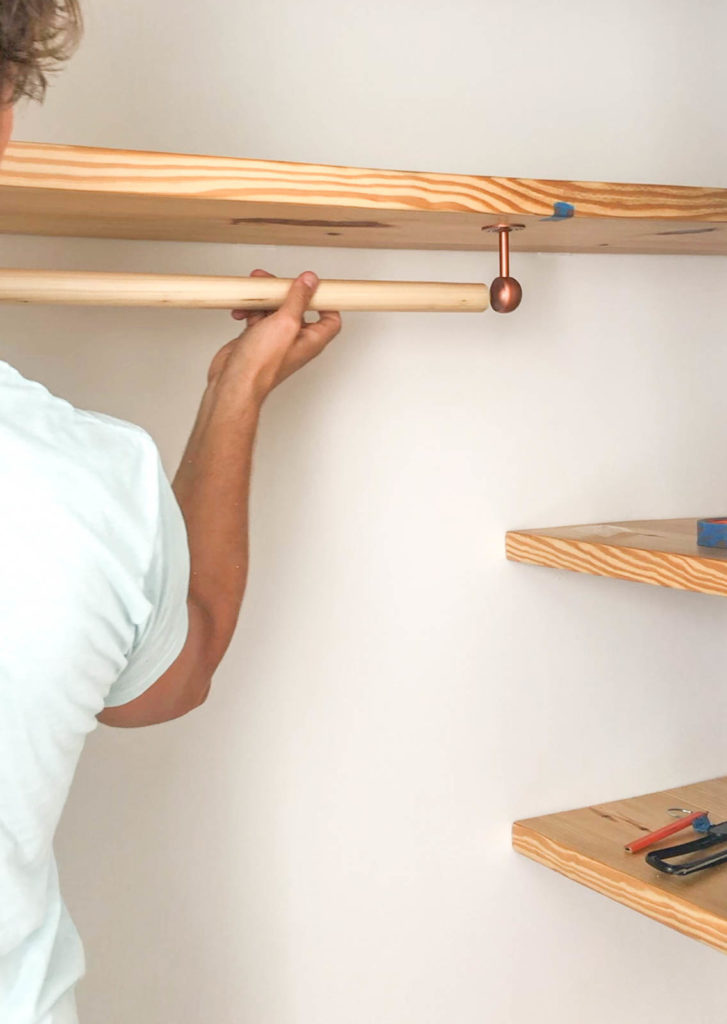
7. Dry fit the shelf into place once again. If no drilling adjustments need to be made take the shelf back down, sand, and apply your finish of choice.
8. Once the finished shelf is completed, slide it back into place, remove your temporary brackets, and you are good to go.
9. For the closet rod we used a 1 ¼ in poplar rod which I trimmed to just over the width of the closet door opening. I quickly sanded with some high grit sandpaper I had on hand (I think 200 or 300 grit), wiped off the saw dust, and applied some OSMO finish to add a bit of shine.
10. Next I spray painted the top mount closet rod brackets copper. Prep the brackets by gently scuffing the bare steel with 300 grit sandpaper (or higher). This will help the paint adhere to the steel, just remember it is a very lite scuff, not deep scratches. Then wipe the brackets down with with denatured alcohol. Once dry spray on a metal primer, allow to dry according to the can’s instructions and apply at least two coats of your colored paint. Once dry, I also like to finish with at least one coat of clear enamel for extra protection of the paint.
11. Last, install the brackets and rod to your shelf with the provided screws, and insert your rod!
Materials for Side shelves
- Two 2x10x8 Pine boards (If making three or more shelves.)
- Wood Glue (I am a big fan of Titebond 3)
- Stain/Wood finish of your choice (I used OSMO clear satin hard wax oil. It is super easy to use!)
- 2ft bar or pipe clamps (I used three. A pocket hole jig can be used if no clamps are available)
- Mini Kreg pocket hole jig
- Pocket hole screws 2 ½ in (And 1 ¼ in pocket screws if using the pocket hole method to create the shelf.)
- Power Drill (Here are inexpensive options for a cordless and a corded drill.)
- Sander and sanding disks (I did a quick and gentle pas will 80, then finished with 120 grit)
- Circular Saw or Small Table Saw
- Level (The shelf brackets come with a 9in spirit level. Here is an affordable 24in level if needed)
- Stud Finder
Instructions for Side Shelves:
1.Cut your boards to length based upon where you will be installing. Next, take two of the boards and join them together using wood glue and clamps, or wood glue and the pocket hole jig and 1 ¼ in pocket screws. You will likely have a roughly ⅛ in gap due to the slightly curved edges of the boards. Allow to harden for at least 8 hrs, then fill in the gap with wood filler and gently sand down the wood filler once hardened. (Alternatively you can trim ⅛ in off of each board and join the newly cut edges together. This will create a much tighter joint that is less noticeable if you make clean straight cuts. If using a circular saw, use a straight edge as a guide to ensure a clean straight cut. Use joint filler if any gaps remain. Starbond CA glue is my go to for small wood filling. Using the accelerator will cause it to dry in seconds.)
2. Once hardened and secured dry fit your shelves. If it does not fit gradually trim a side in small increments until it fits as desired.
3. Next, use a stud finder to mark your studs on the wall. Transfer the stud locations onto your shelves, then use the pocket hole jig to create holes in the underside of your shelf for each stud location.
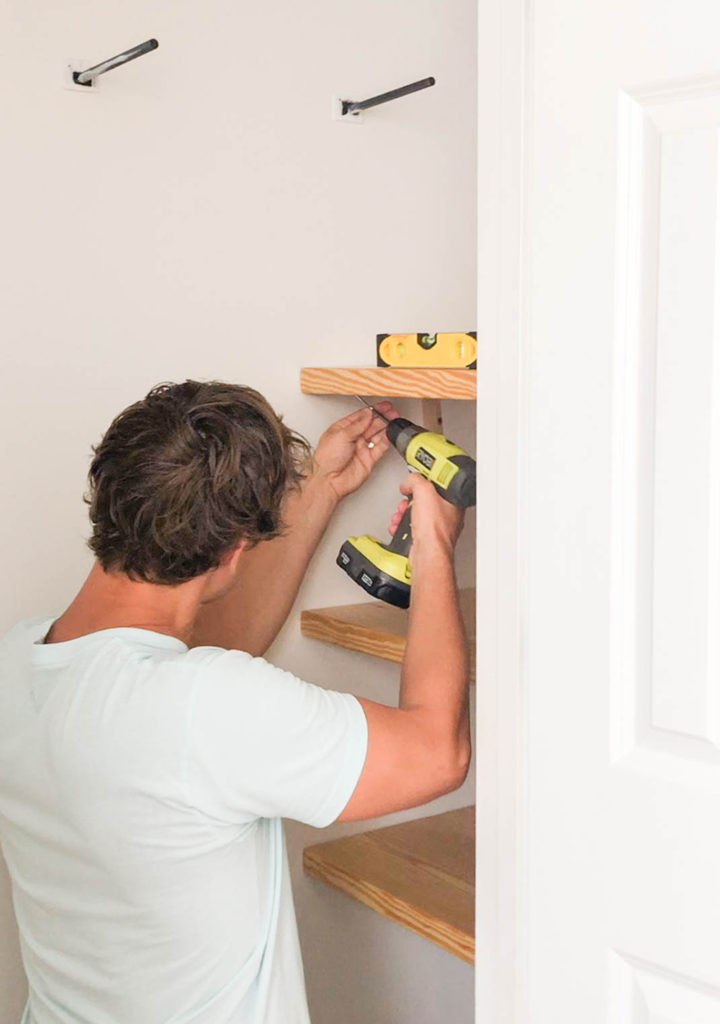
4. Sand and shape your shelves and apply your finish.
5. Lastly, use the 2 ½ in pocket hole screws to secure your shelves into the wall studs. Use a level to ensure that each shelf is as flat as possible as you install. If possible, have another person hold the shelf in place as you secure the shelf into the wall. If no one else is available to hold the shelves during install, insert wood shims between the shelf and wall to hold it in position as you insert the screws. If the studs are not in proper locations to secure all corners or sides to the wall, corner braces with wall anchors may be used instead.
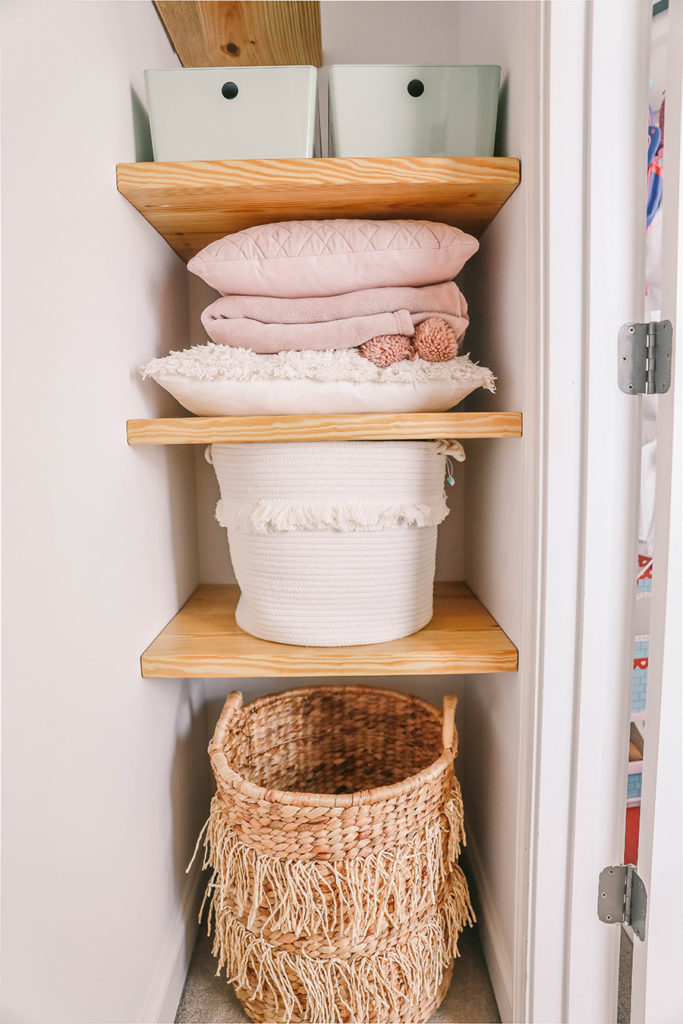
Now you’ve got yourself a durable long lasting set of shelves! Please let me know if you have any questions in the comments below, and I would be happy to answer!
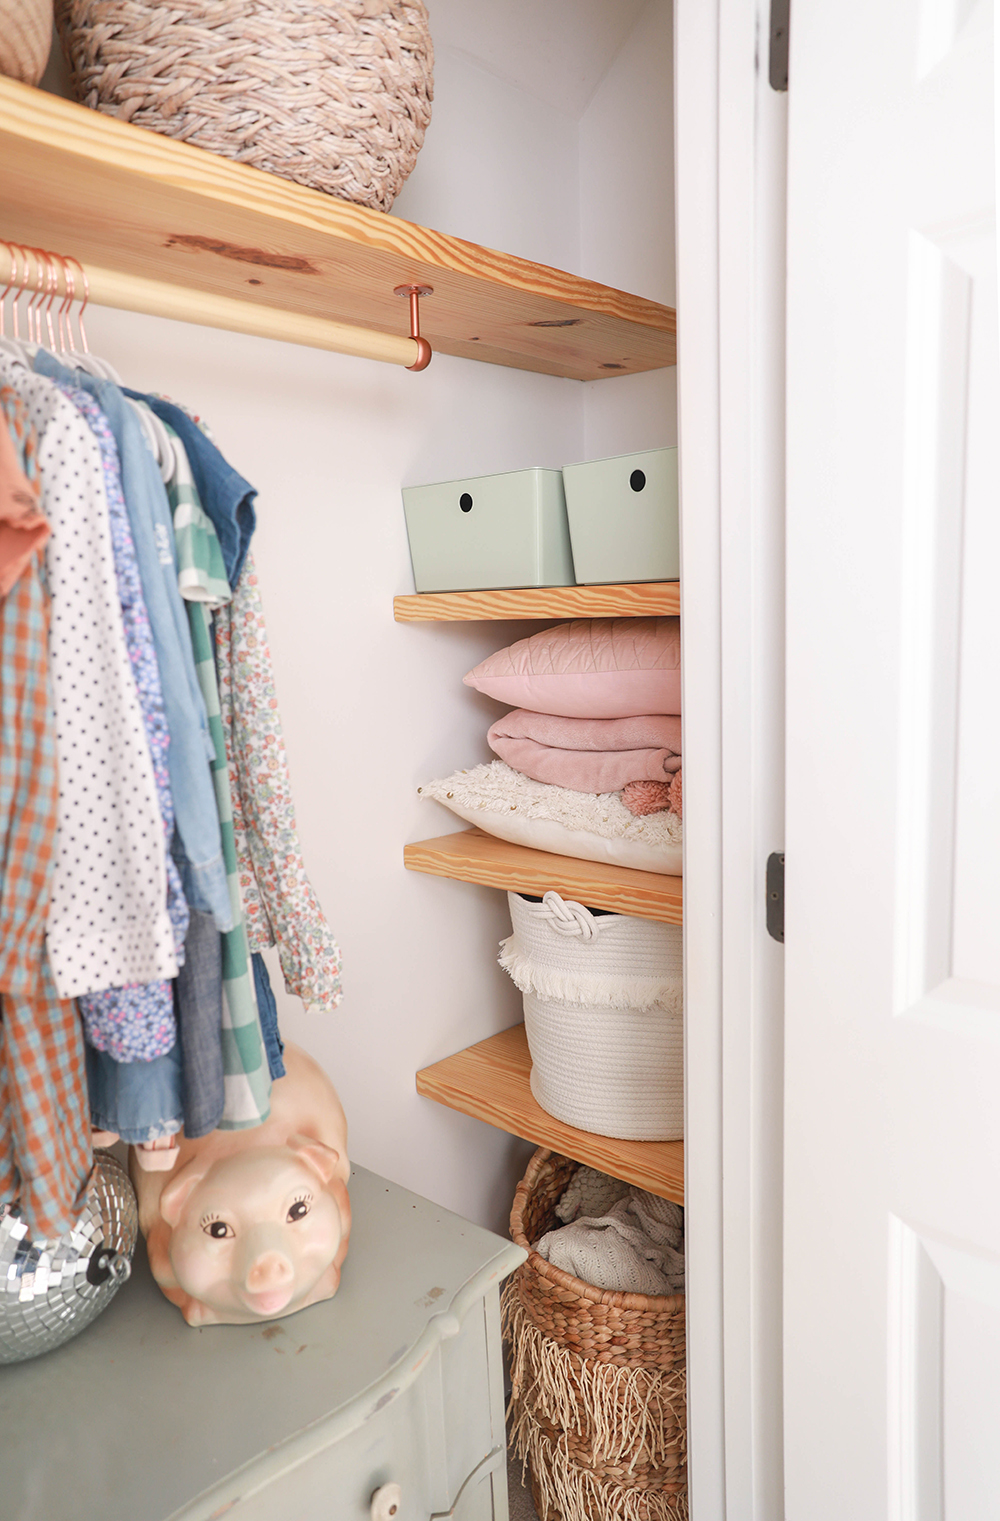
In case you missed, this full closet makeover post is here.


