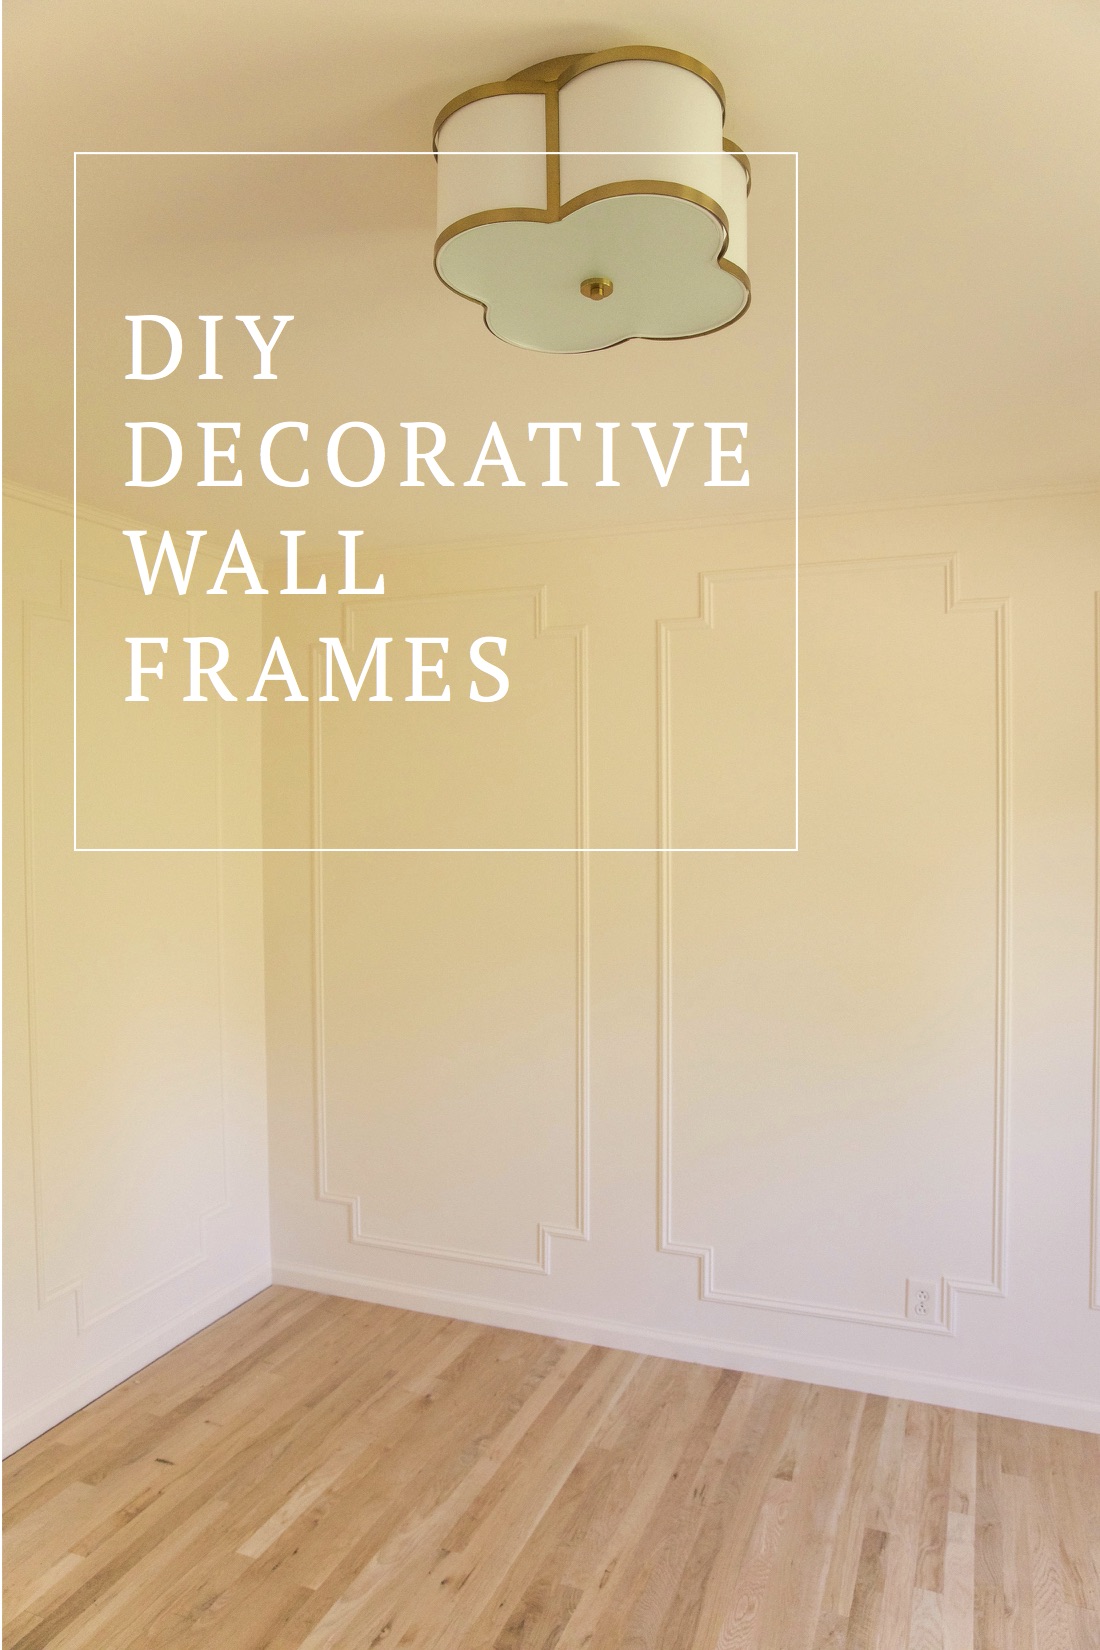
You may remember when we made wall panels for our bedroom in the old house? It was a great solution for un-level walls. However, we wanted to use an even simpler method this time around for Chiara’s room design. I am breaking it down into steps I did to make and install these frames so you can give it a try in your own spaces!
Materials
Finishing Nails
Wood Glue Painter’s Putty or wood filler to fill nail holes. (I used JB Weld KwikWood for the first time and love it.)
Moulding Caulk
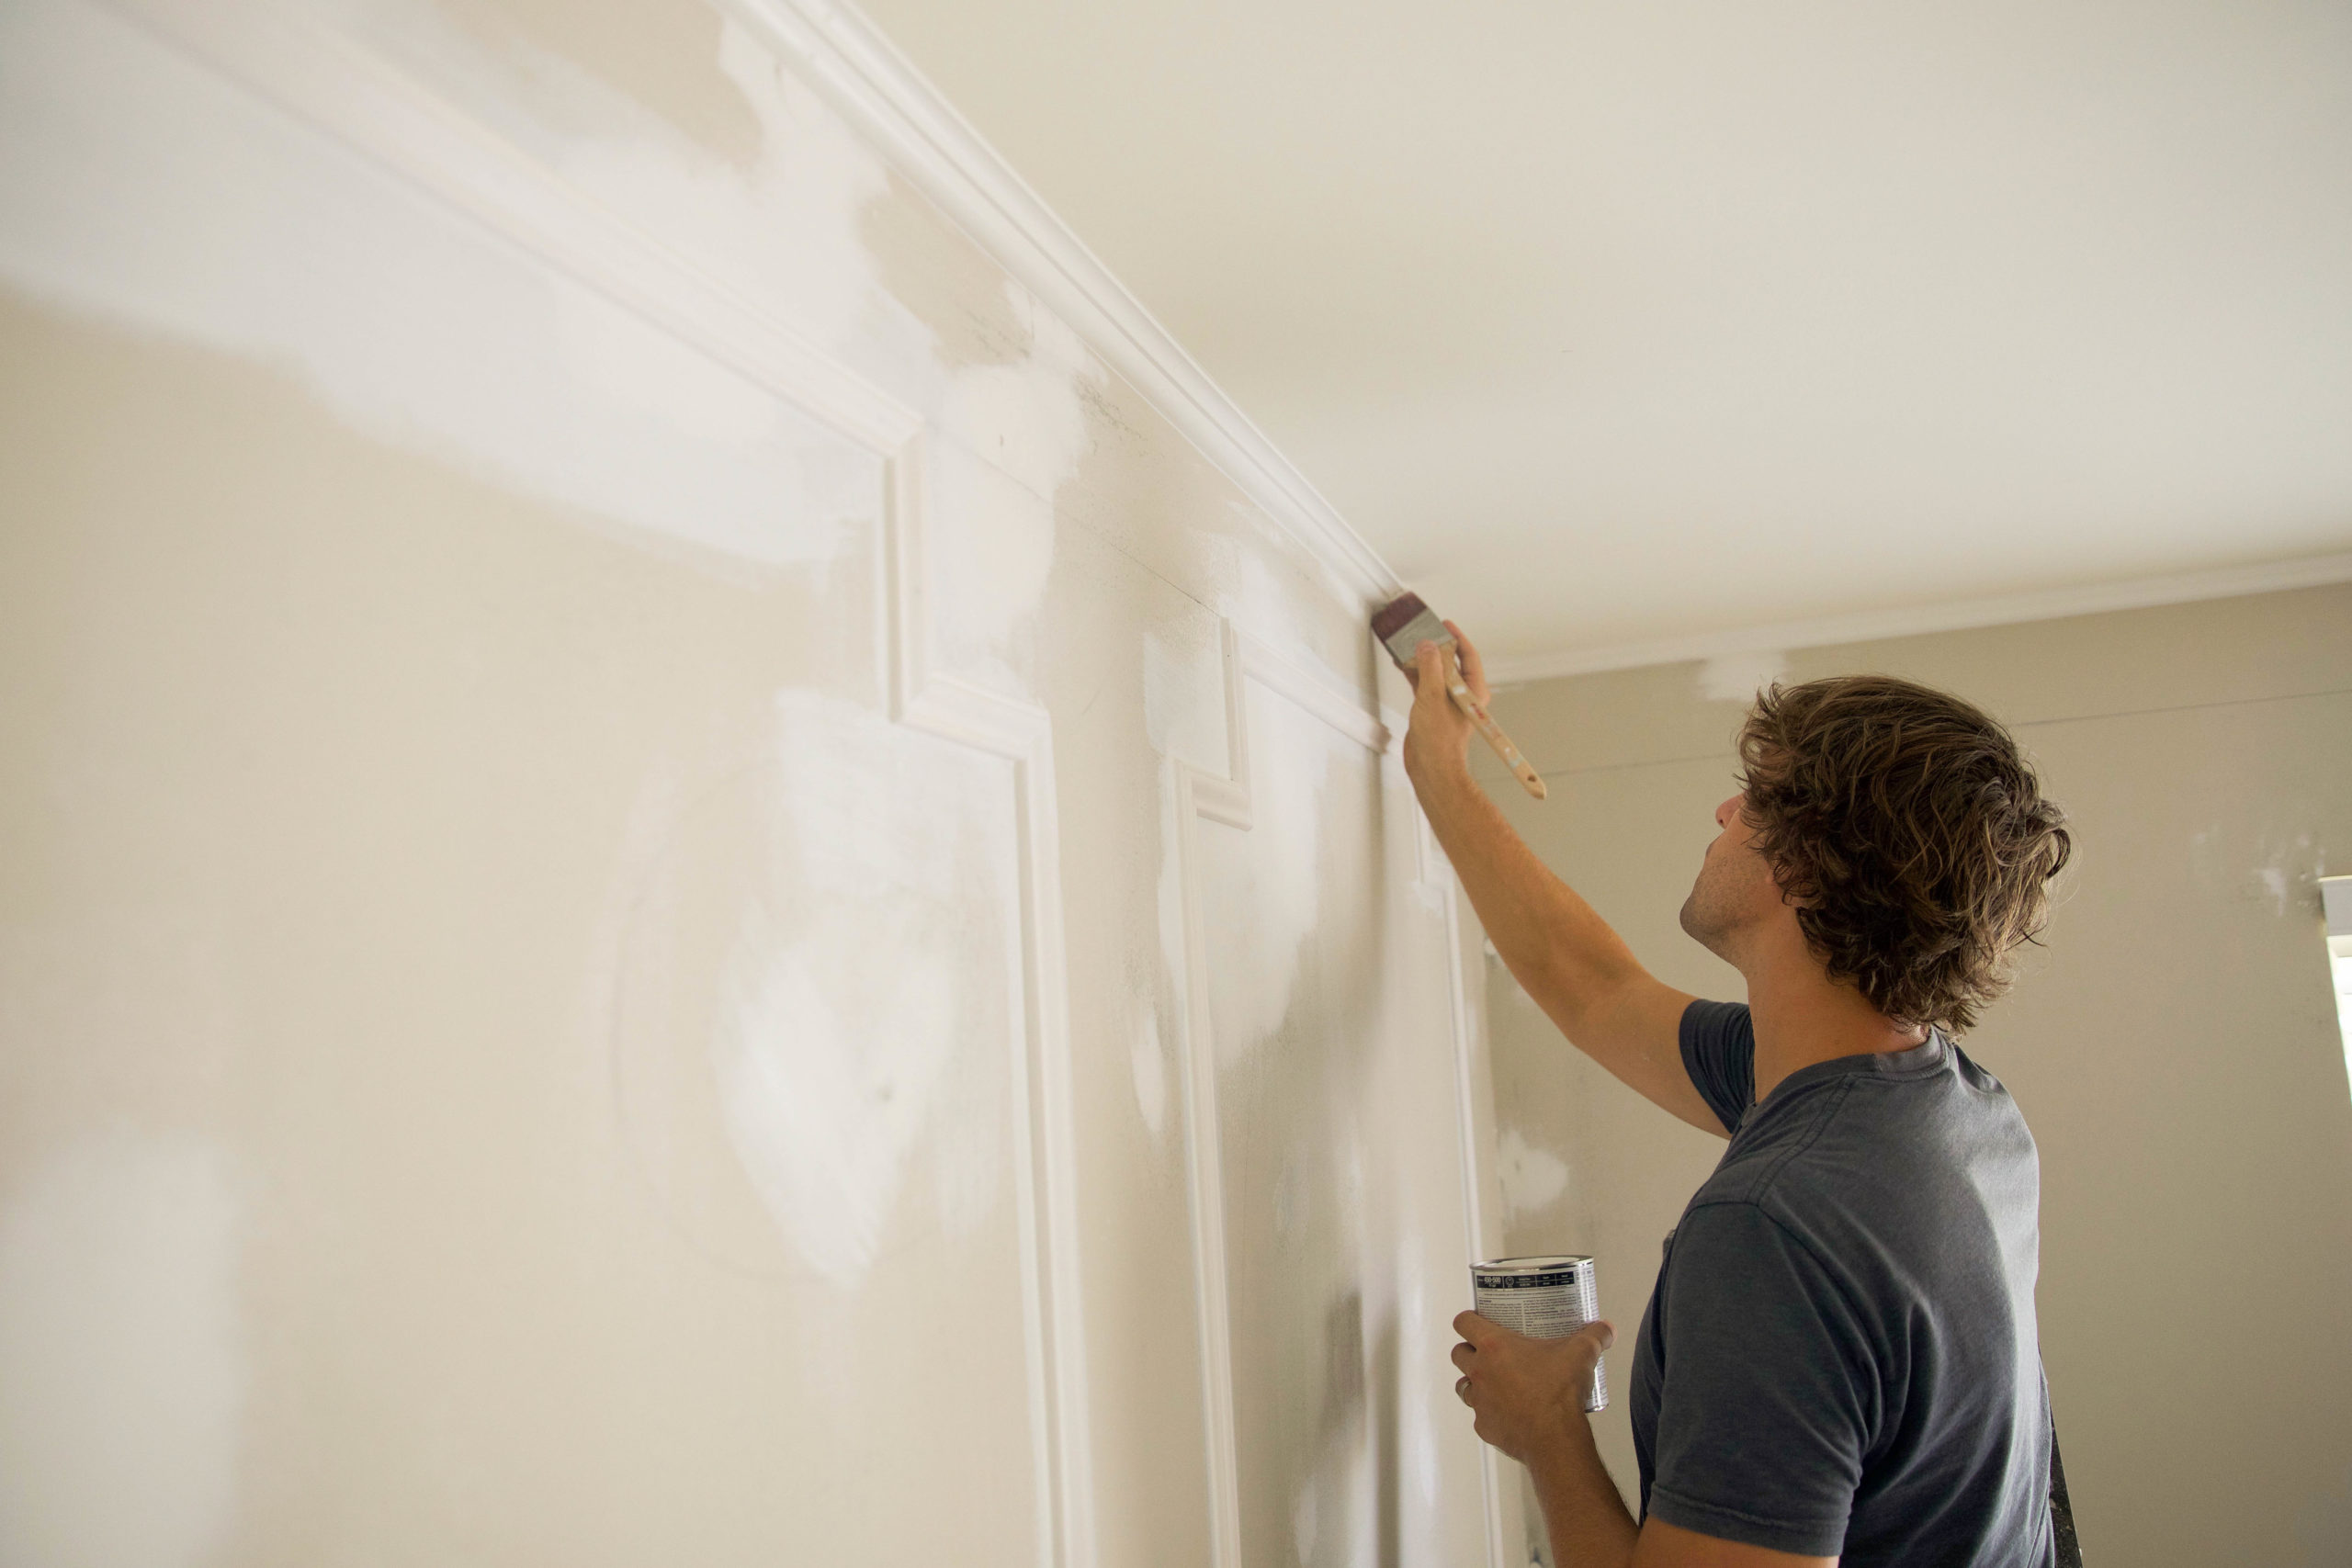
Primer paint
Flat back moulding of your choice – This is what we used.
Tools
Miter saw (On super sale right now!)
Finish Nailer or Brad Nailer (Hammer and finishing nails can work as well, but will be more work)
Brushes and Rollers for painting
Caulk Gun
Level (the longer the better)
Tape Measure
Nail set
Hammer
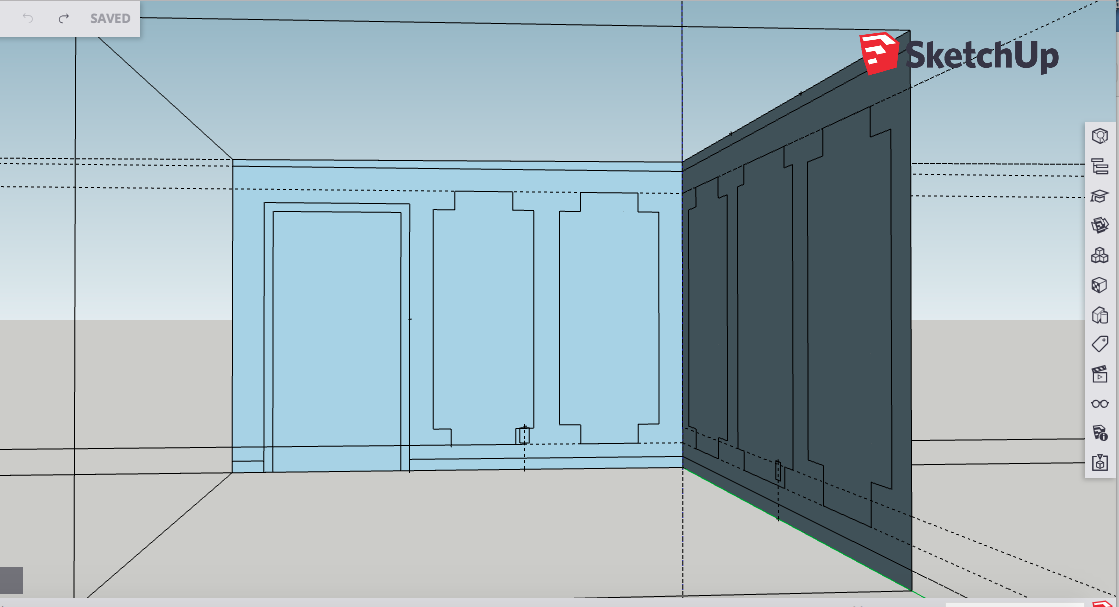
Pre- planning – The first thing I highly recommend is creating your design on a program like SketchUp. It allows you to move things around in the design ahead of time, and gives you an idea of what size and spacing will work well on each wall. You also have the ability to add the precise location of possible obstructions (such as outlets or coax plates) directly to your drawing. In short it allows you to create a detailed plan that will save a lot of time and headache down the road.
(A video guide above if that is helpful for you!)
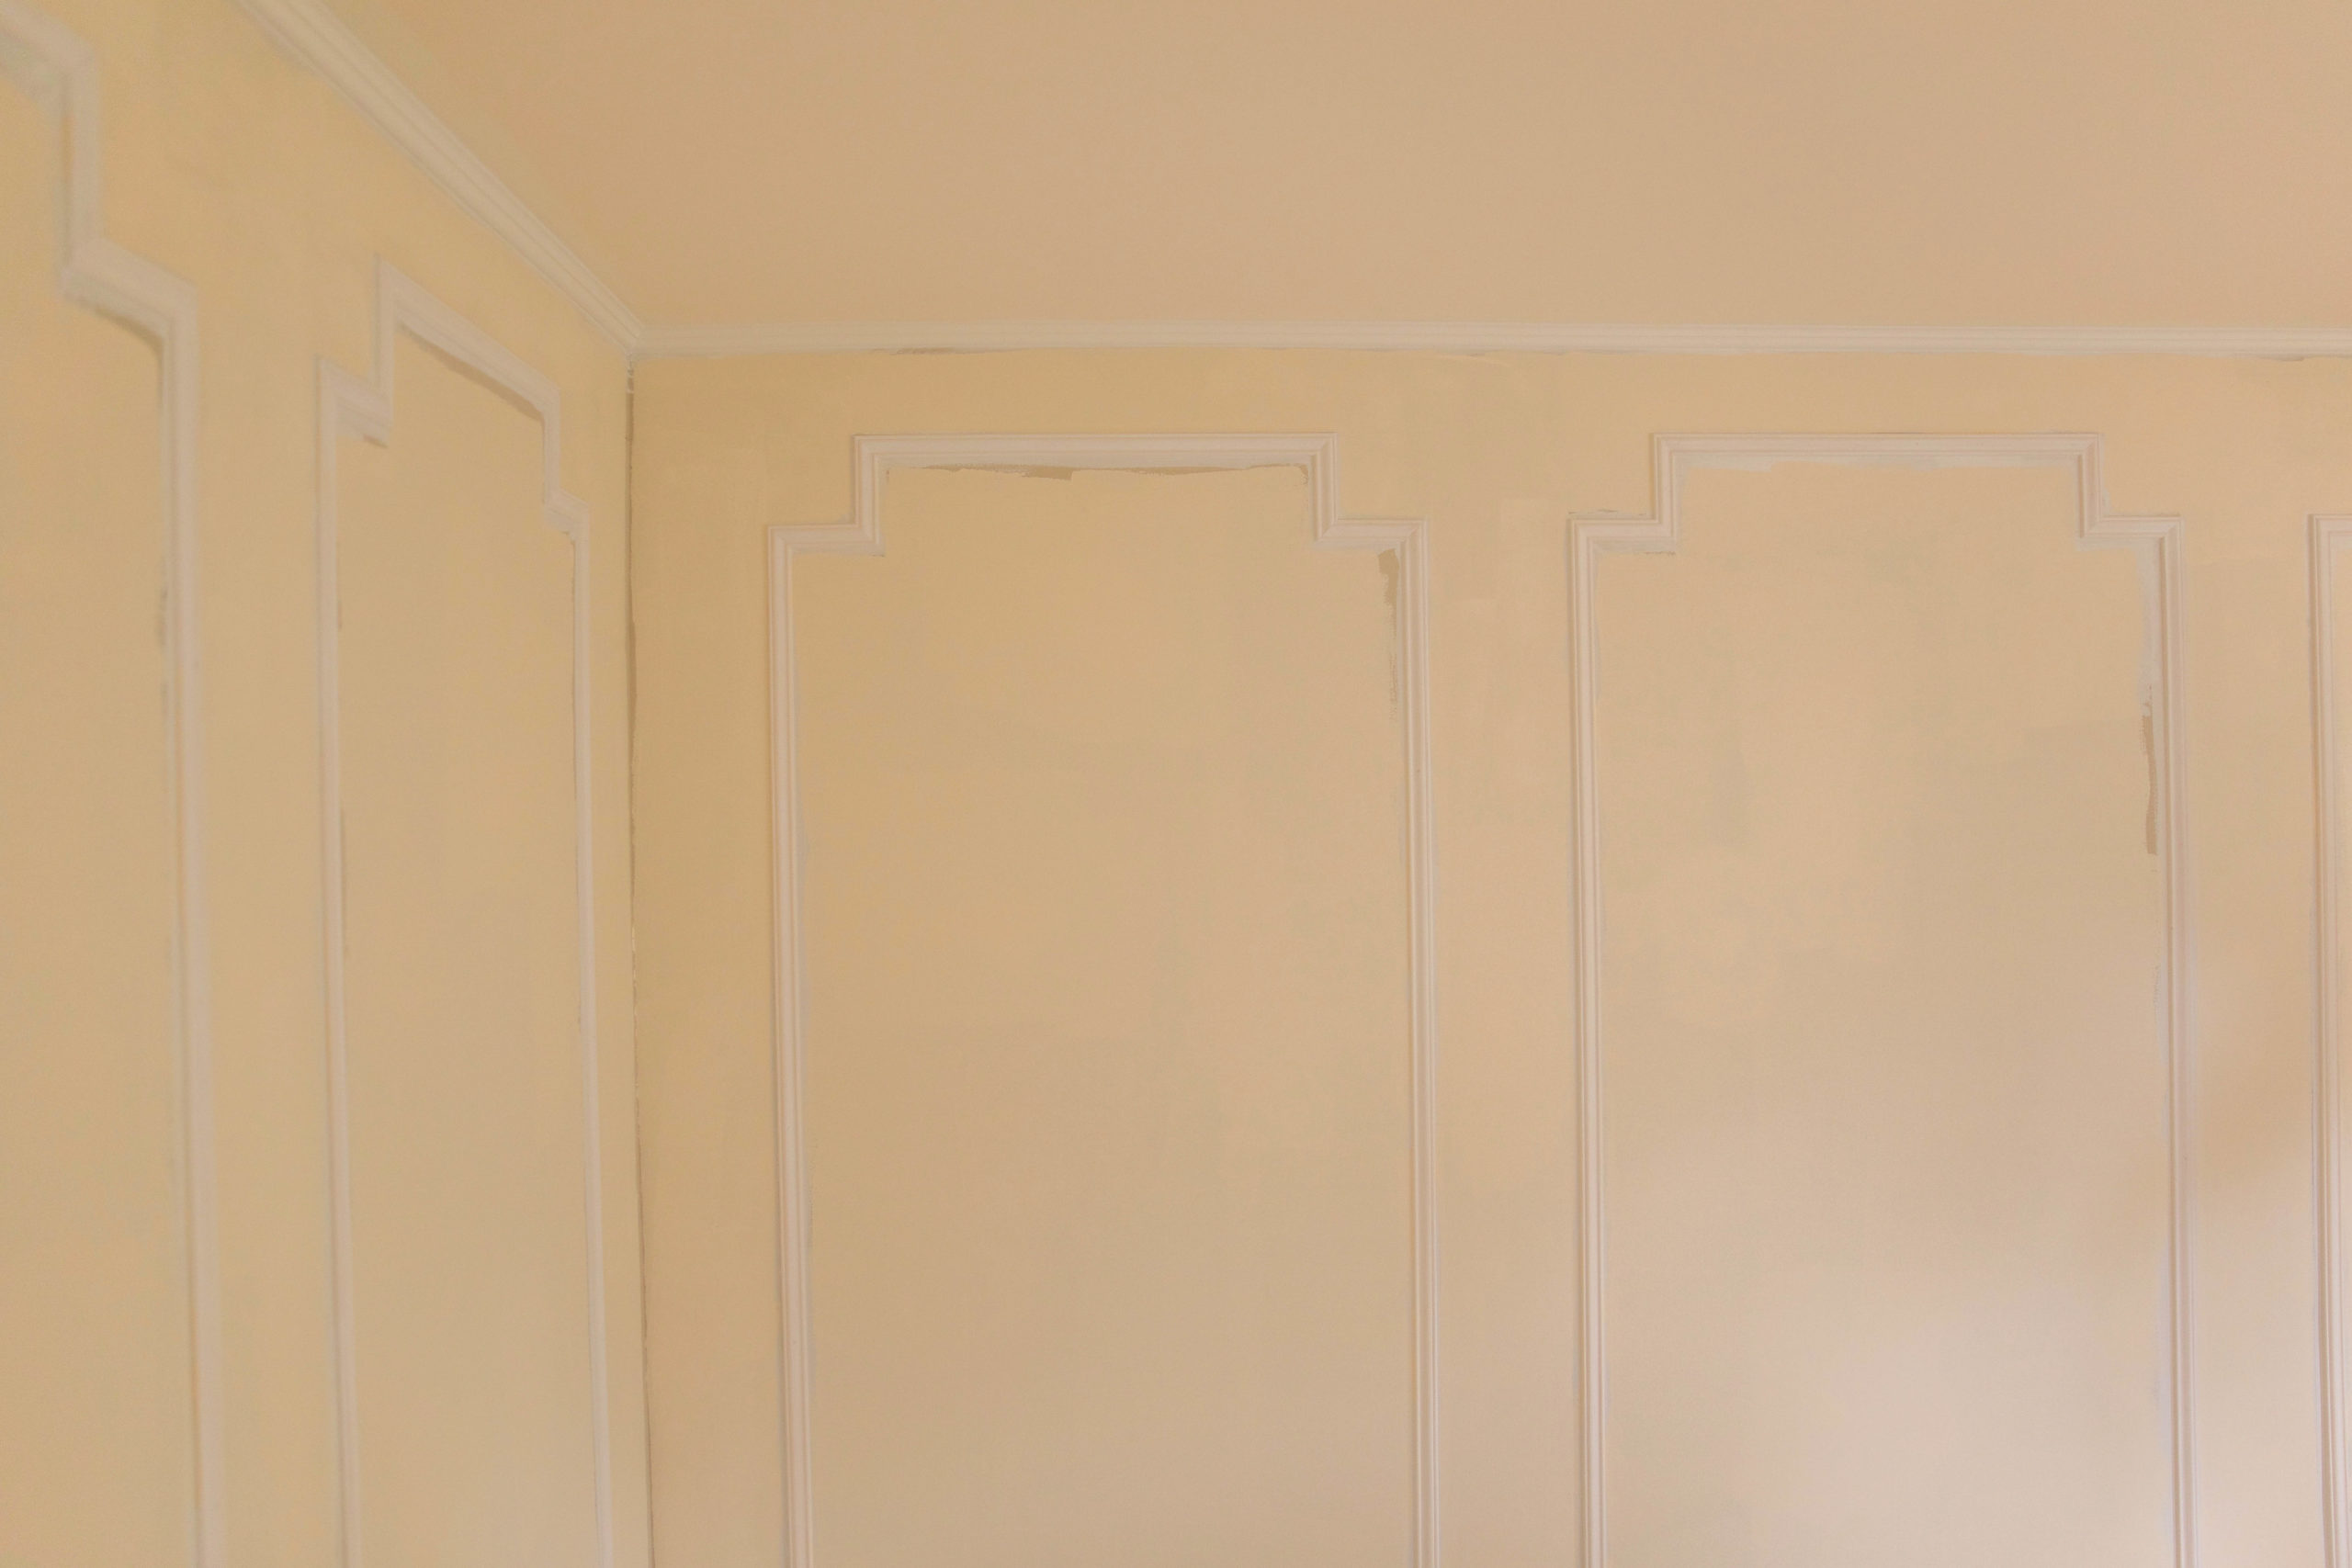
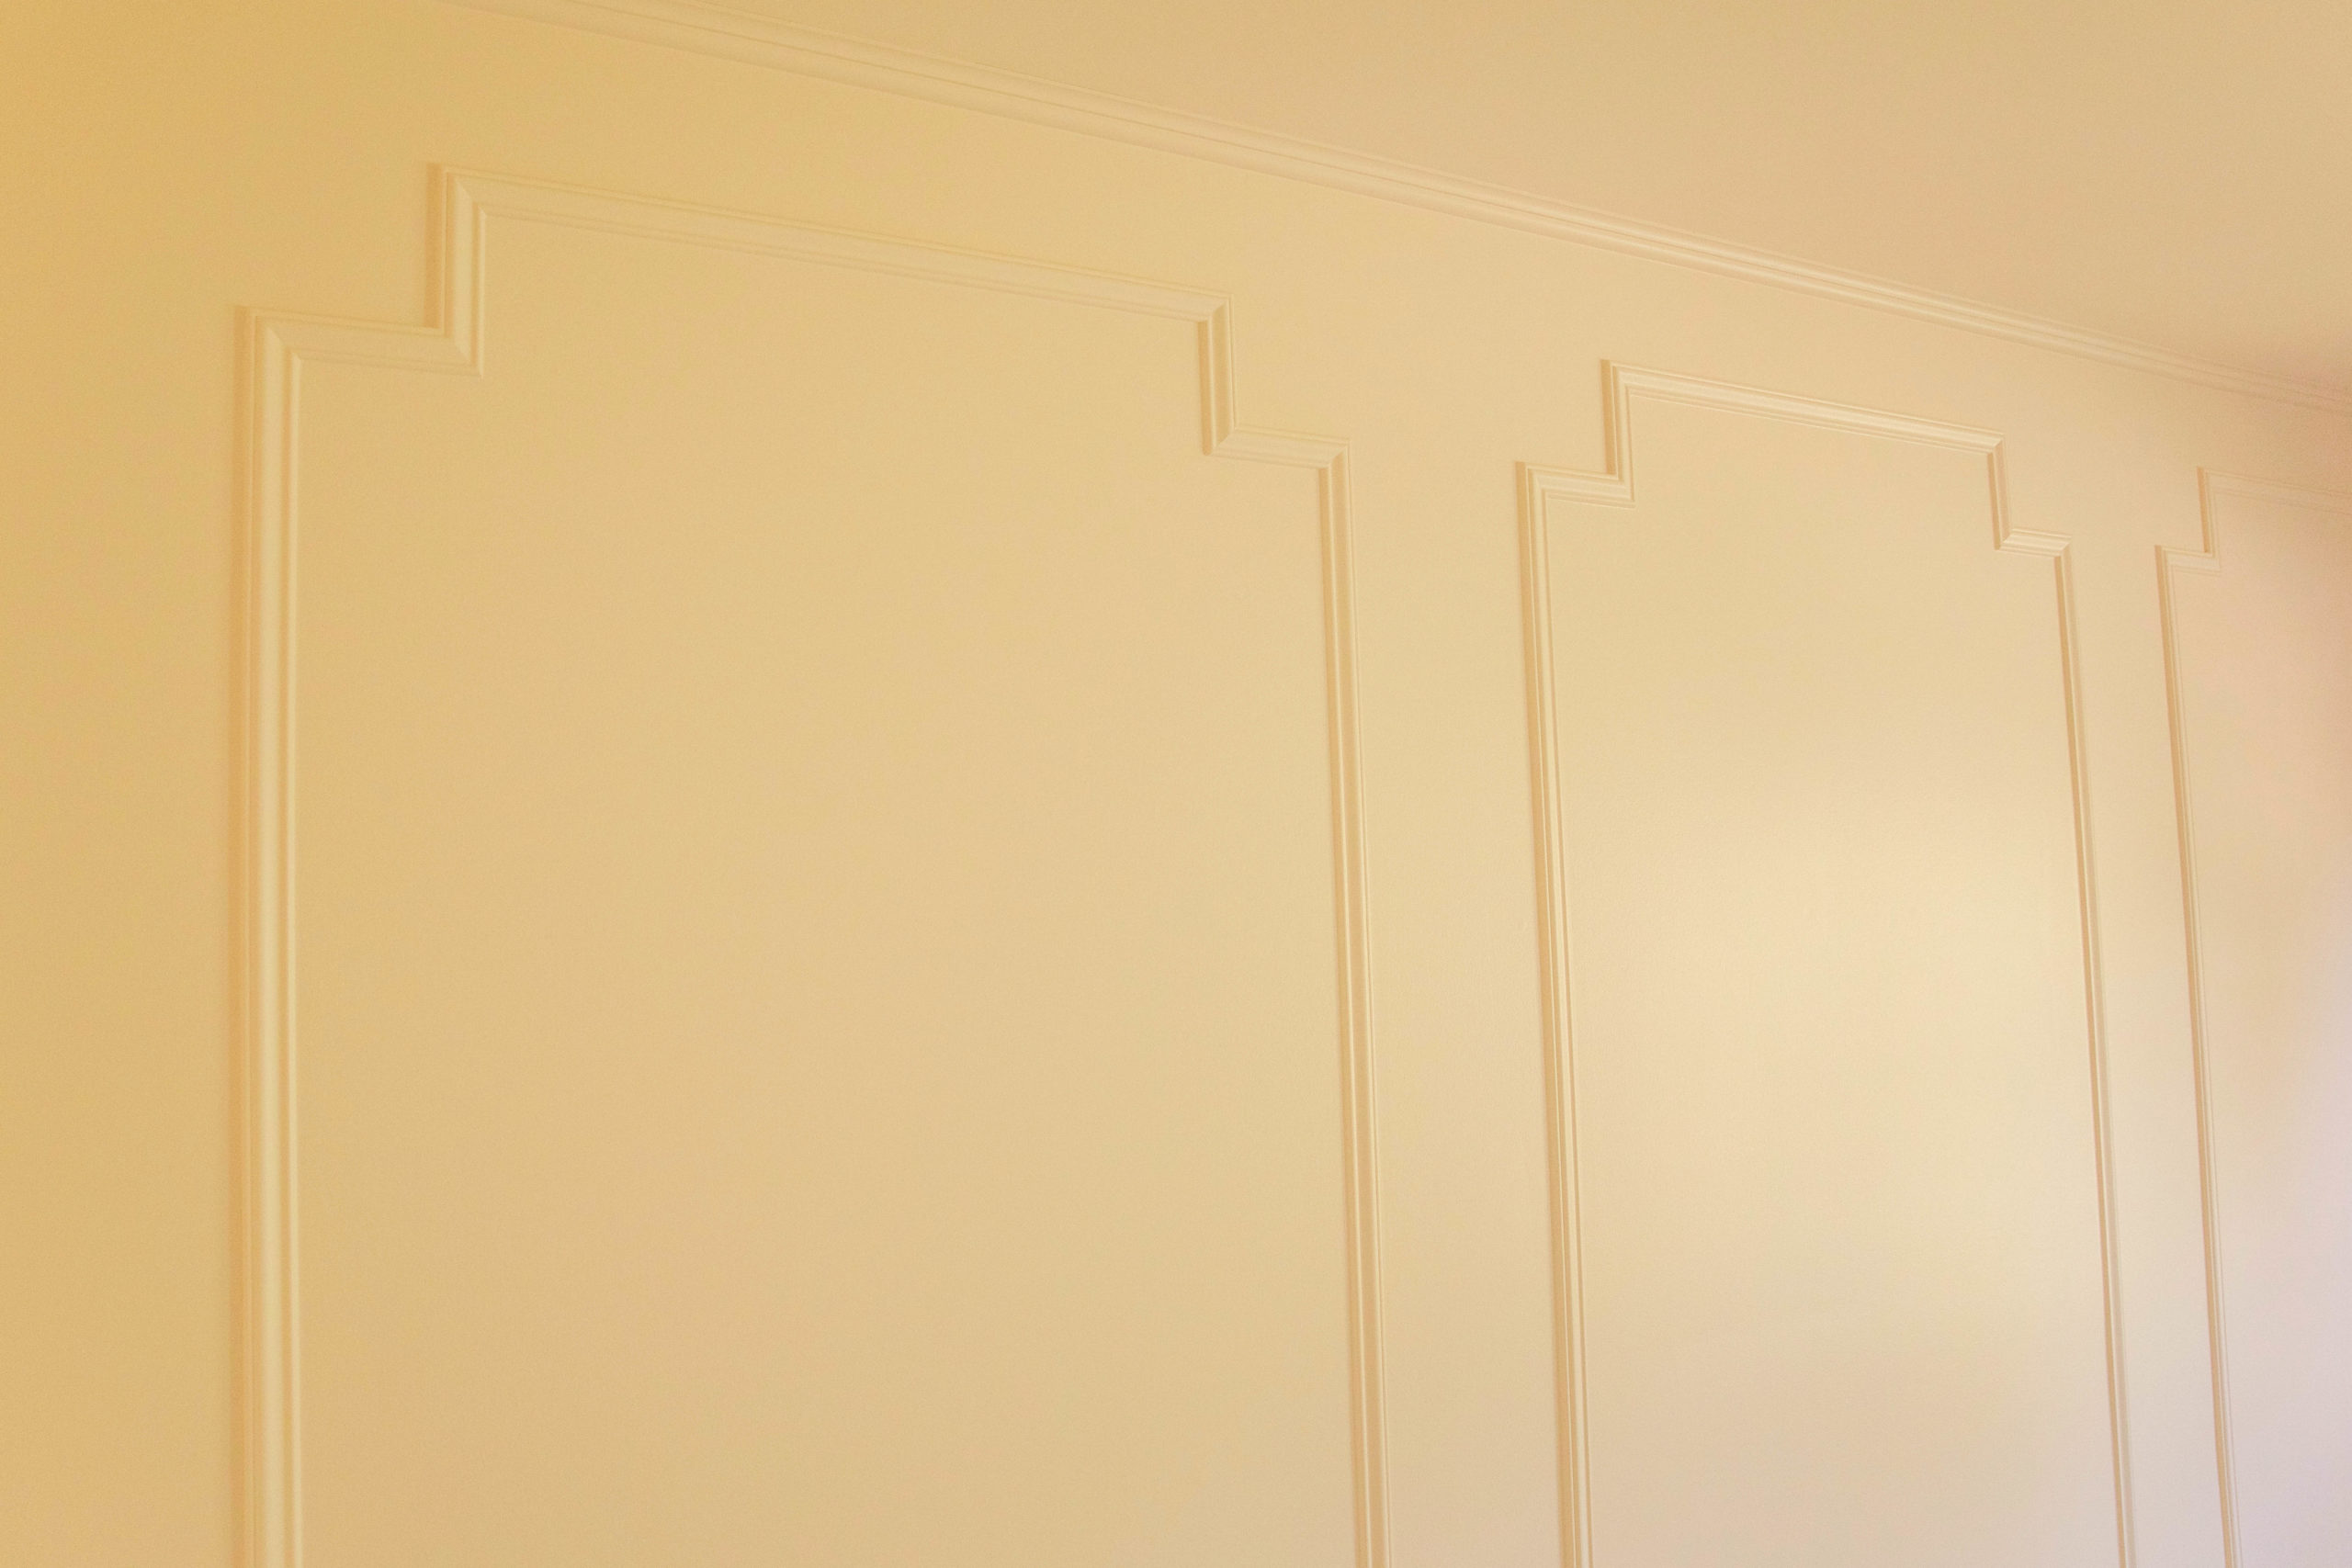
Spacing – I like to first determine how much space we want in between each frame. The space from wall corner to frame should ideally be the same as the space between the frames themselves. Once you have this decided, you can determine the distance from ceiling (or crown molding/bed molding) to the top of the frame. After these measurements are set you can decide the width of each frame. In this particular case, we used 8 in. between each frame, roughly 8 in. from the top of the frame to the bottom of our bed molding, and roughly 4.5 in. from the top of the baseboards. We also settled on 5 in. insets for each frame corner.
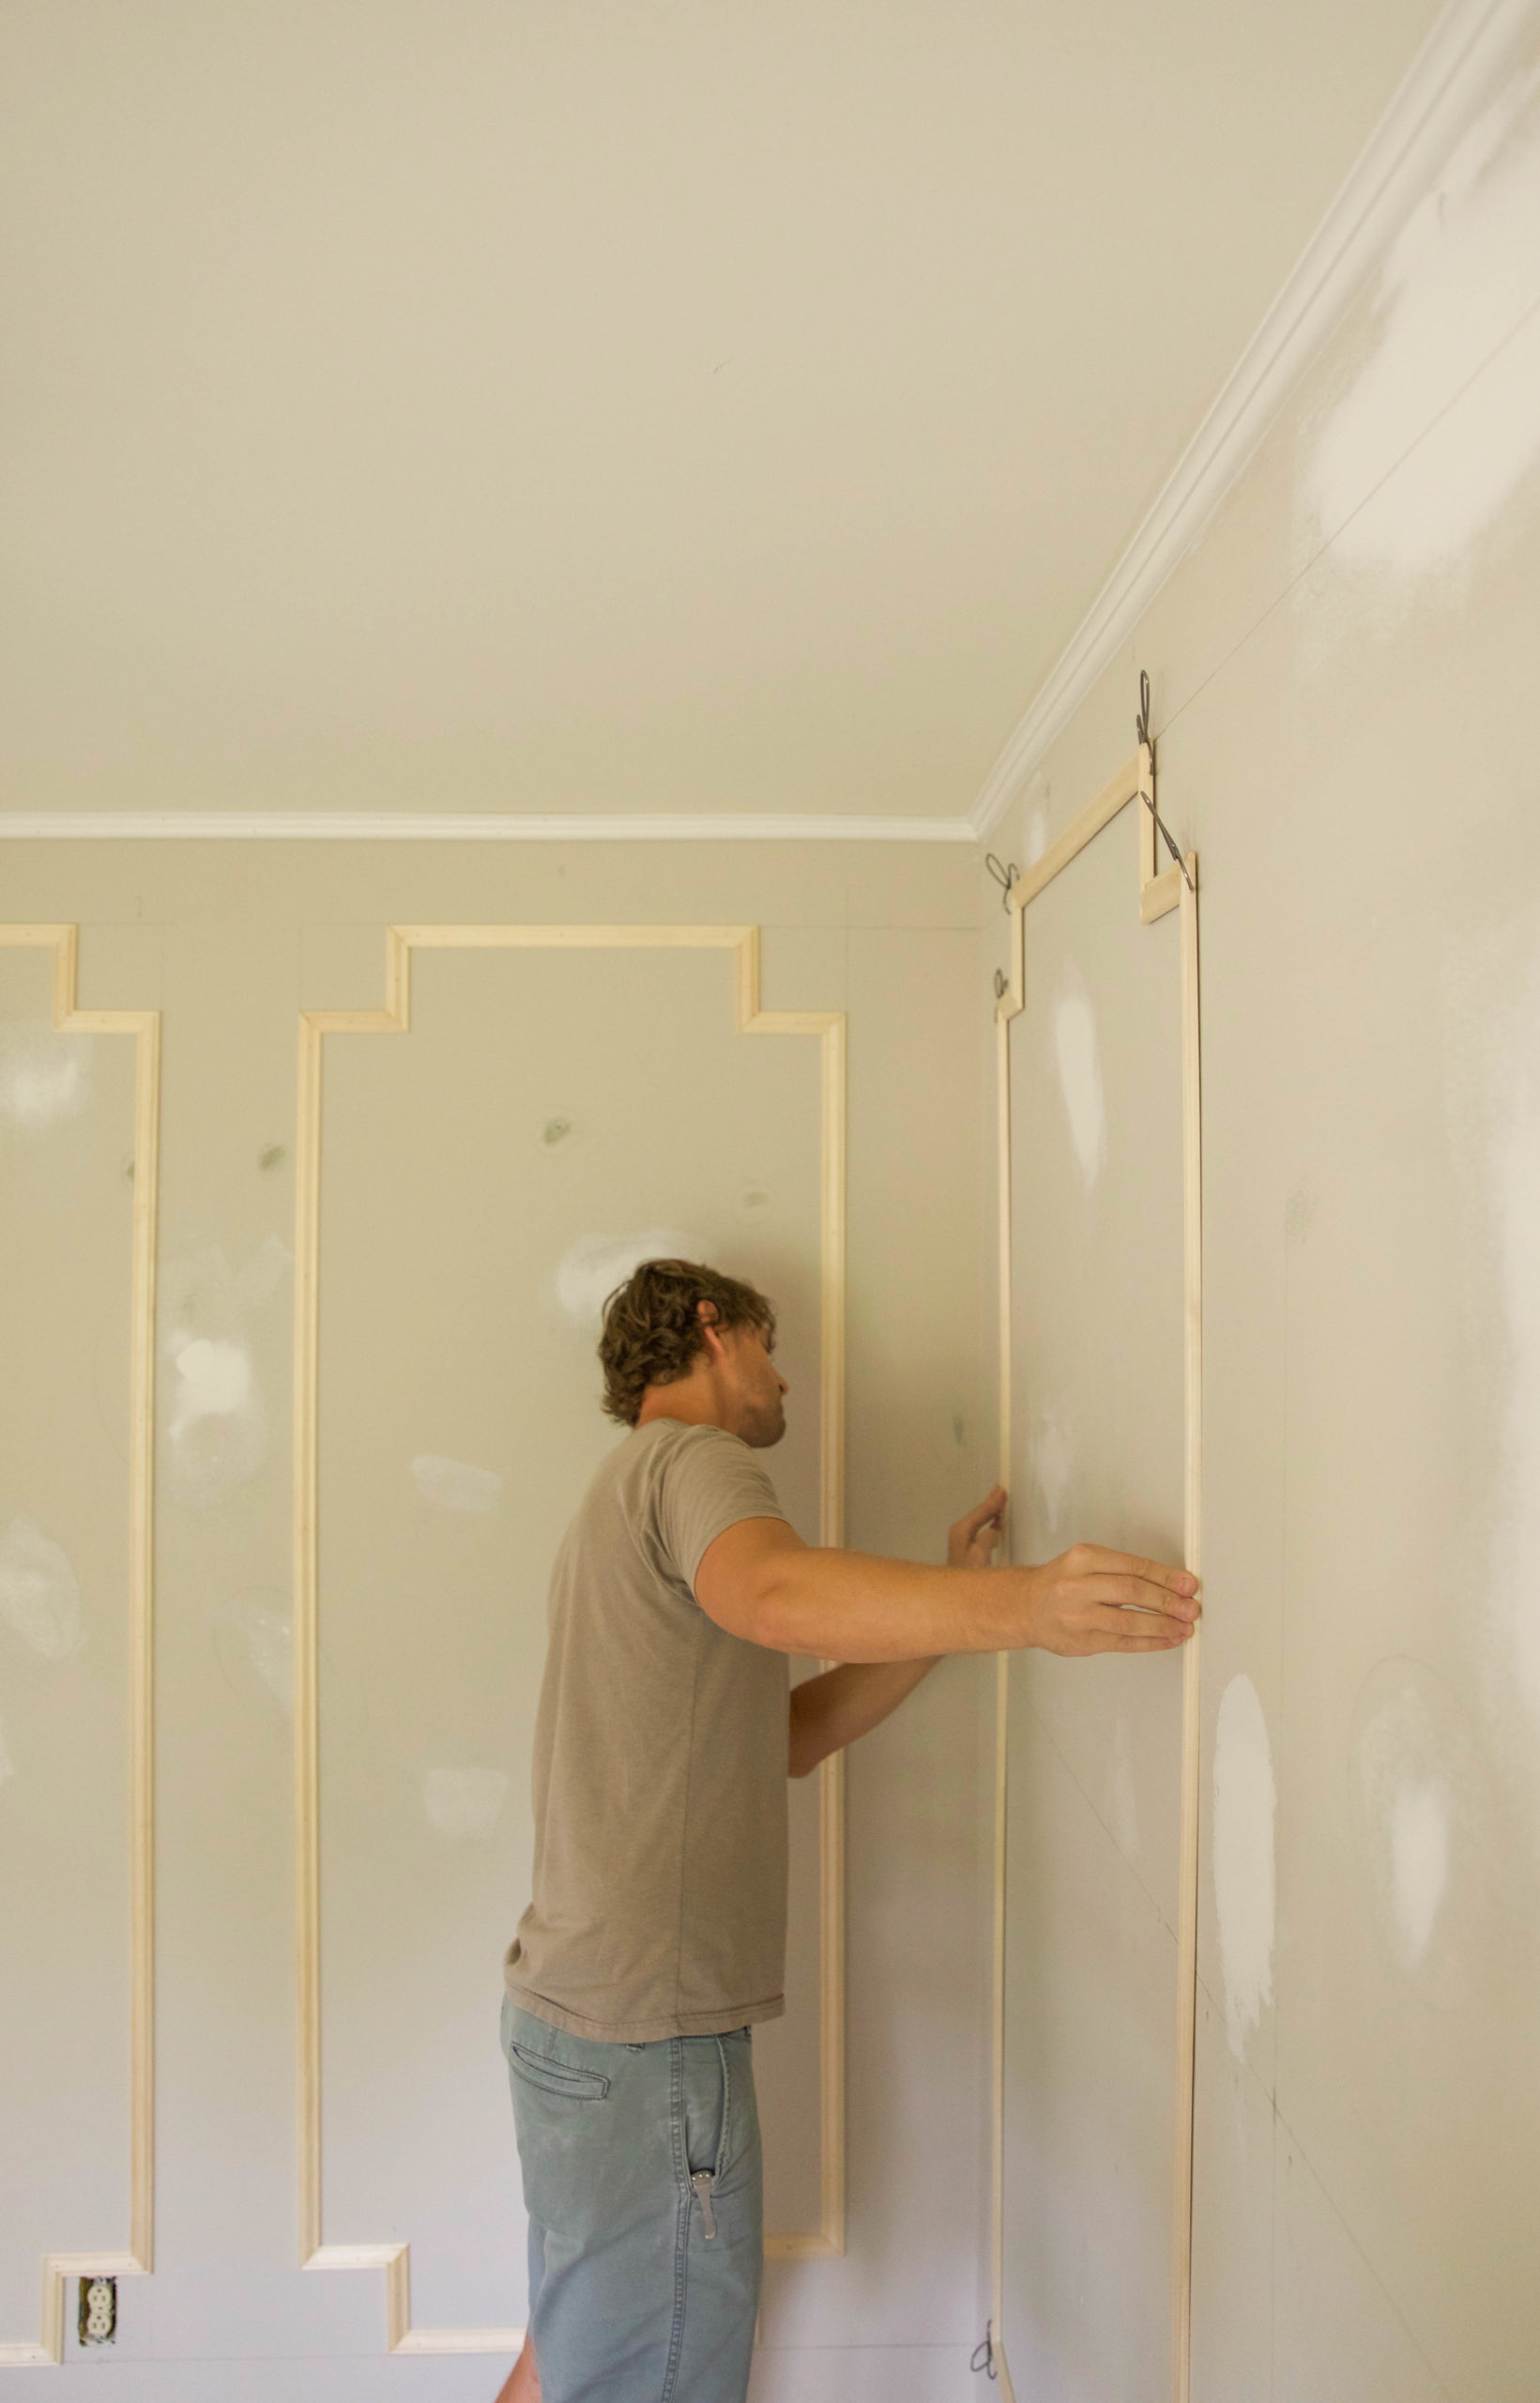
Pre-construct – The second thing I would highly recommend is to pre-construct the moulding frame before installing it on the wall. Doing so helps to create tighter joints, saves on caulking time, and, depending on the condition of your walls, can reduce the possible need for shimming the frame.
Step 1) Prep your walls. Fix in any holes, cracks, and uneven areas of your wall with quality spackle or drywall mud. Painters putty is also a quick way to fill in small nail holes. Prime where necessary. You can also pre-paint the wall at this point if you wish.
Step 2) Using your straight edge and level, mark out and draw the locations of each wall frame. Be sure to place the location of the top of each frame based upon a straight level line and not based upon how far the top is from the ceiling. (Walls and ceilings are rarely properly plumb and level. ) For example, if you measure 8 in. from ceiling down the length of the wall your line will only be level if your ceiling is level. If your ceiling and line are not level yet it is used to place your wall frames, there is a good chance your frames will be uneven or slanted.
To find your top level line, pick a corner and measure the distance between the top of the frame and ceiling. Mark that location. Then use your level to draw a straight level line around the room using your mark as your starting and ending point. This will give you a level line that will ensure level frame placement. Have I lost you yet? Hope not.
Step 3) Pre-constructing your frames.
- Cut your pieces for one wall at a time and double check your measurements. The more precise and consistent your cuts are the better your finished product will look.
- Use miter clamps and wood glue to put each frame together.
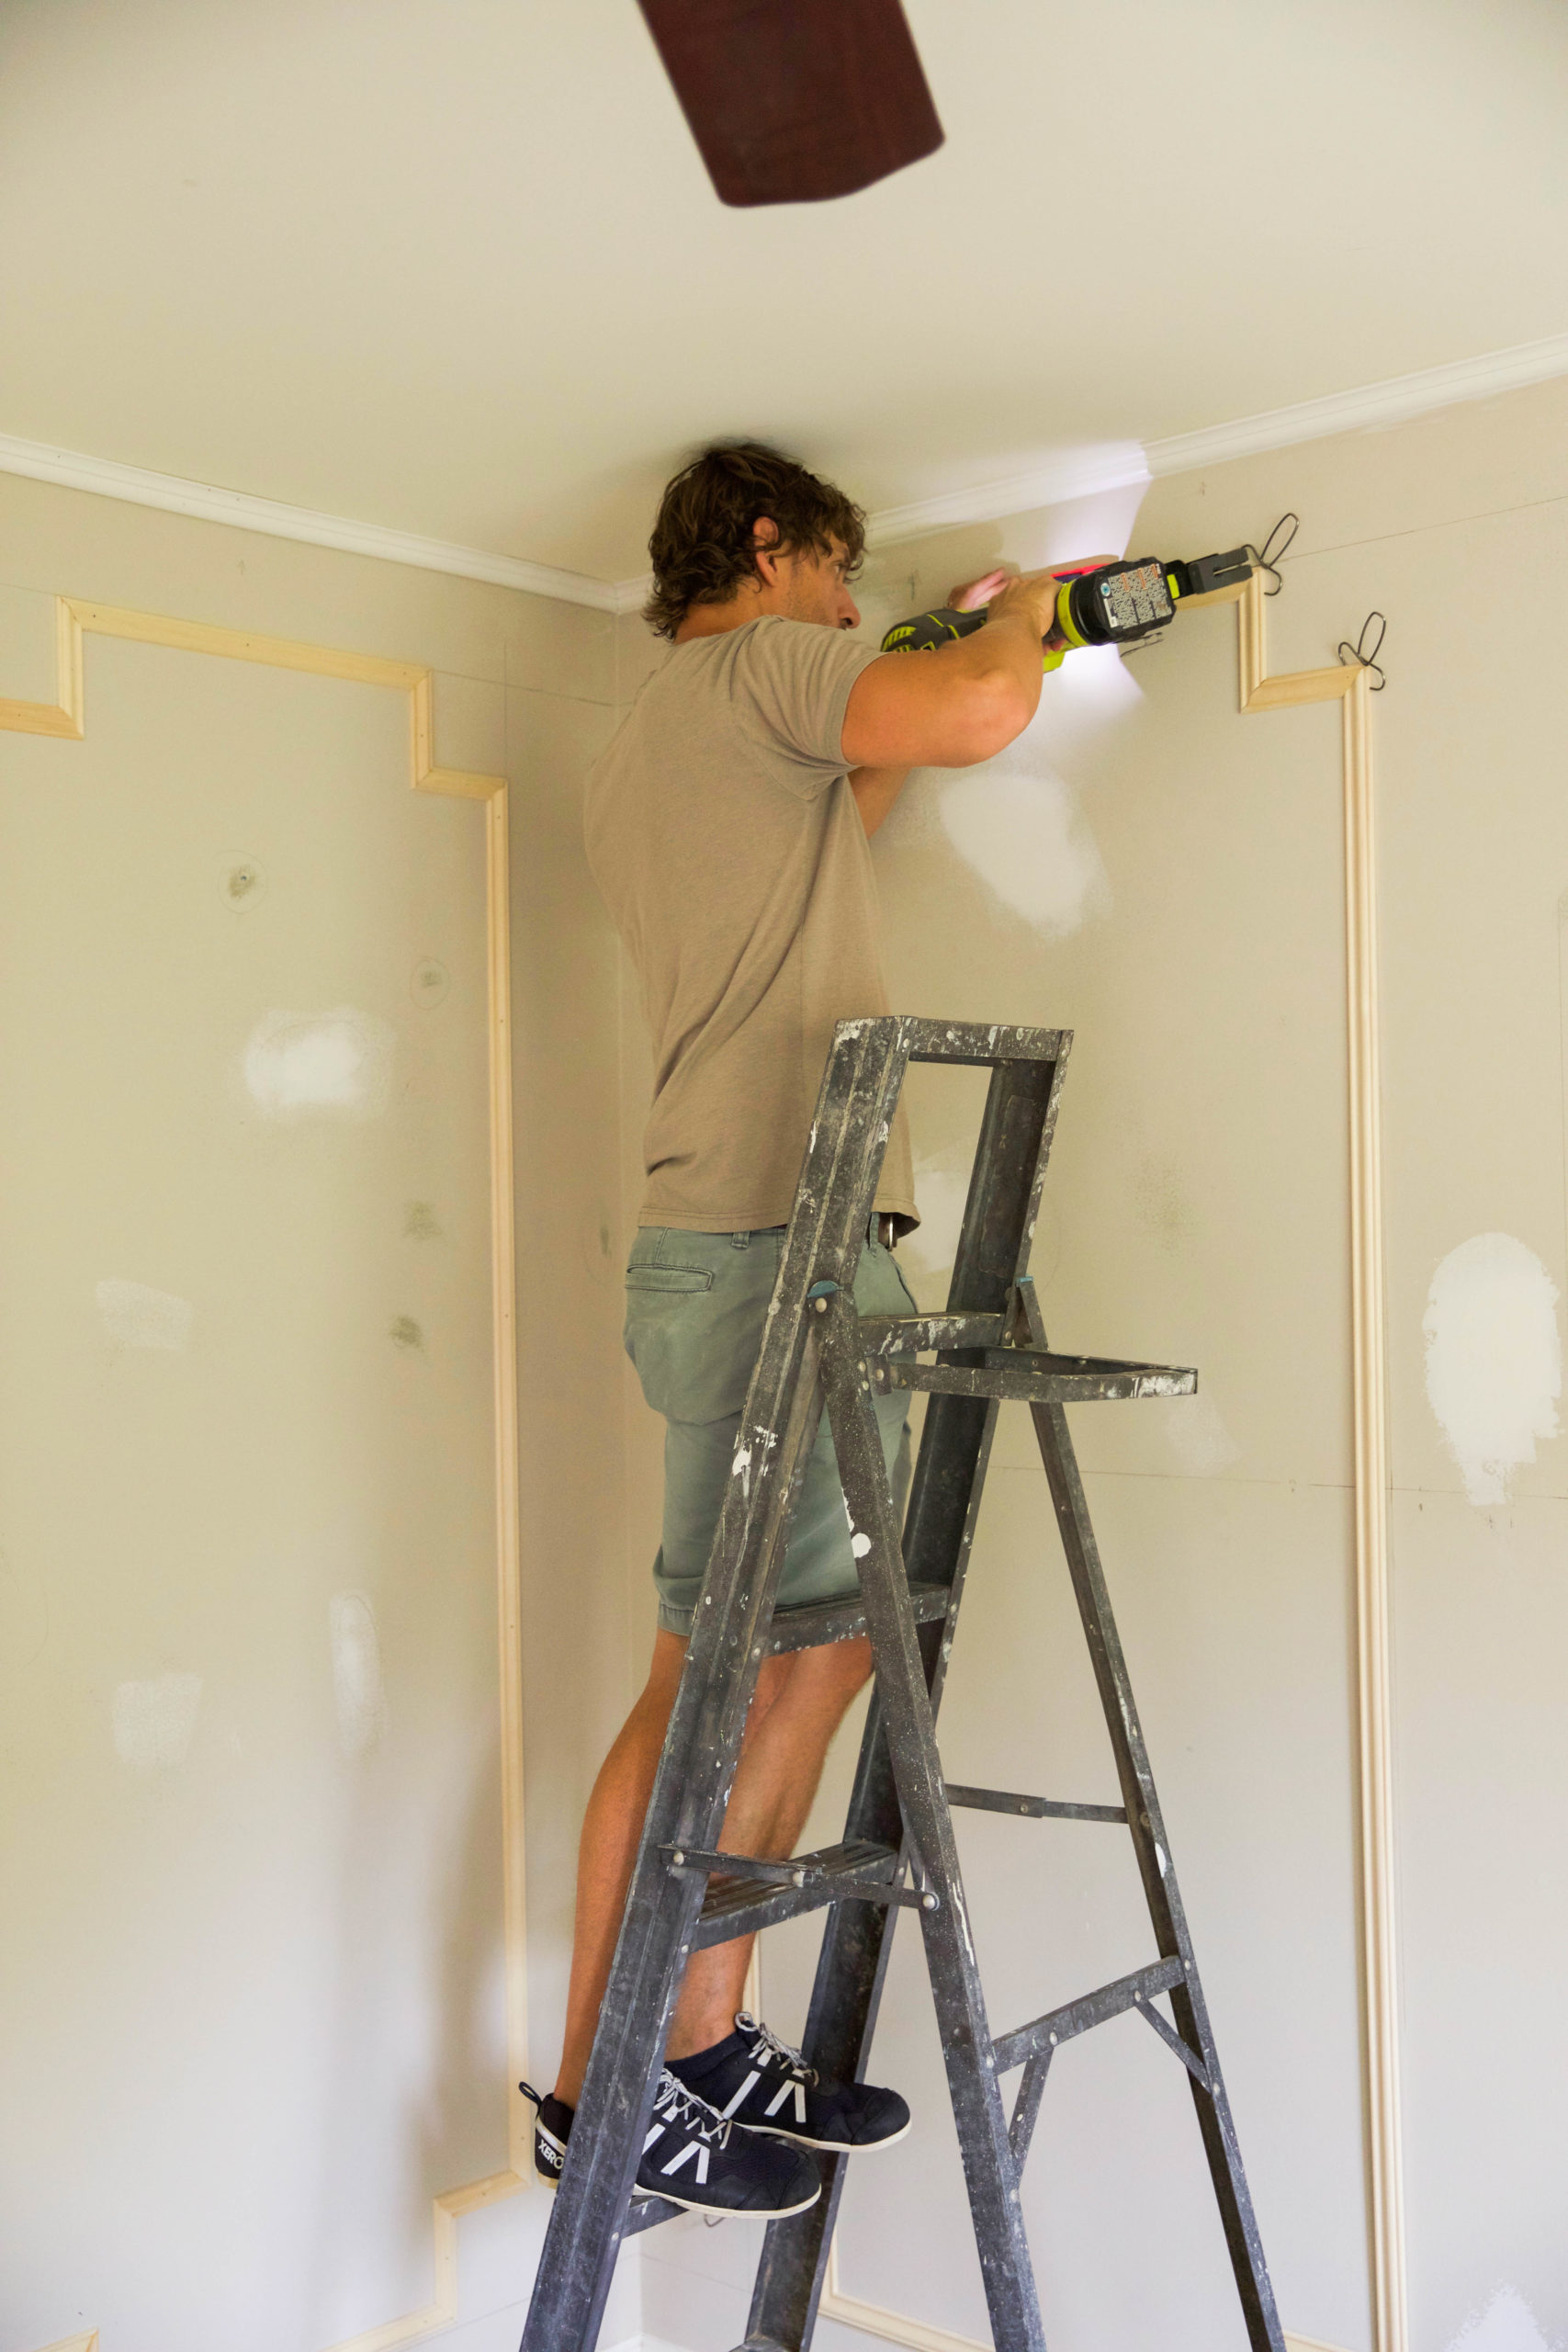
Step 4) Once dry and solid use a finish nailer or brad nailer to install it onto your wall using the location guide lines already drawn on the walls. Insert your nails at an angle instead of straight into your wall as it will hold your moulding tighter and more securely to the face of the wall.
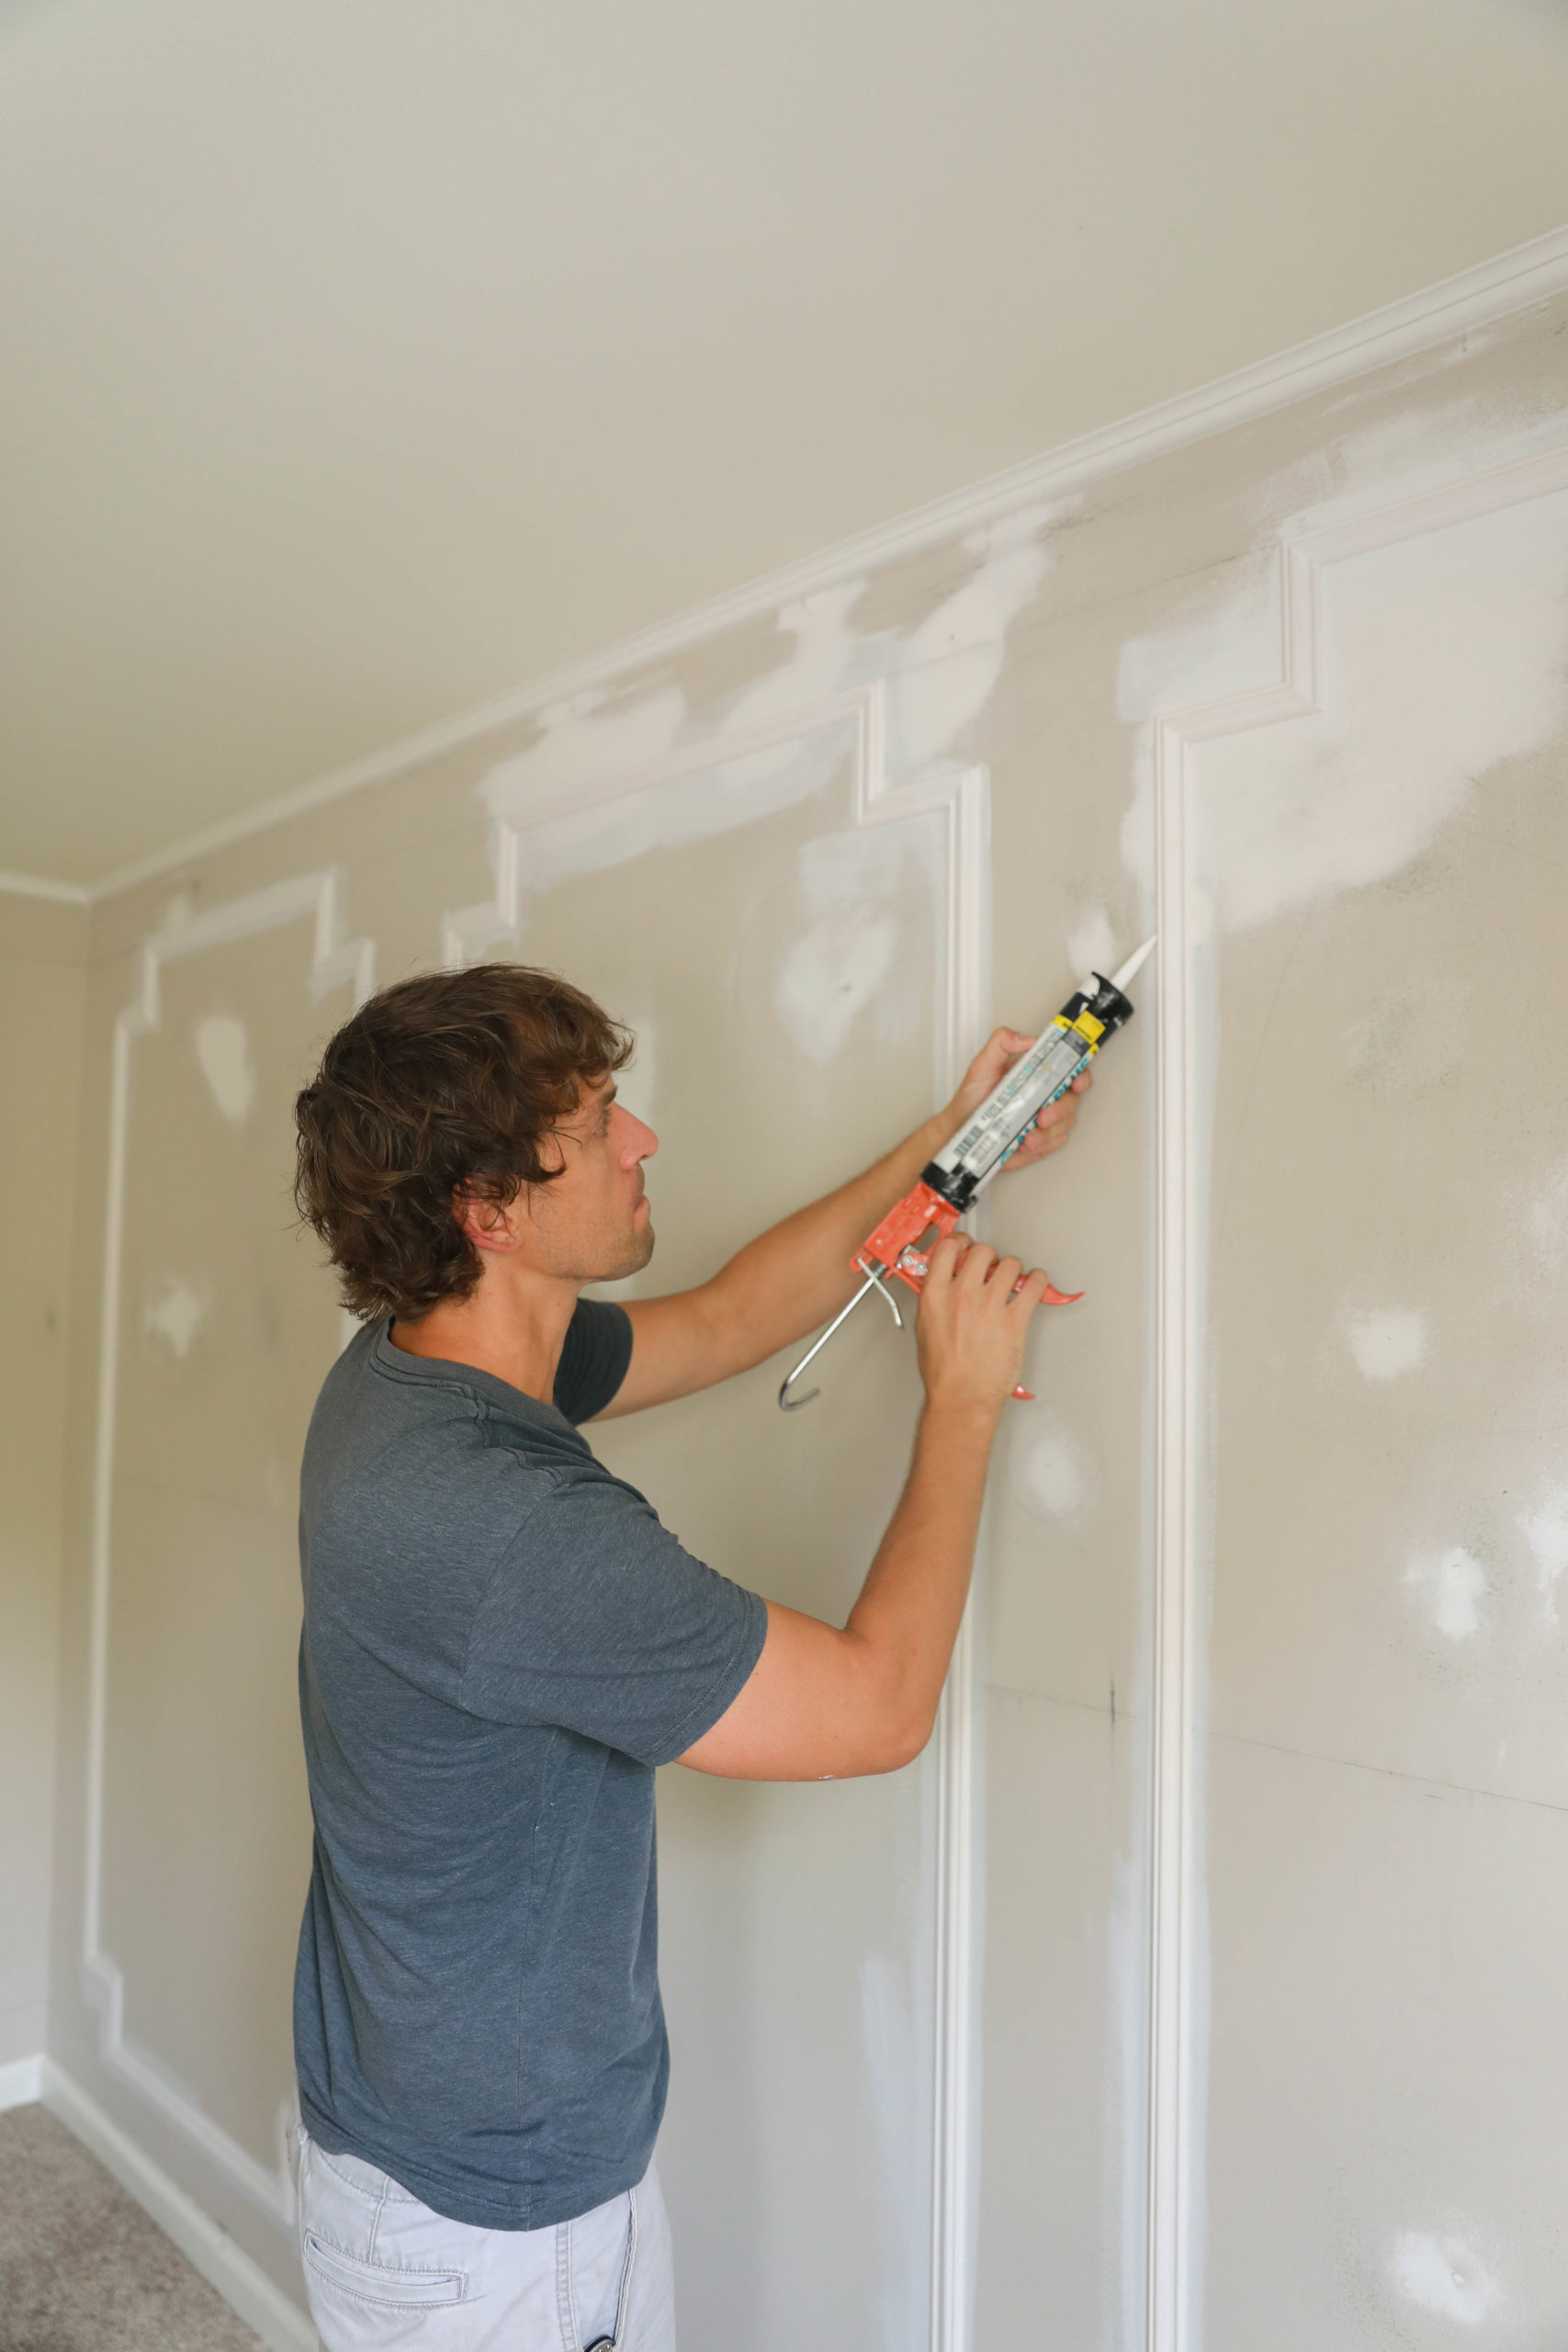
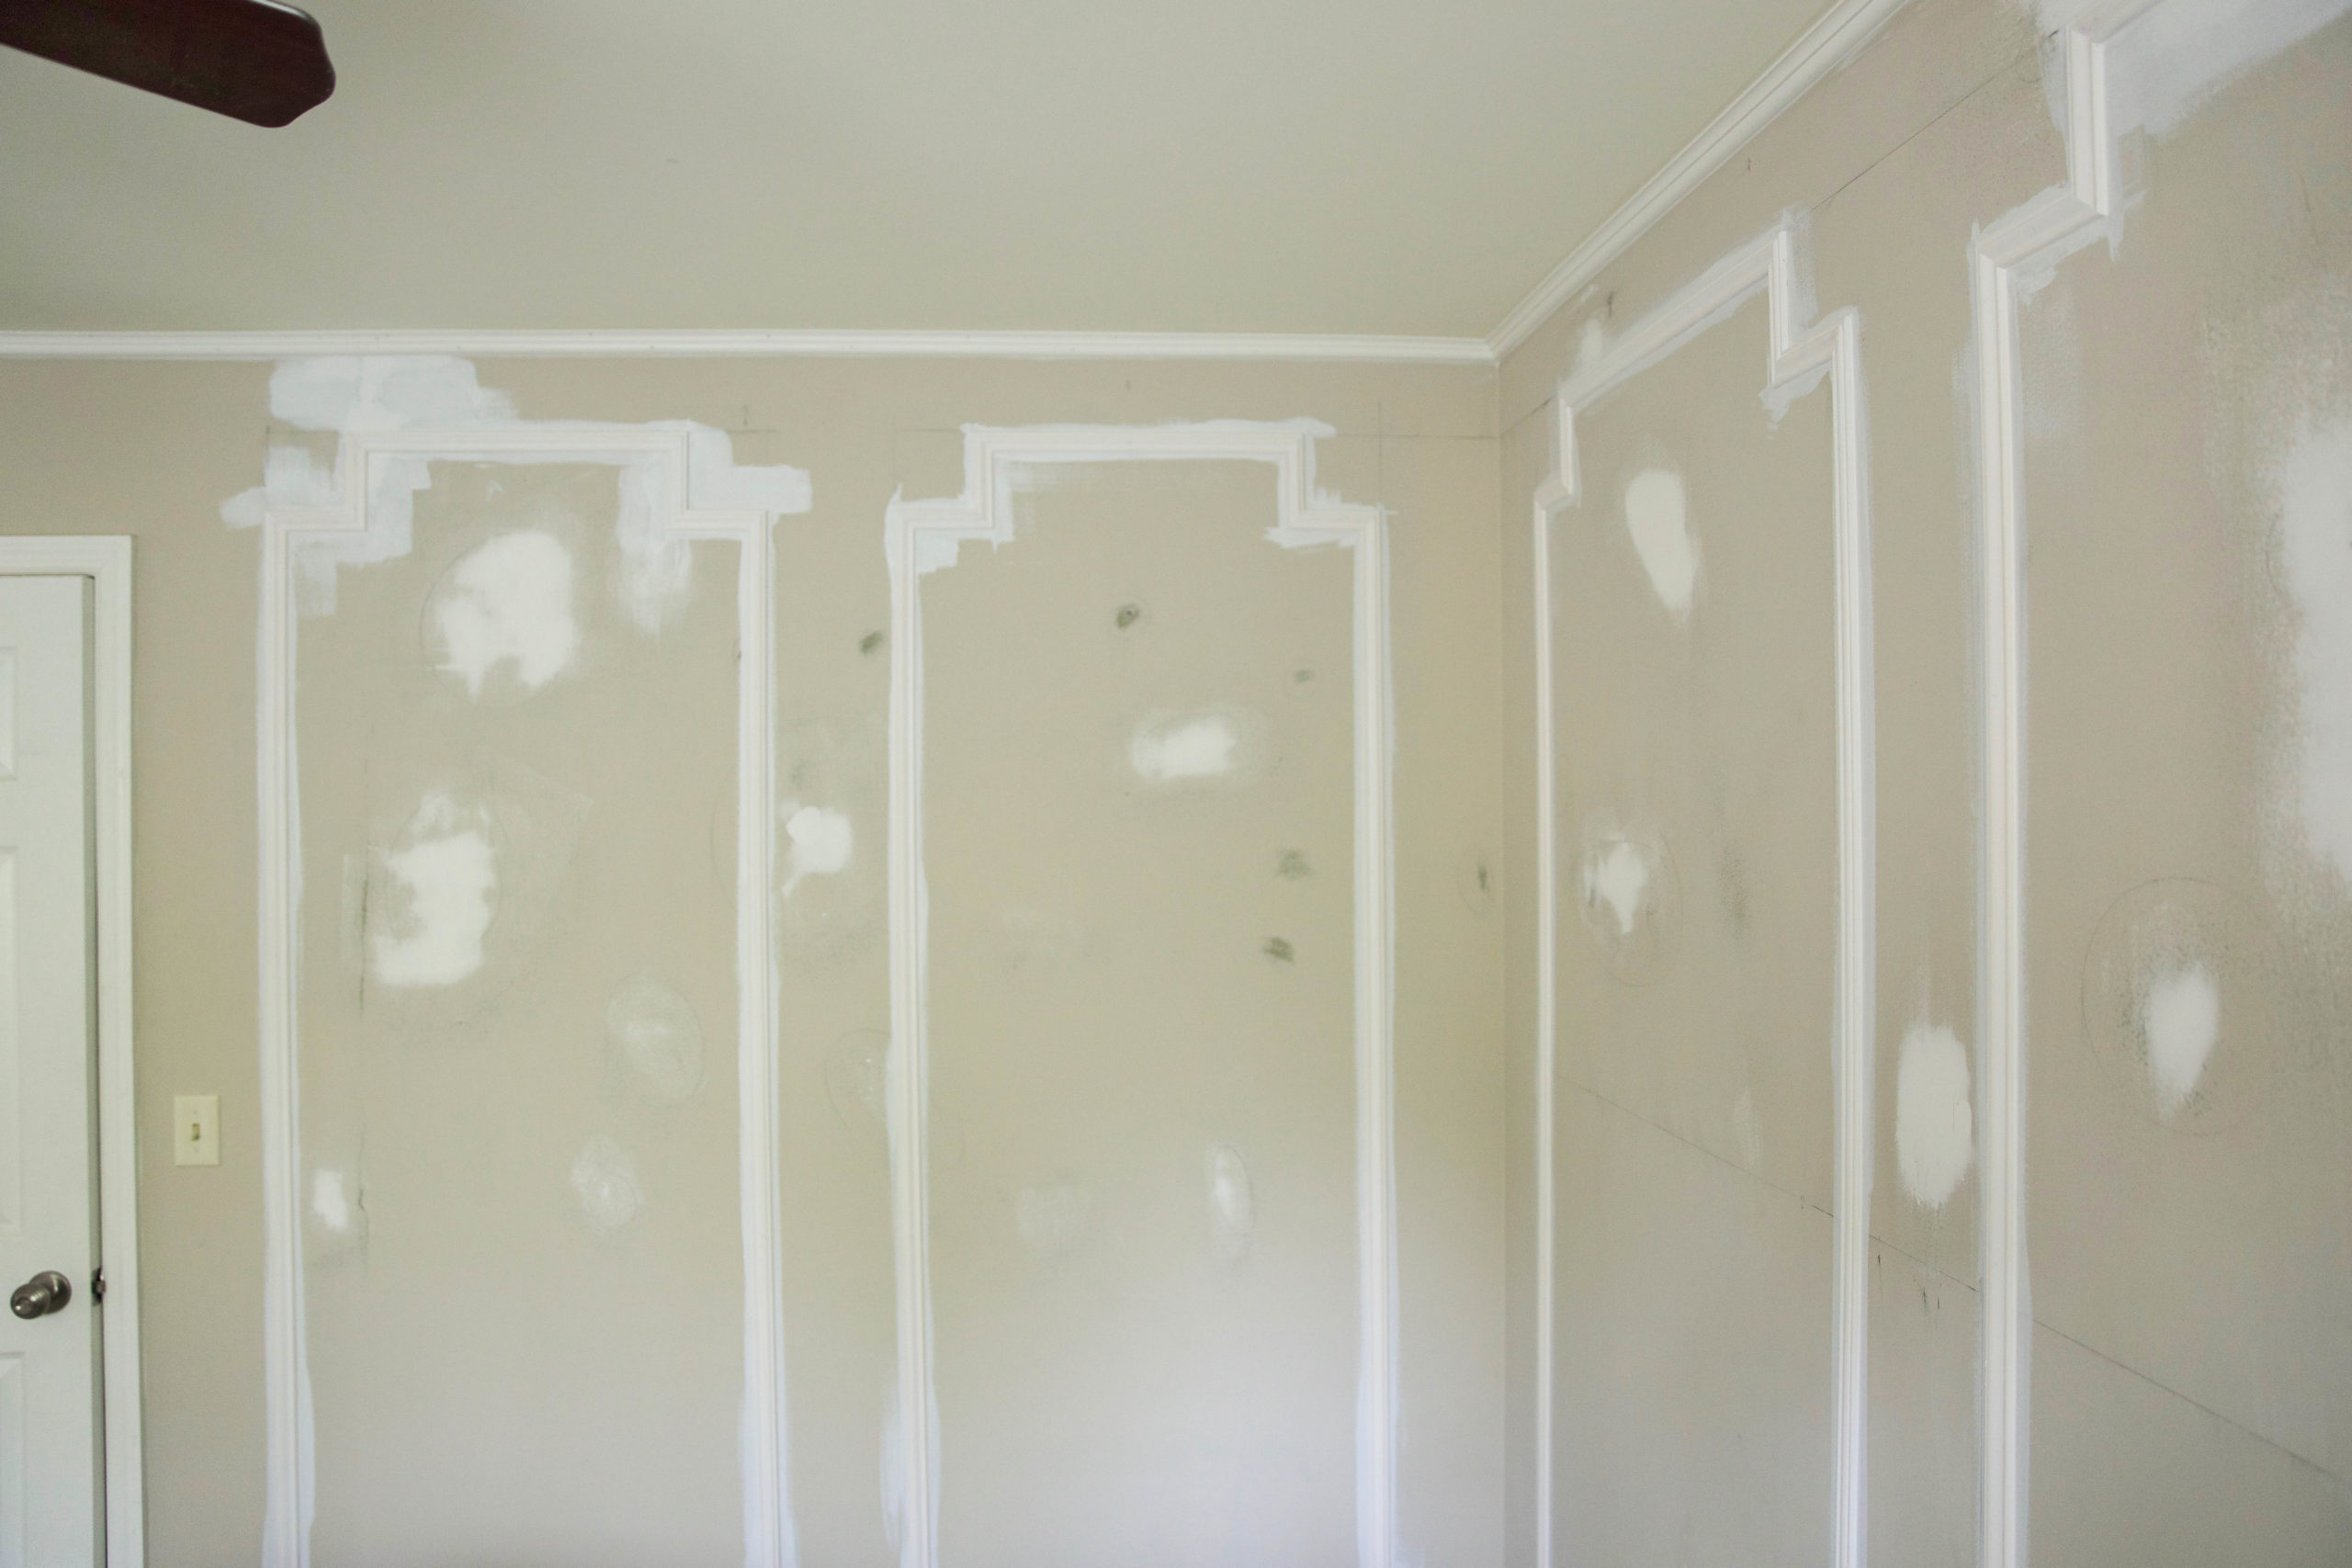
Step 5) Use moulding caulk to caulk the outer and inner edge of each installed wall frame and wood putty or painters putty to fill in any nail holes. (If your molding is unprimed, it is a good idea to prime it before caulking.) If using wood putty you may need to lightly sand the filler to ensure it is flush with the moulding. If your frames were not pre-assembled, you may need to use caulk or filler to close up any corner gaps in the moulding.
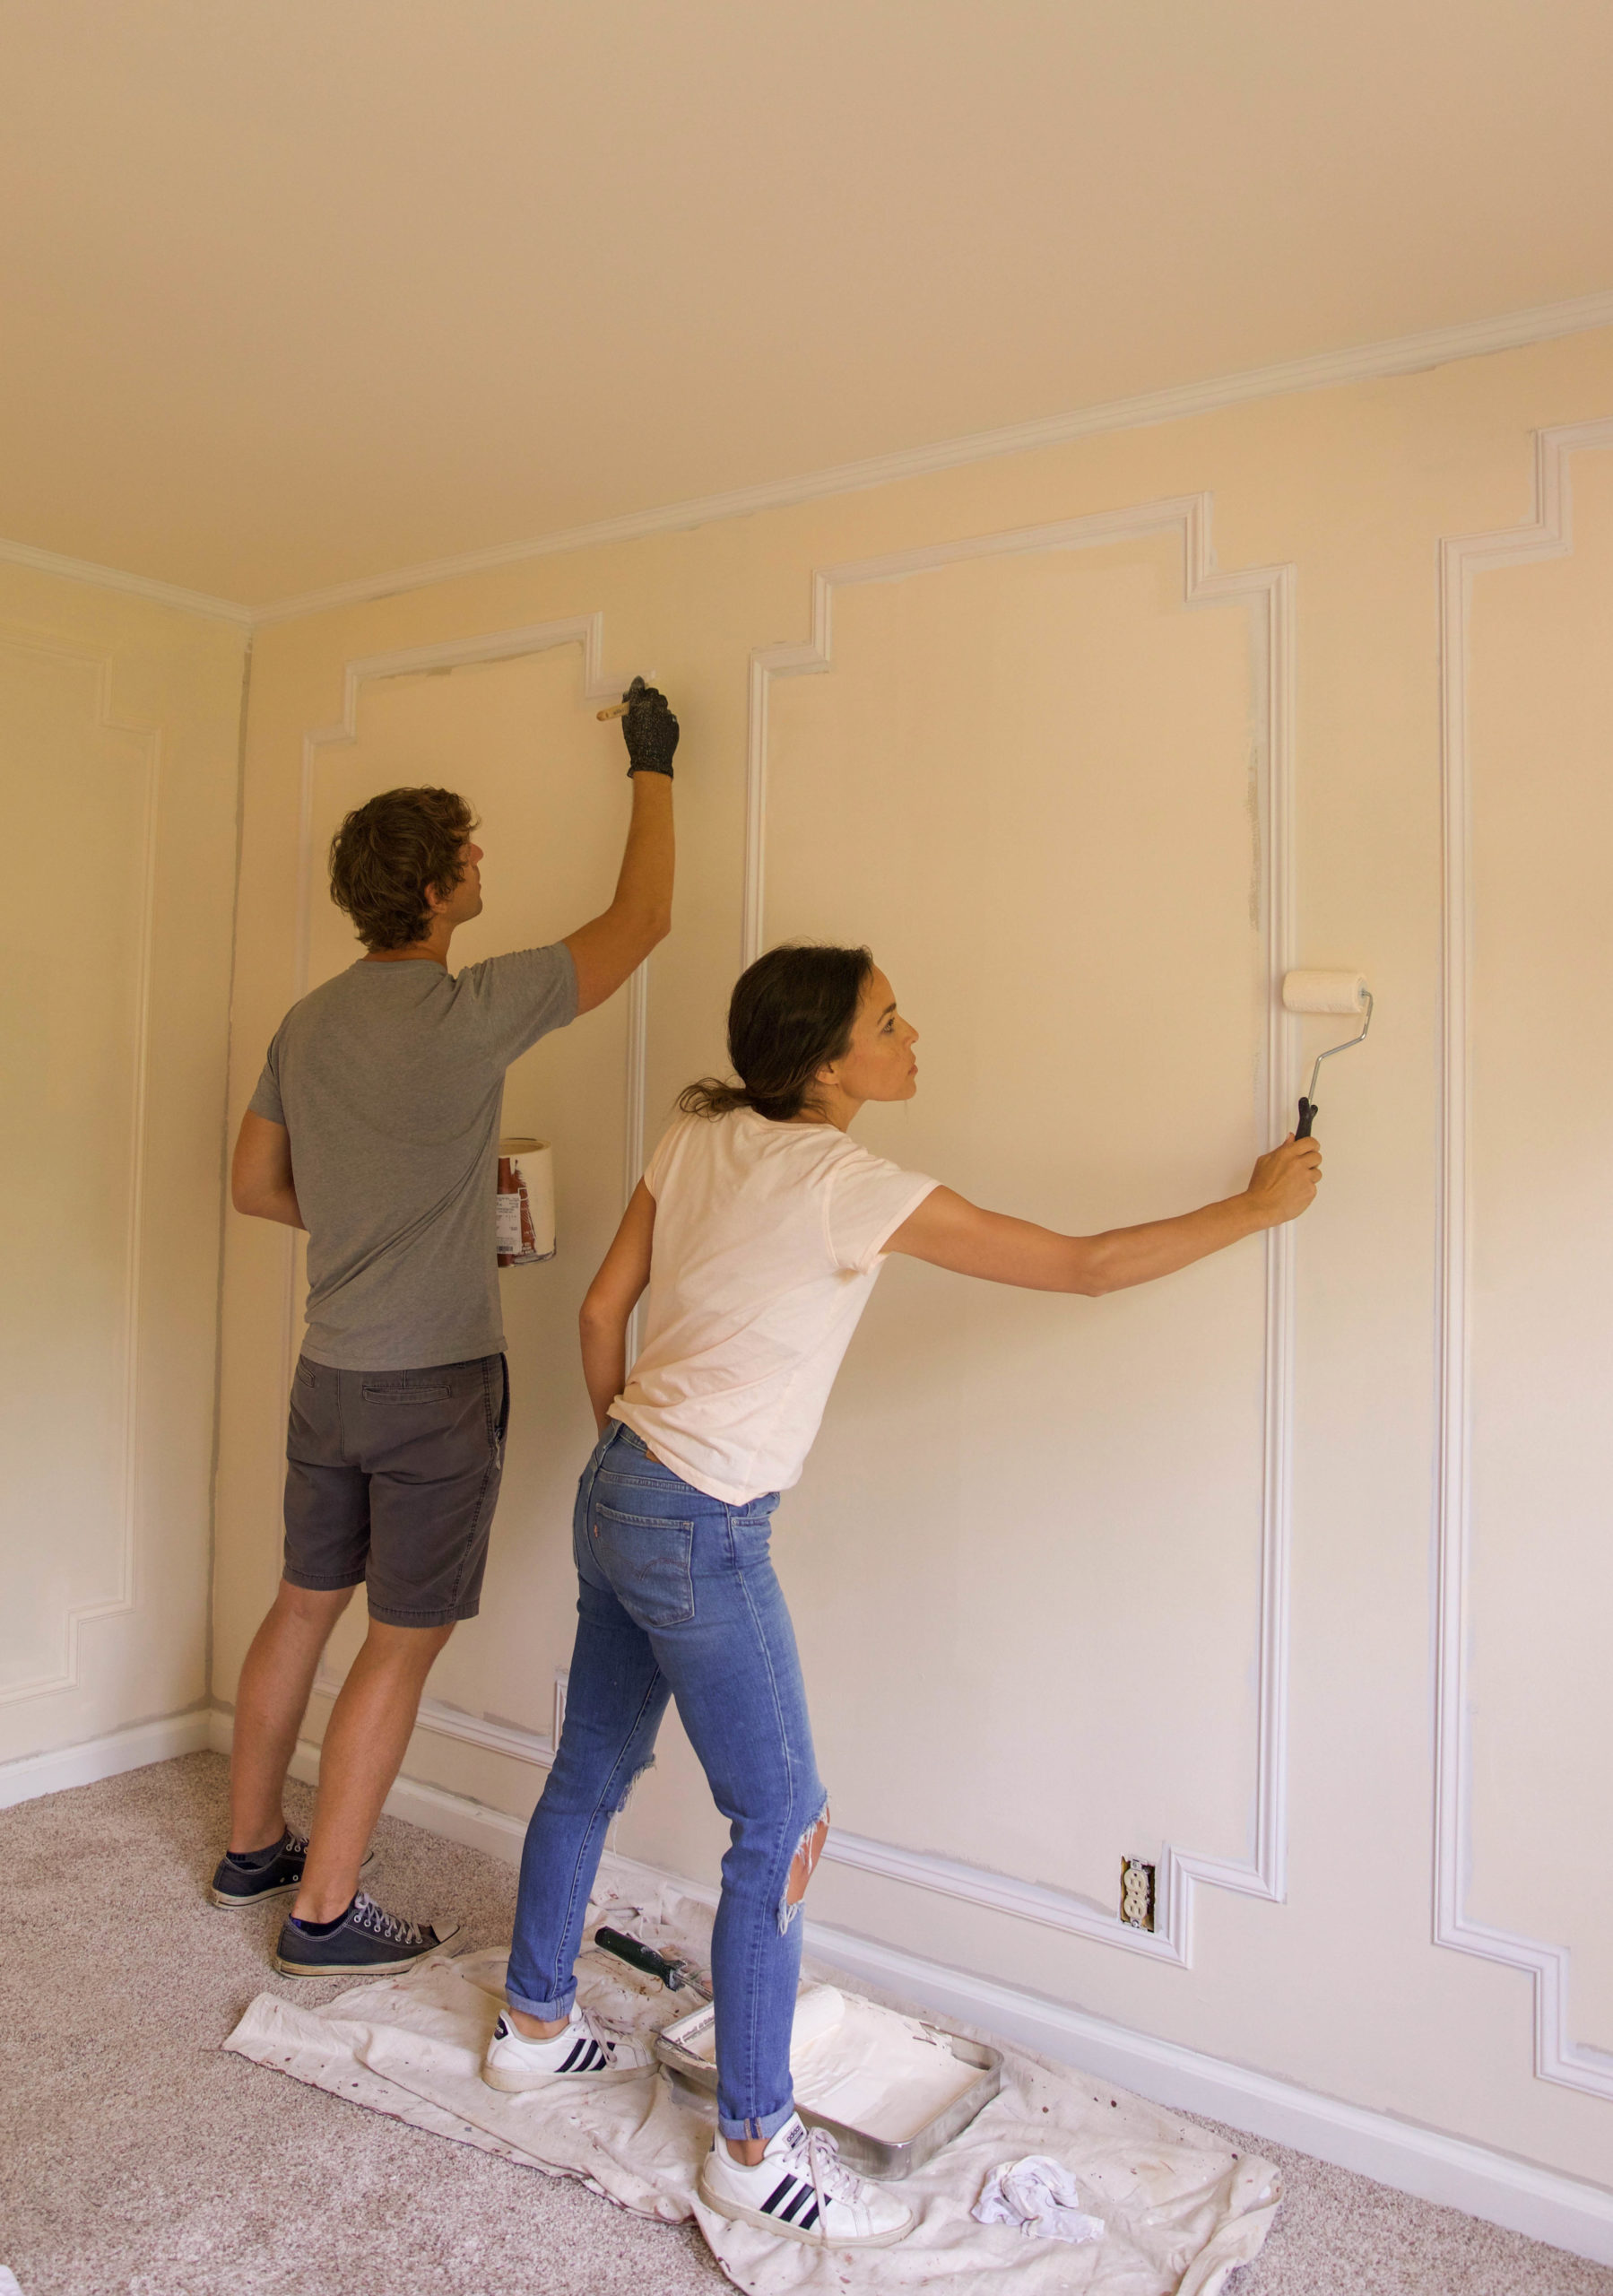
One coat
Two coats on ceiling, trim, and walls
Step 6) Lastly, finish up with some fresh paint. If your molding was not pre primed, be sure to use a quality primer before using your colored paint. For PVC moulding use a high quality bonding primer. (I like Sherwin Williams Extreme Bond Primer.)
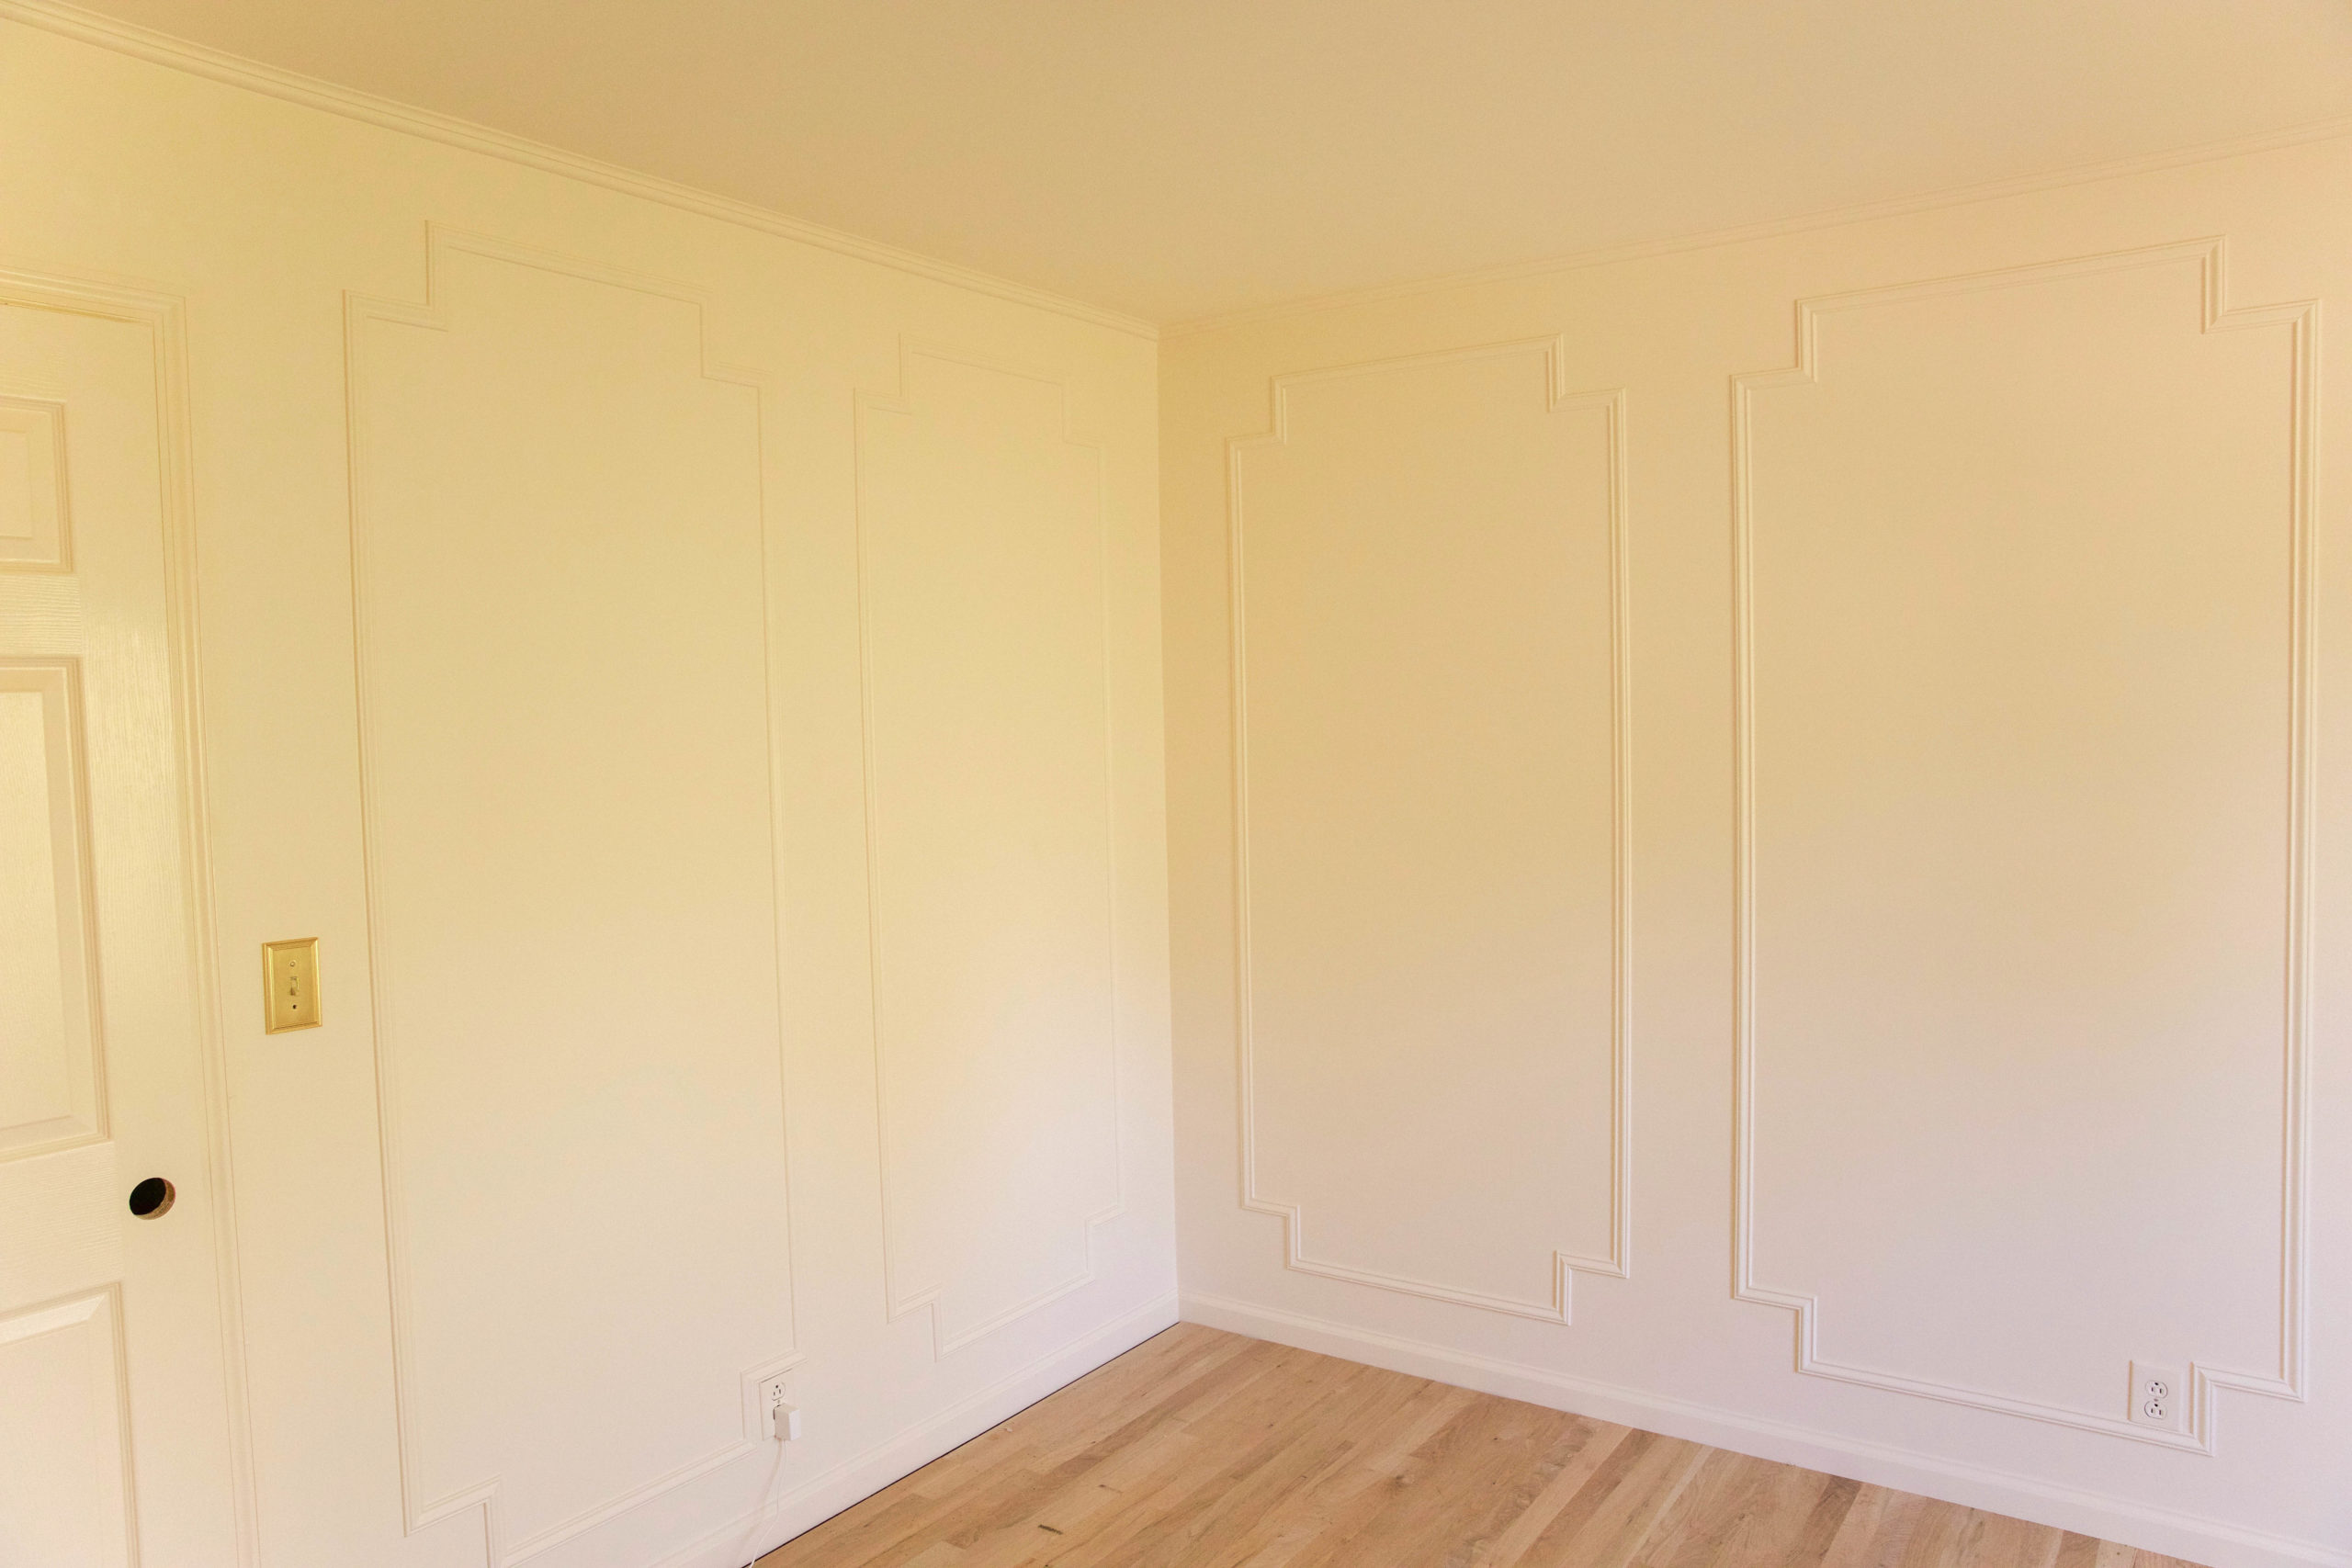
This might take a couple weekends to complete due to the numerous cuts necessary to make the wall frames, but it is well worth the time and effort as it really brings an element of timeless elegance to any room. You can do it! Show us what you come up with, we love to see what you do in your own homes.
We will share the painting and wood floor process very soon!


