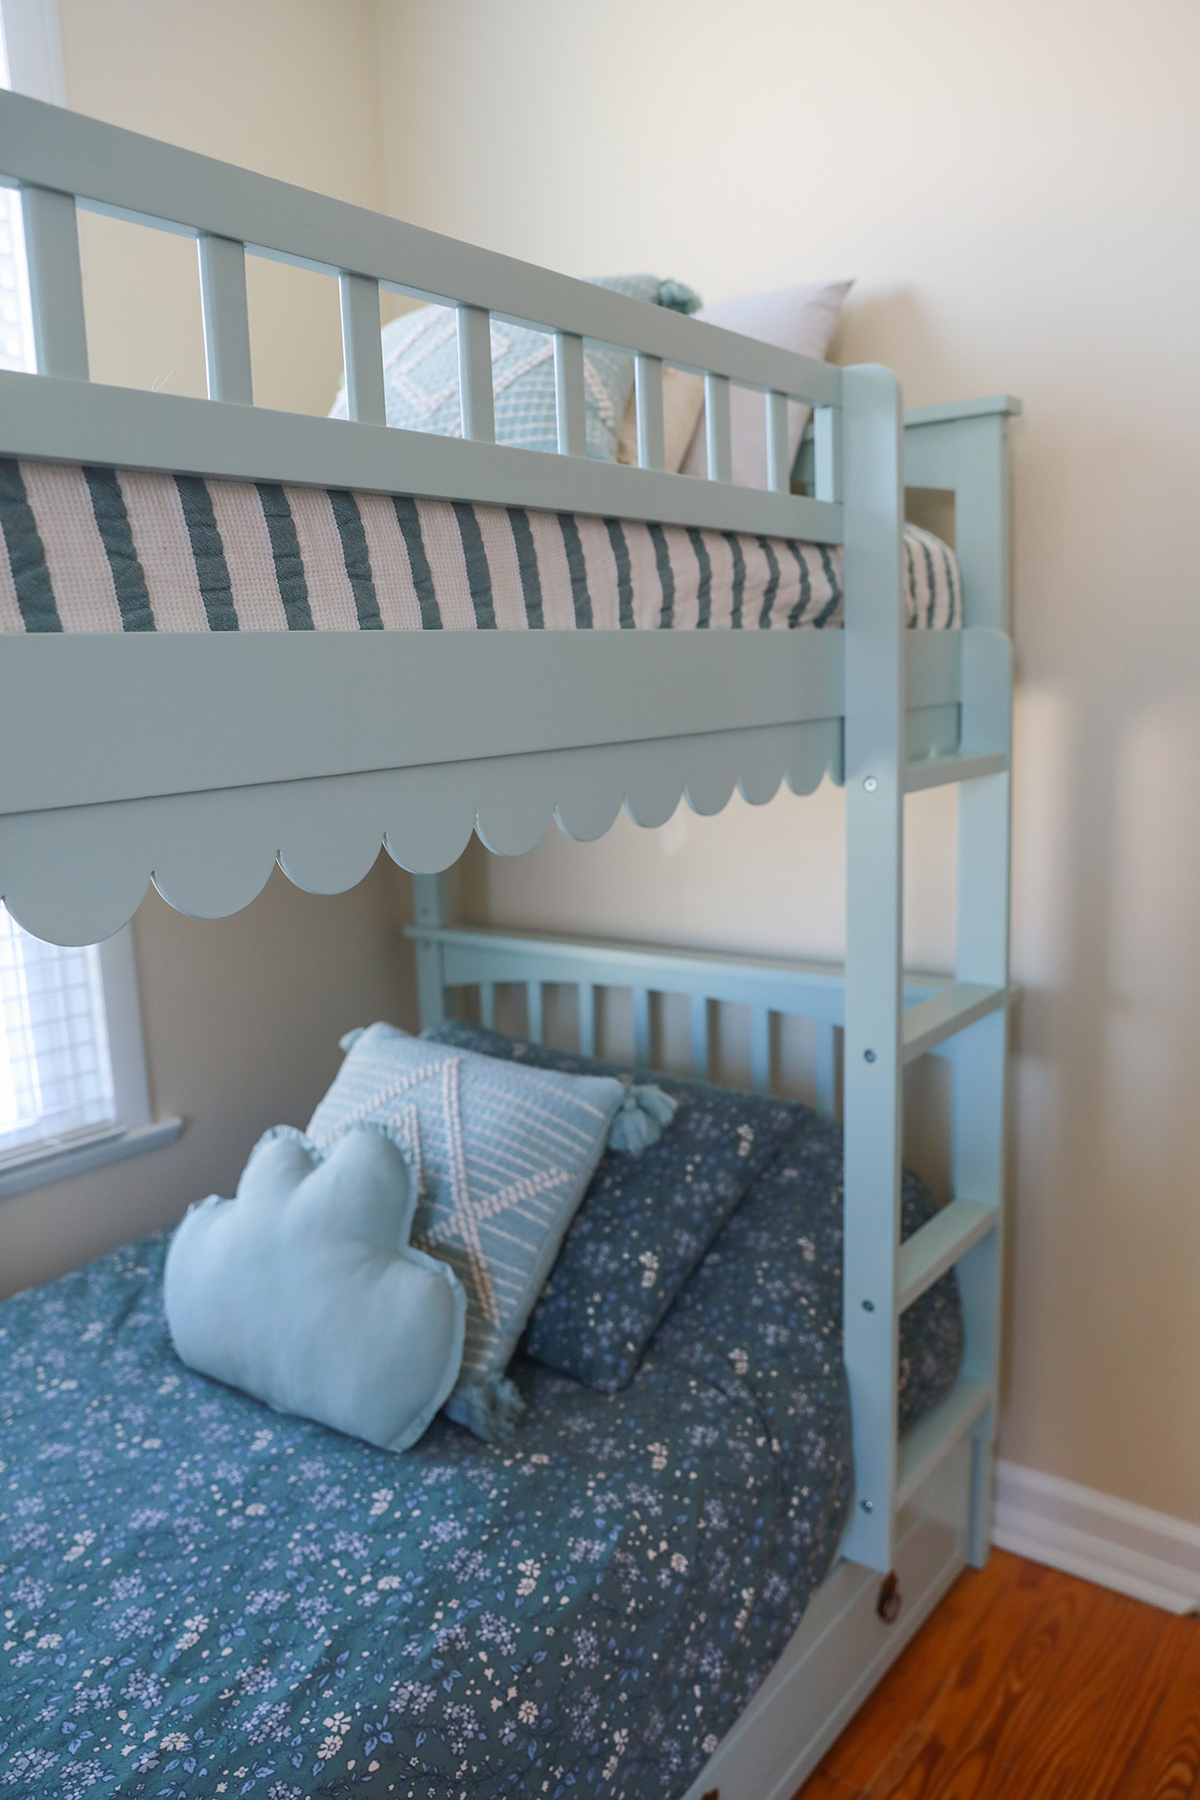
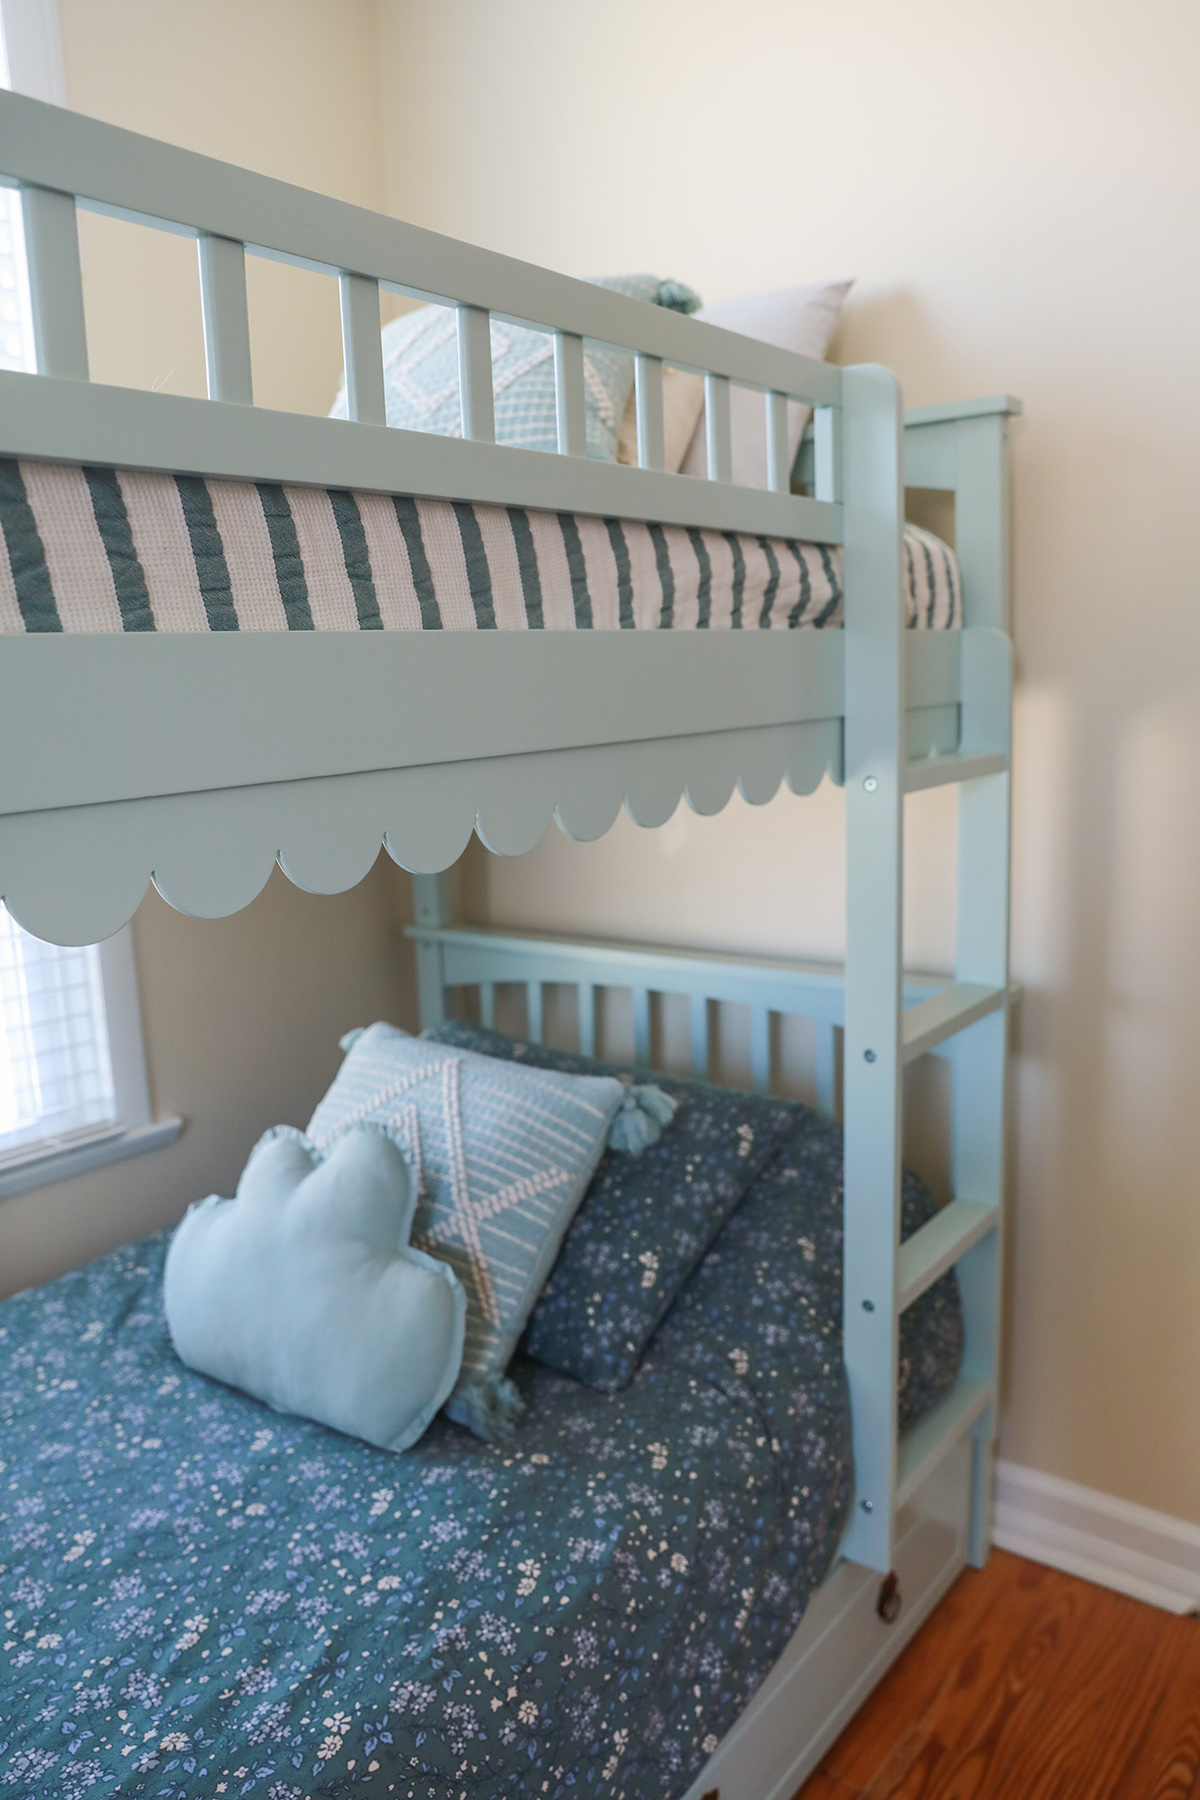
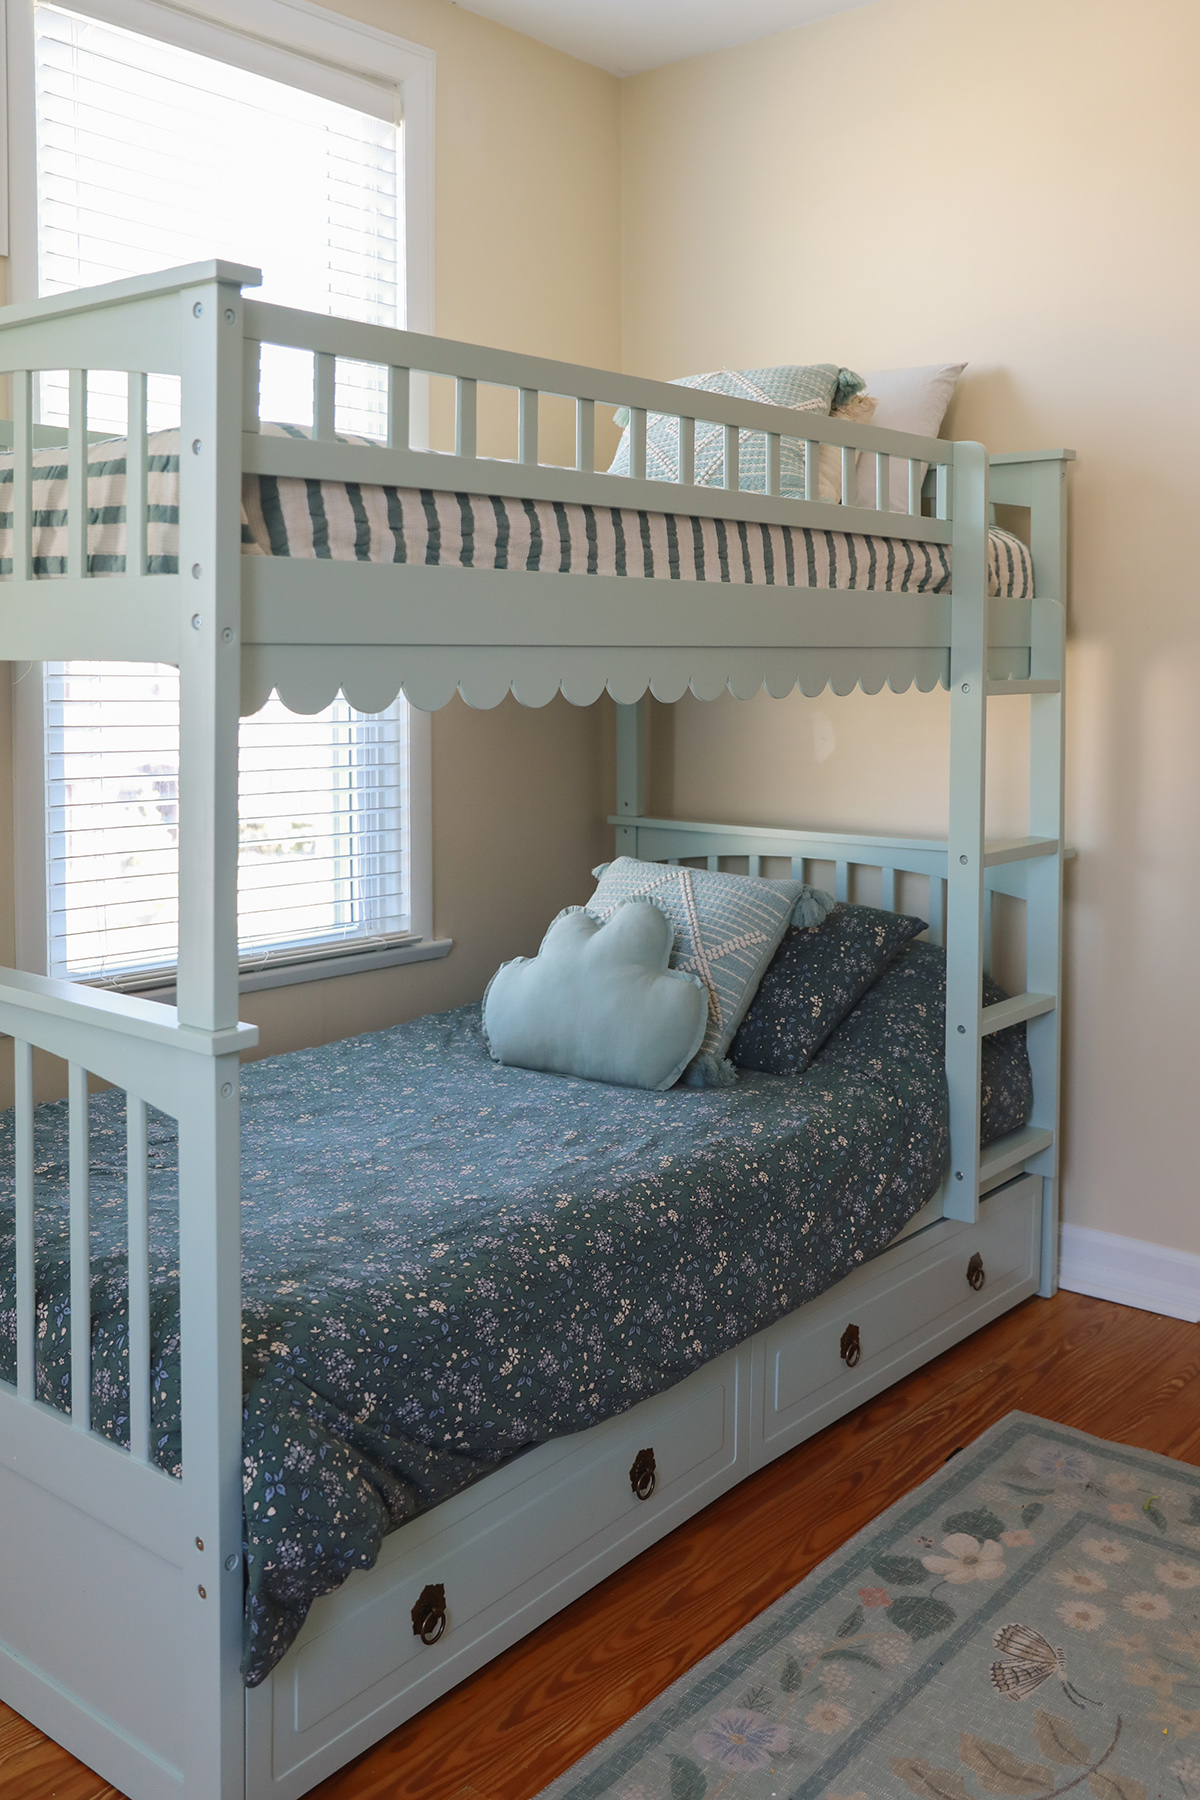
We had to sell a lot of furniture before our move. Mainly items we knew wouldn’t work in the new house, or that we could find easily on marketplace. We bought the most affordable bunk bed set with storage we could find, and customized them. Sharing the steps for these DIY scallop edge bunk beds below.
It was a lot of change for our kids when we moved, and I wanted to keep their rooms similar to their old rooms for now so that it feels familiar. We have so many large scale renovation projects coming, so I welcomed the distraction of a smaller creative project. I used the same color and concept from their scallop bookshelf, and we decided to give it a try on these bunks!
Materials Used:
Liquid Nails
Scallop Trim
Nail Gun
Hand sander
Tack cloth
1 in. x 1 in. square dowel
Shellac Primer
Paint – Color: Bali by Benjamin Moore
Paint sprayer (you can also hand paint of course!)
PART 1 – PREP AND PRIME YOUR BUNK BED PIECES
- Gently hand sand with 220 or 300 grit sandpaper. The objective of this preliminary sand is to lightly scuff the surface as it allows your paint to adhere much better to Ikea furniture. Do not use a power sander as it will likely damage your work surface.
- After scuffing, vacuum off all dust with a soft vacuum head attachment, then wipe down with a tack cloth to remove any remaining fine dust particles.
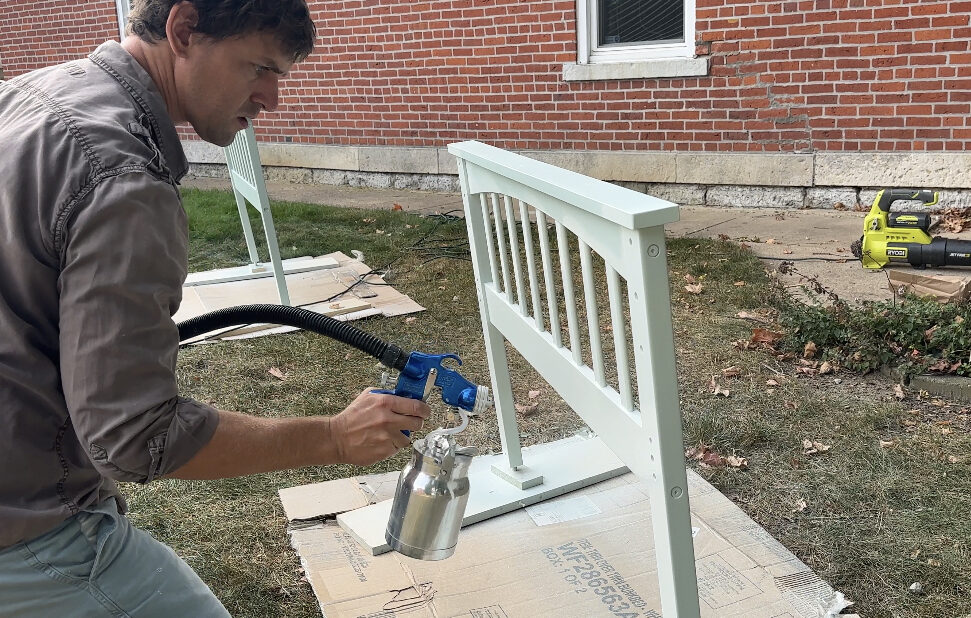
- Prime your surface by adding a high quality primer paint. I prefer to use an oil based primer when painting Ikea or plywood items, as a water based primer does not always properly adhere. My go to is Zinsser BIN Shellac Based Primer for a few reasons: it has great adhesion, it levels out very well once applied, sprays and rolls on well, and it sands out well once dried. It is a high quality oil based primer and it does smell a bit, so use it in a well ventilated area. We applied the primer using our the earlax spray station, but the Graco 360 VSP paint sprayer is also great for furniture pieces.
- Clean out your paint gun well.
PART 2 – ADD YOUR SCALLOP TRIM
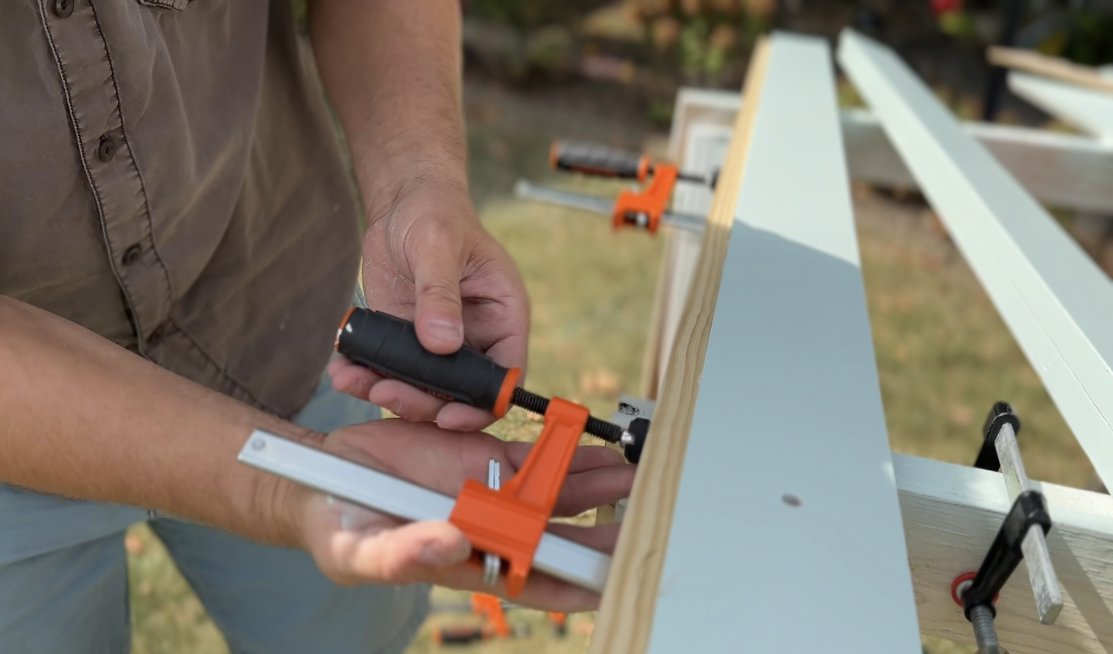
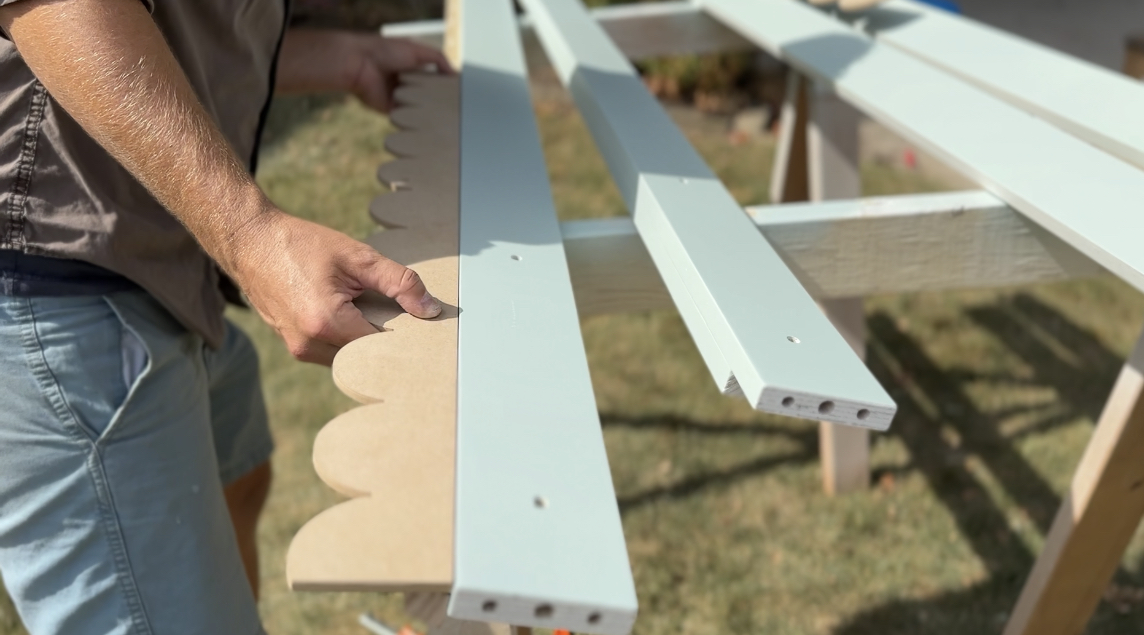
- Measure and cut a 1 in. x 1 in. square dowel the full length of the bed.
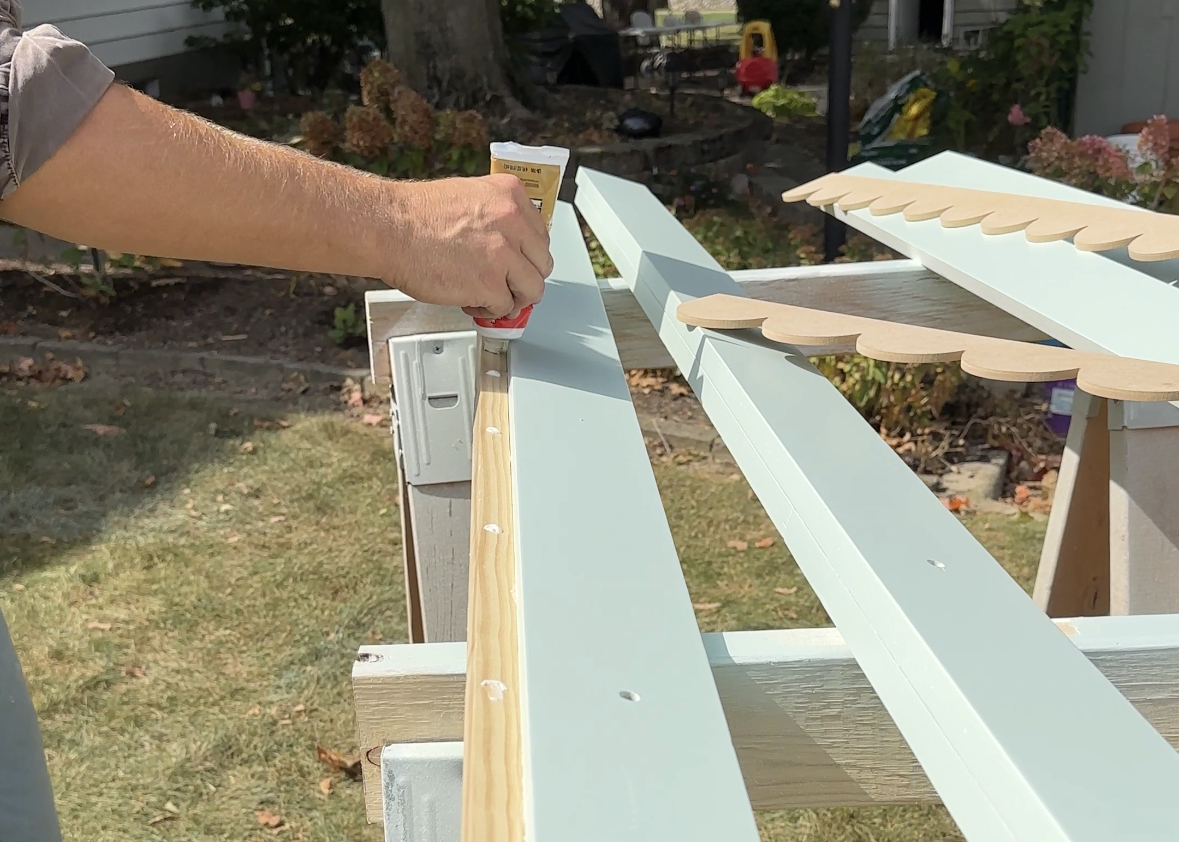
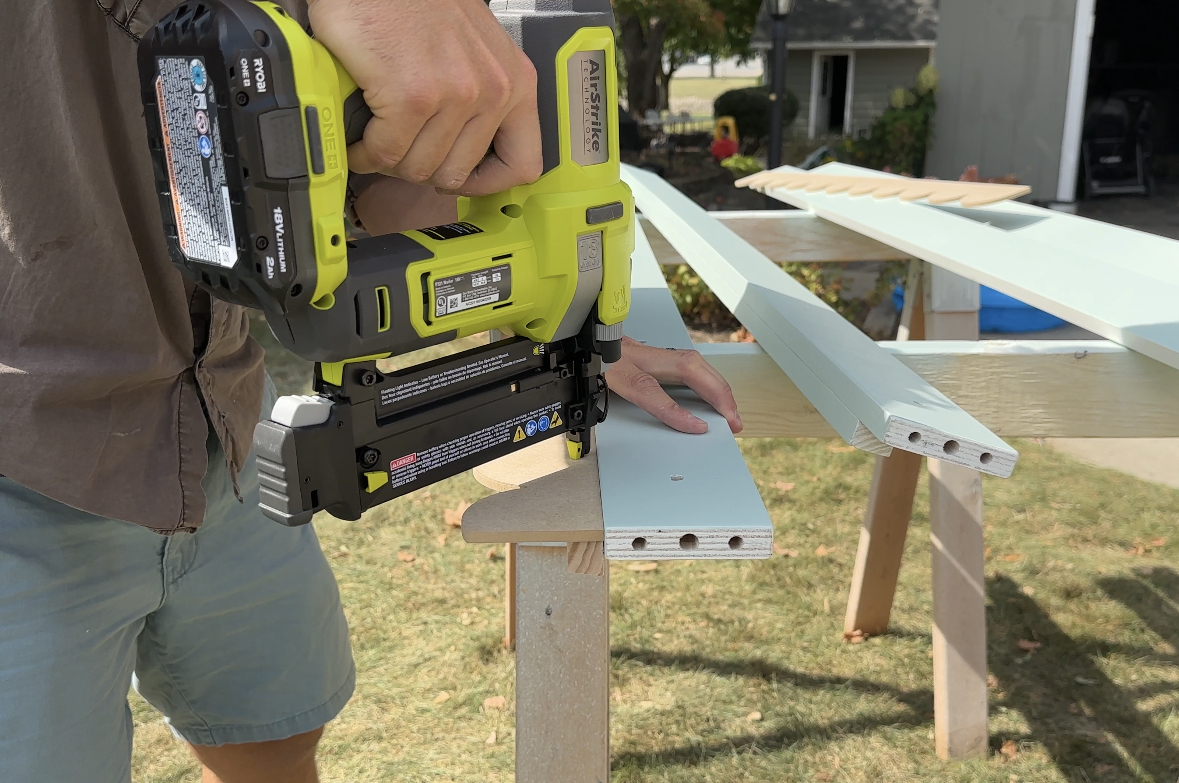
- Attach underneath the edge of the top bunk bed with liquid nails (Secure with clamps), followed by a nail gun. (We attached close to the edge.)
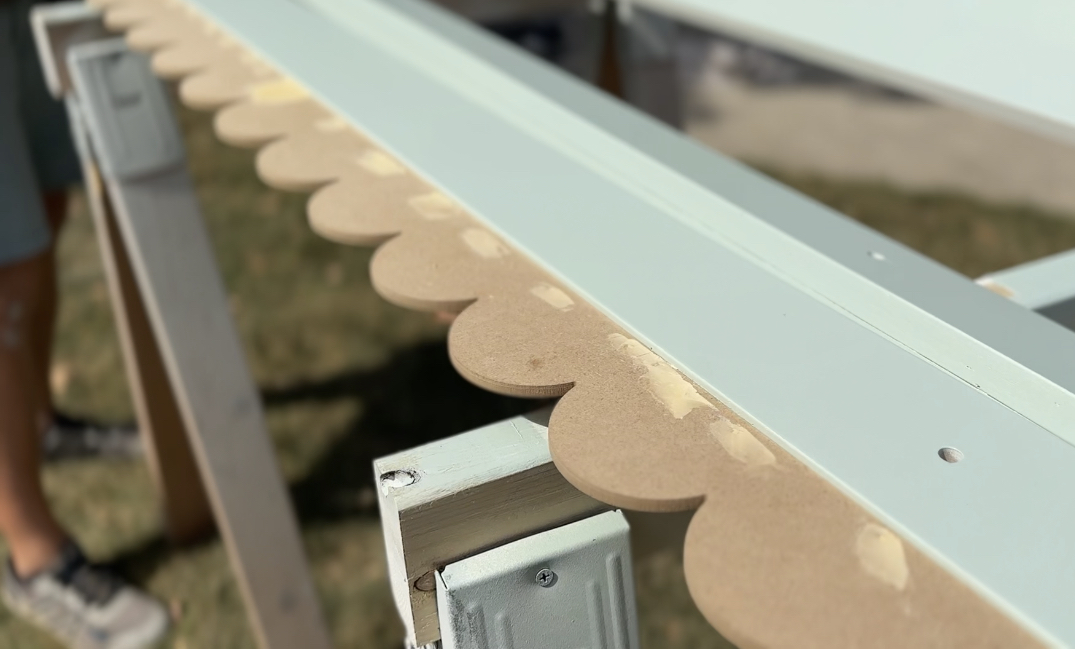
- Align the scallop trim on top of the 1 x 1 by also using liquid nails and a nail gun. This will keep it secure and tight.
- Fill nail holes with a little wood filler and let dry.
- Gently sand over the wood filler patches and wipe down.
- Prime your scallop trim with a hand brush or spray gun.
PART 3 – PAINT
1. Paint your bunk beds. We like to use Benjamin Moore Advance in a satin finish. It is a hard wearing water based enamel paint to use on doors, trim, and furniture. It sprays very well, levels and tightens well (especially if sprayed or rolled with a quality fine finish roller pad), and produces a hard durable finish. No need to sand between coats unless you find a blemish that needs to be gently smoothed out.
Quick tip, if you find there are slight runs after painting, roll the sides with a high density foam roller pad with a very light pressure about 3-5 min after applying the paint coat.
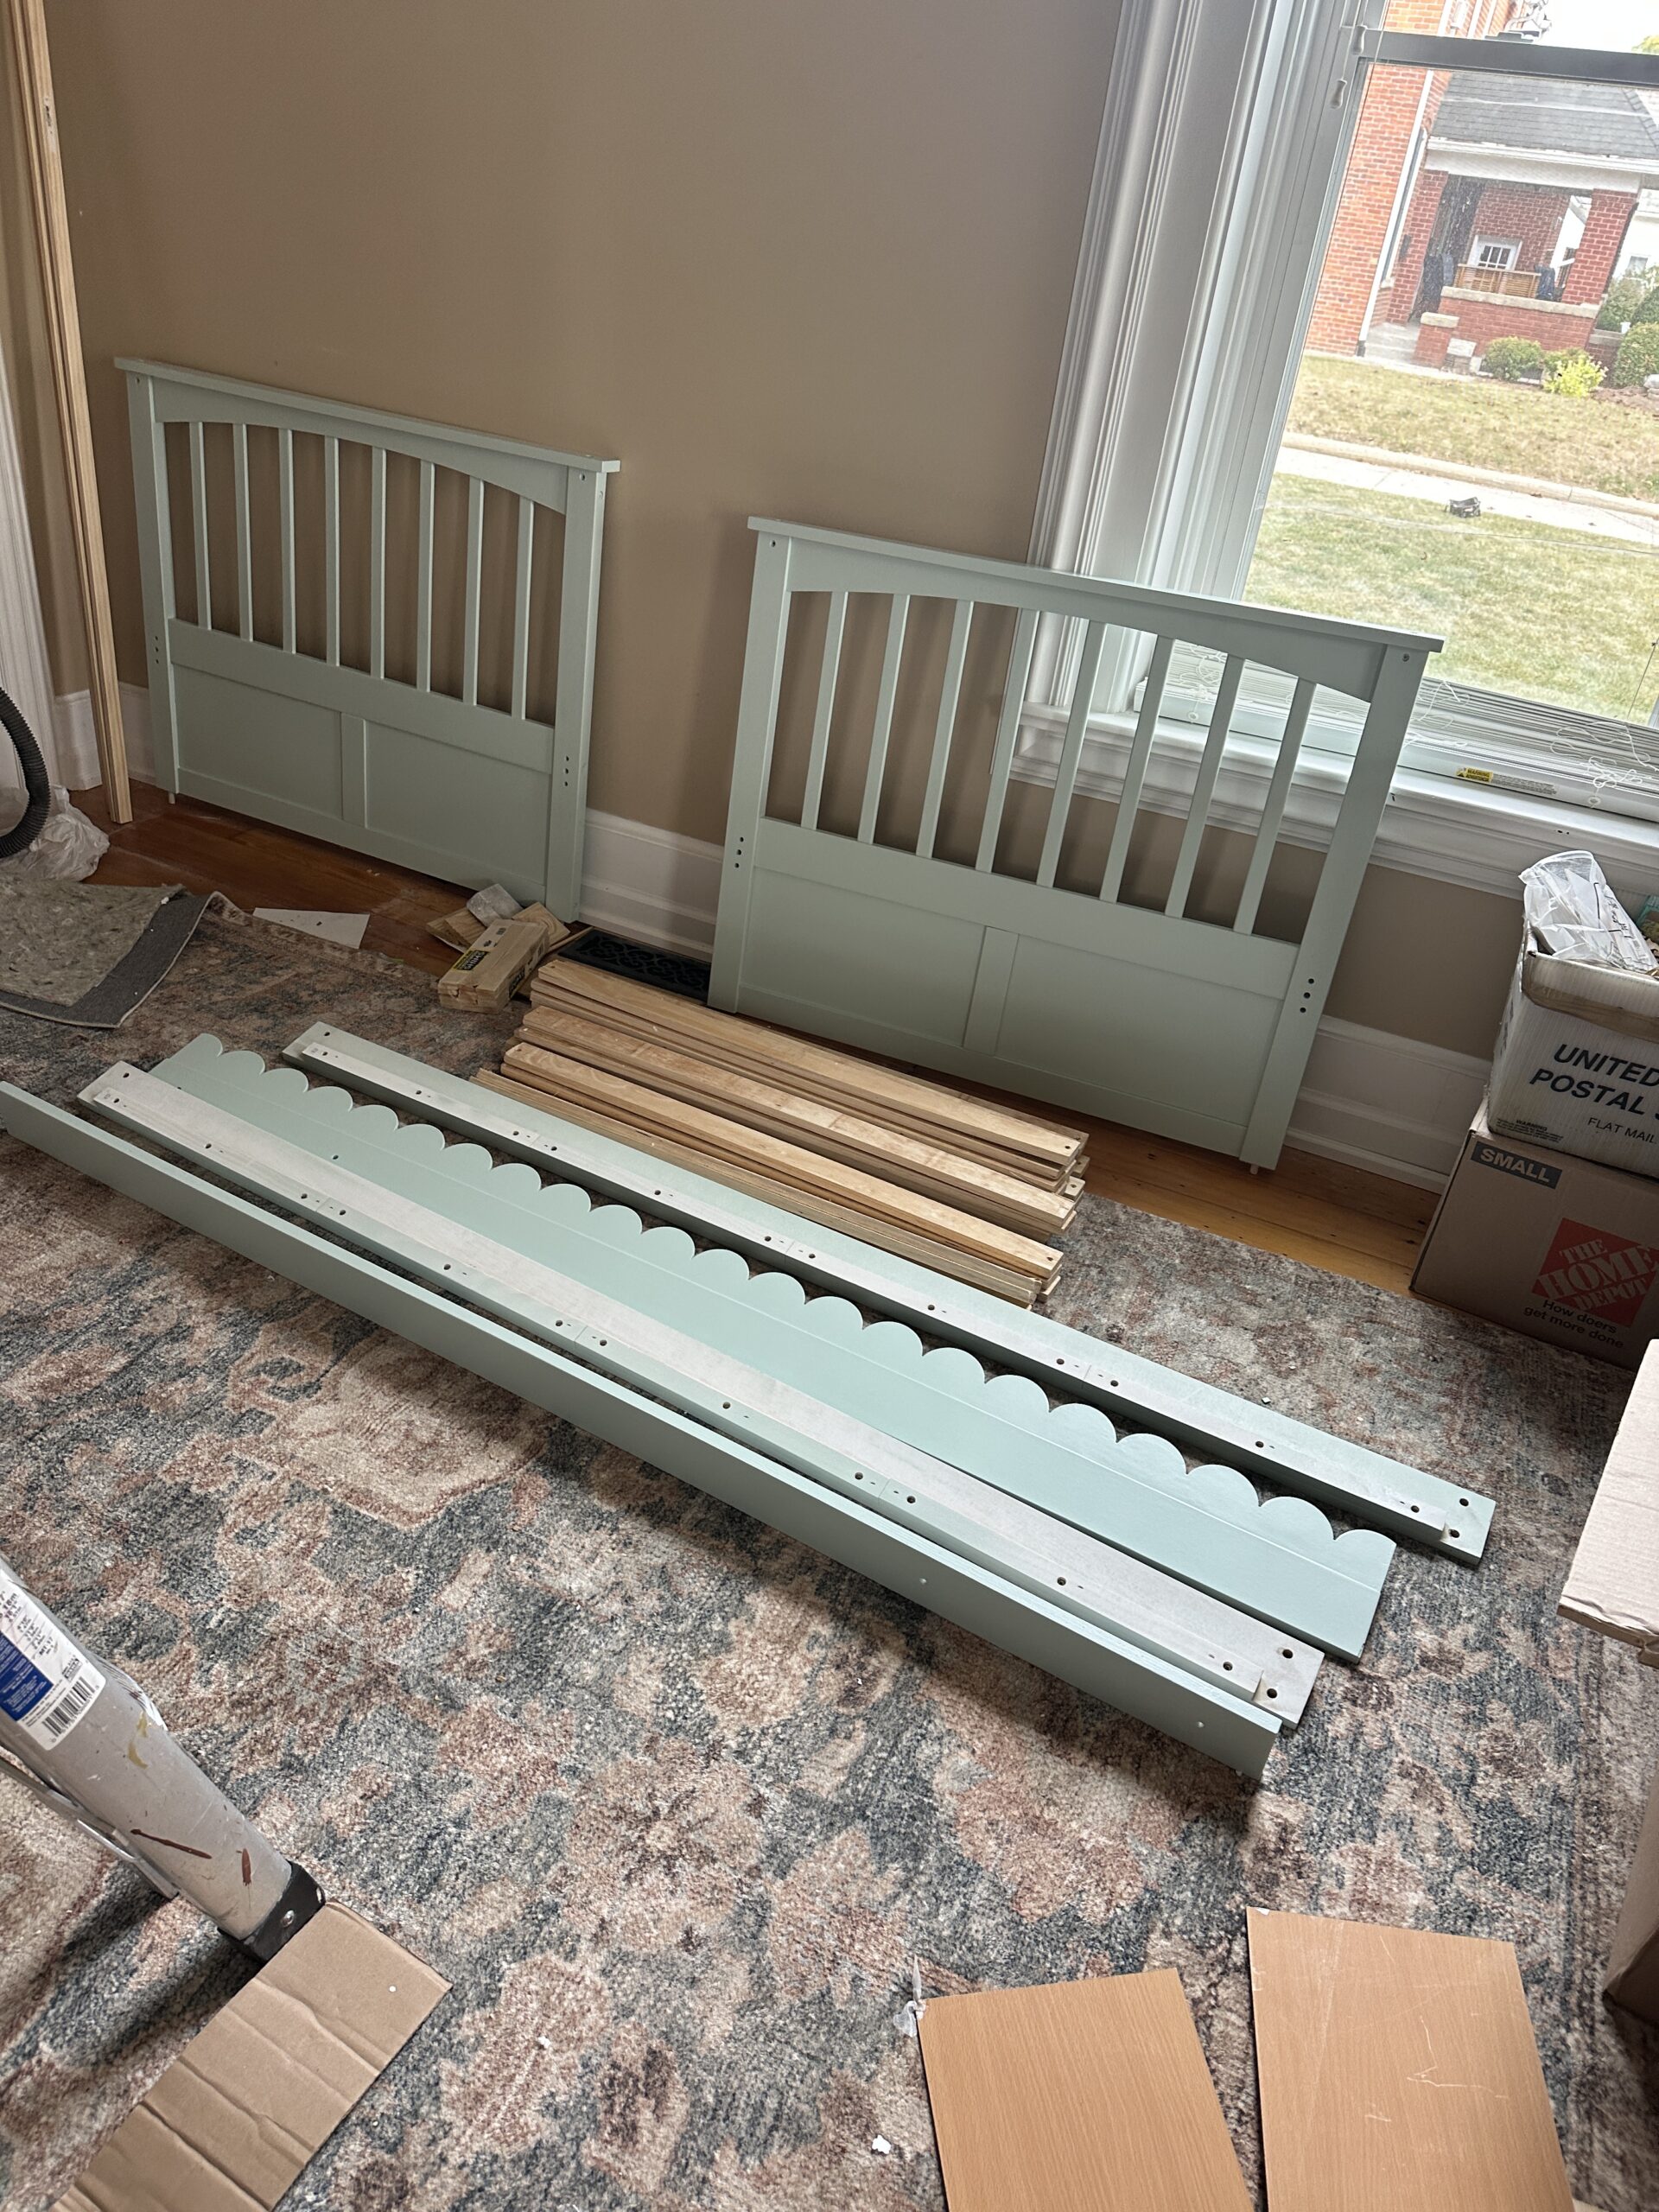
PART 4 – ASSEMBLE
These weren’t the easiest bunk beds to assemble, as some of the holes were misaligned so it required a few extra drill adjustments. We usually find this to be the case with beds in a box. So if you are going to opt for an unassembled bed, make sure you factor in the time it takes to put it together.
Sources:
Floral duvet
Comforter
Striped comforter
Throw pillows
Cloud Pillow
Flower pulls
Twin Mattresses
Bunk Beds
Wallpapering this room is next! It’s been a while, and I believe the only reason I am going for it is my foggy memory of how much time and effort it actually takes. Let us know if you have any questions about this project in the comments!


