
After a very slow start to our year, we started back on our living room renovation. I wanted to share this project from concept to completion including the plans, before photos, and the outcome! If you have ever wanted to add a fireplace area on a blank wall, we are sharing our process and how to install a cast stone mantel.
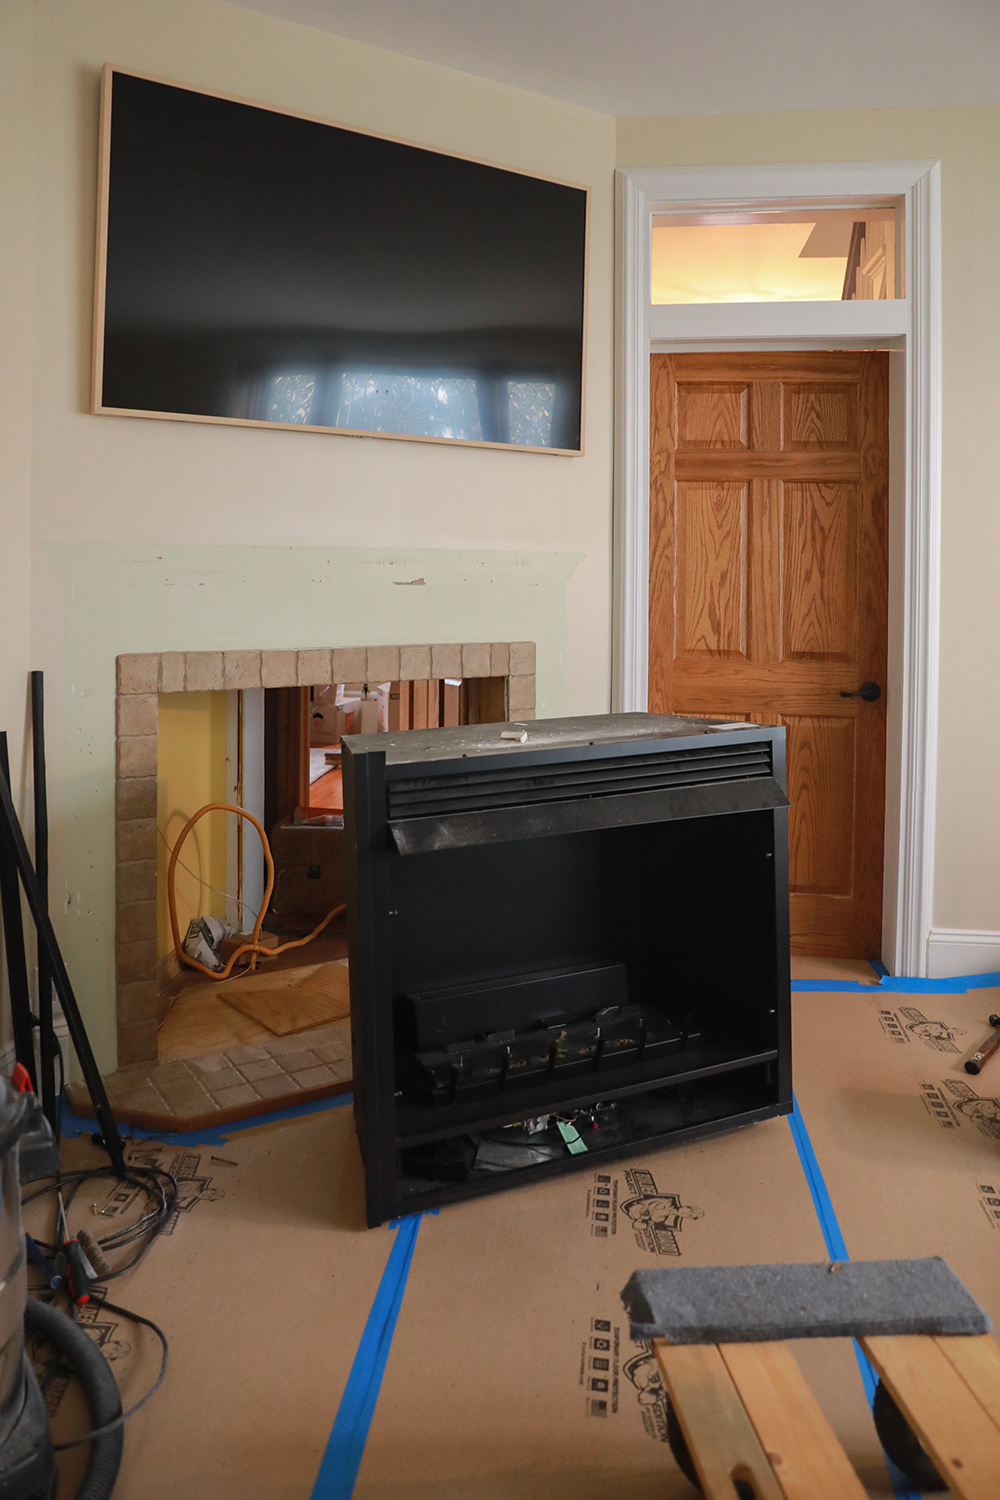
The home’s original fireplace was removed and replaced with a staircase long ago, so a ventless gas fireplace insert was installed by the previous owners in the living room. Since the wall was diagonal it didn’t leave many options for cabinets and bookshelves like we were hoping to add.
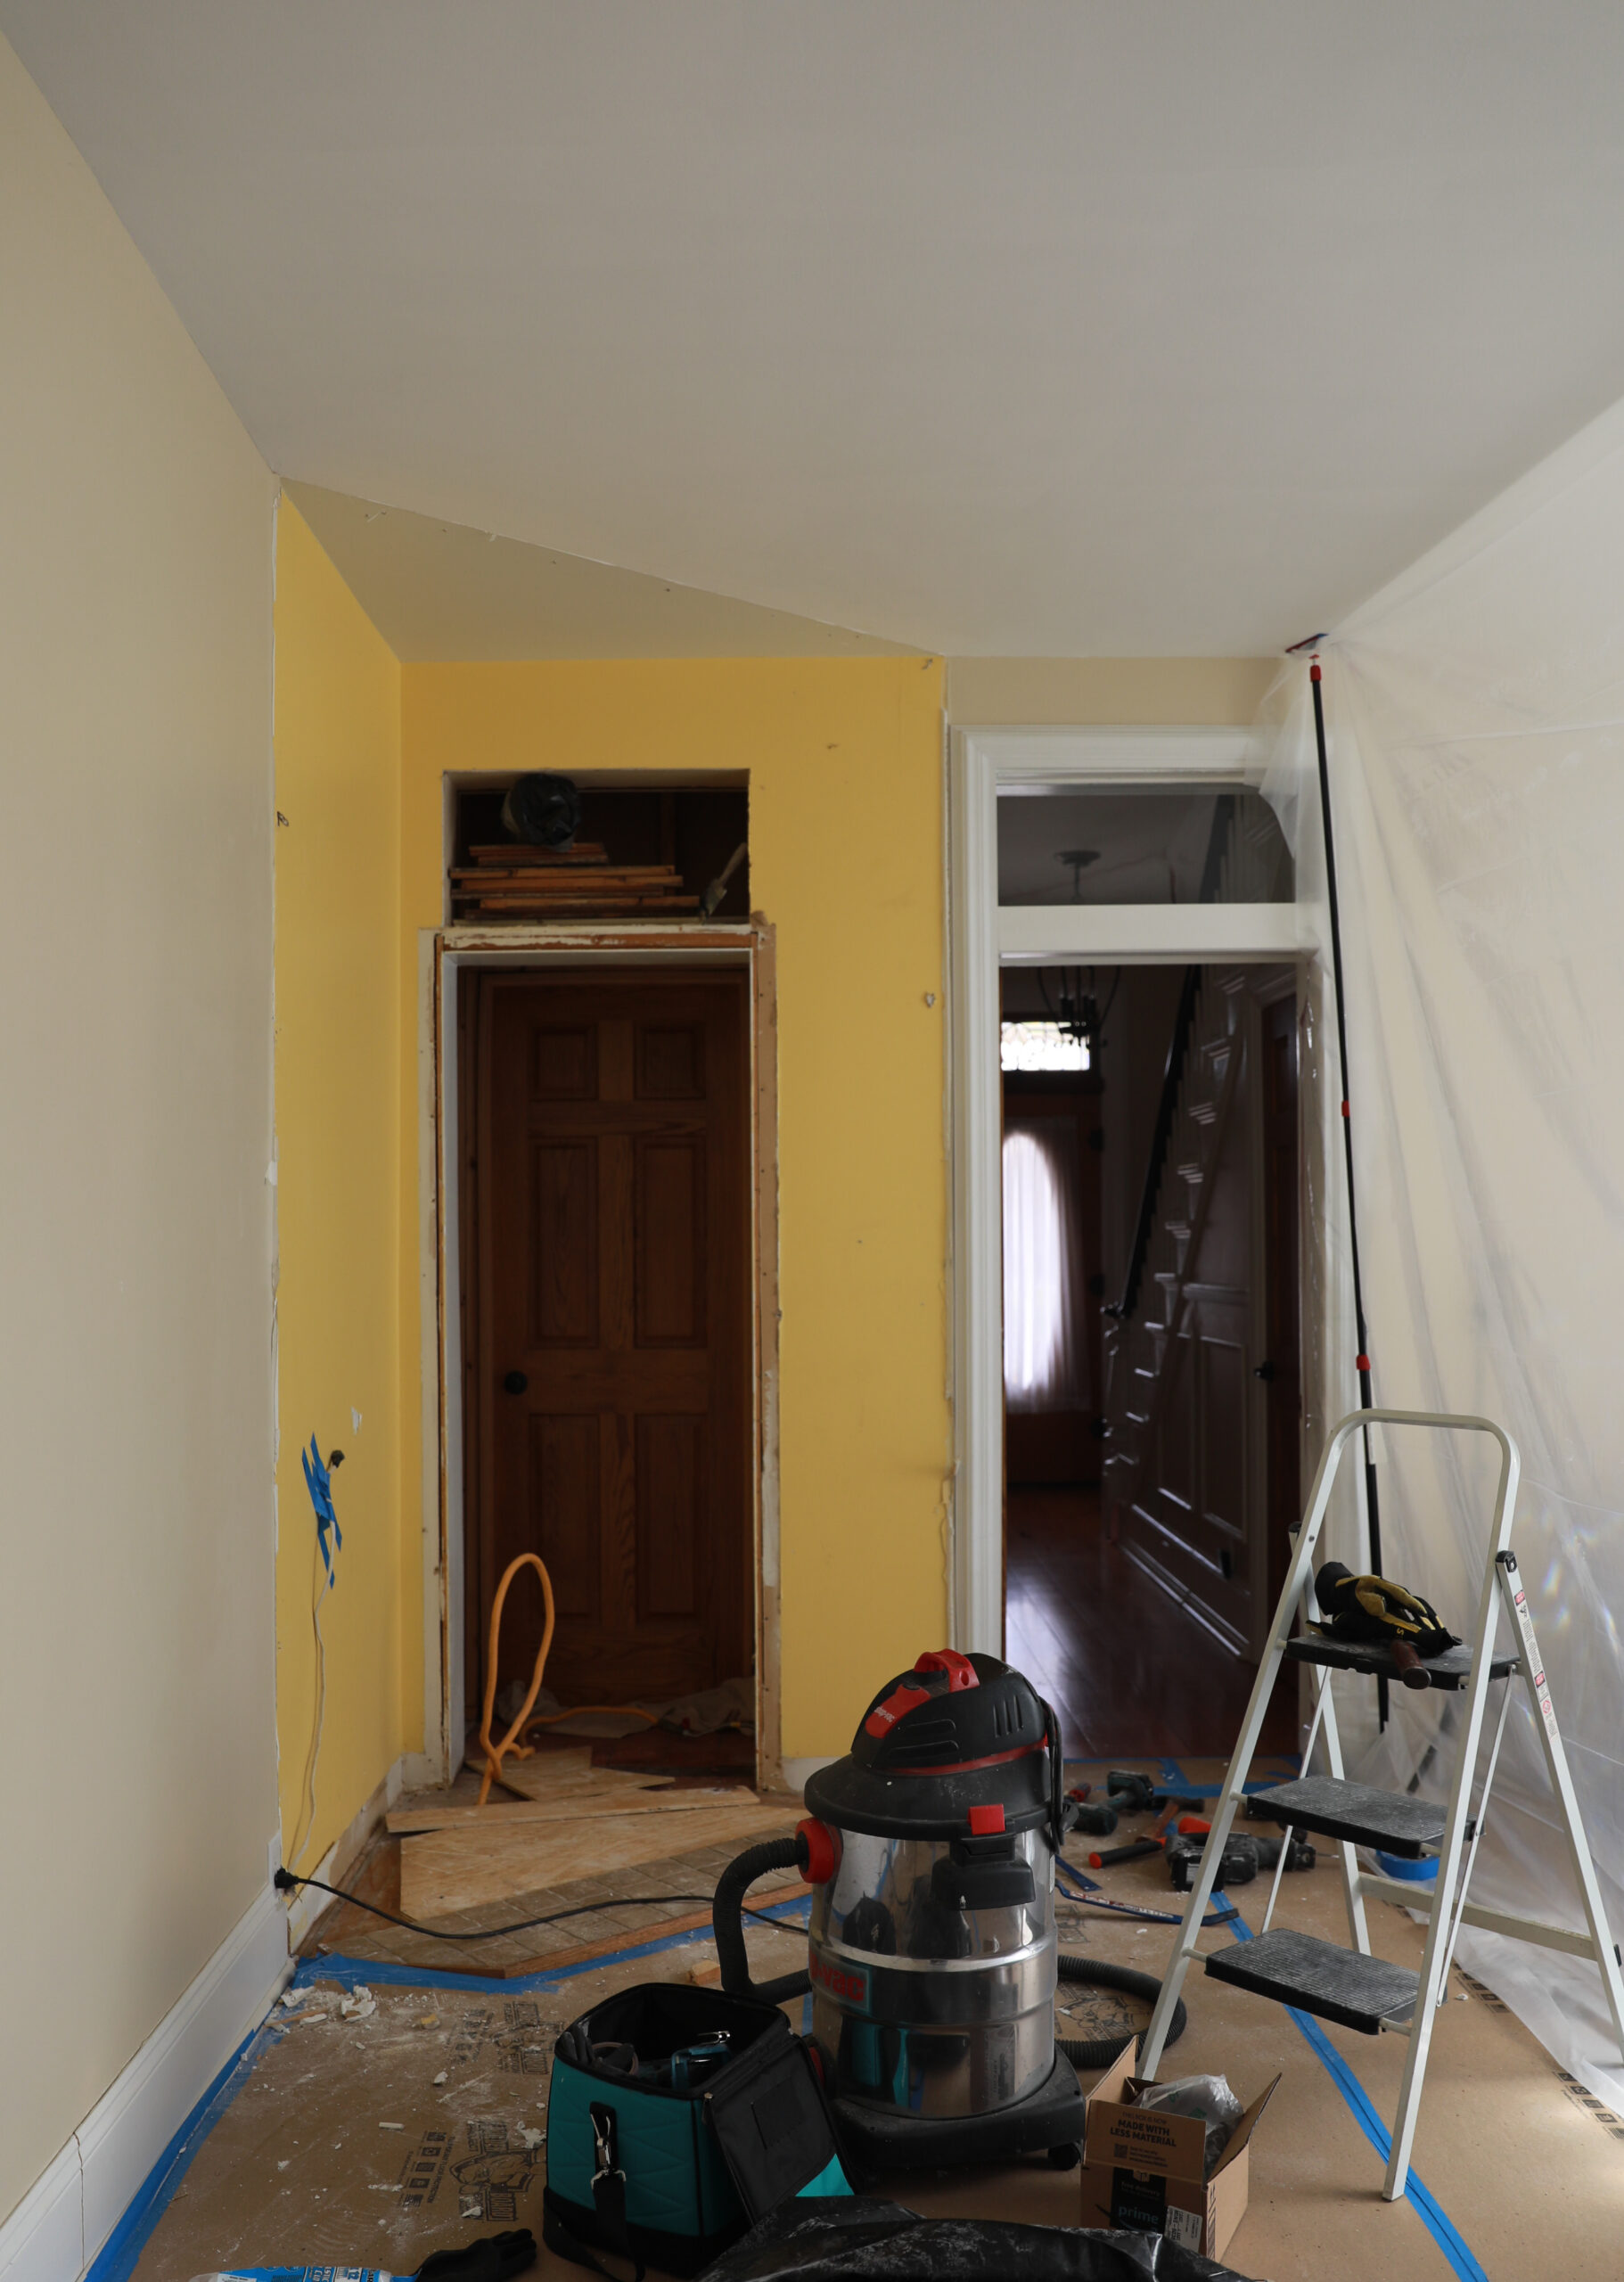
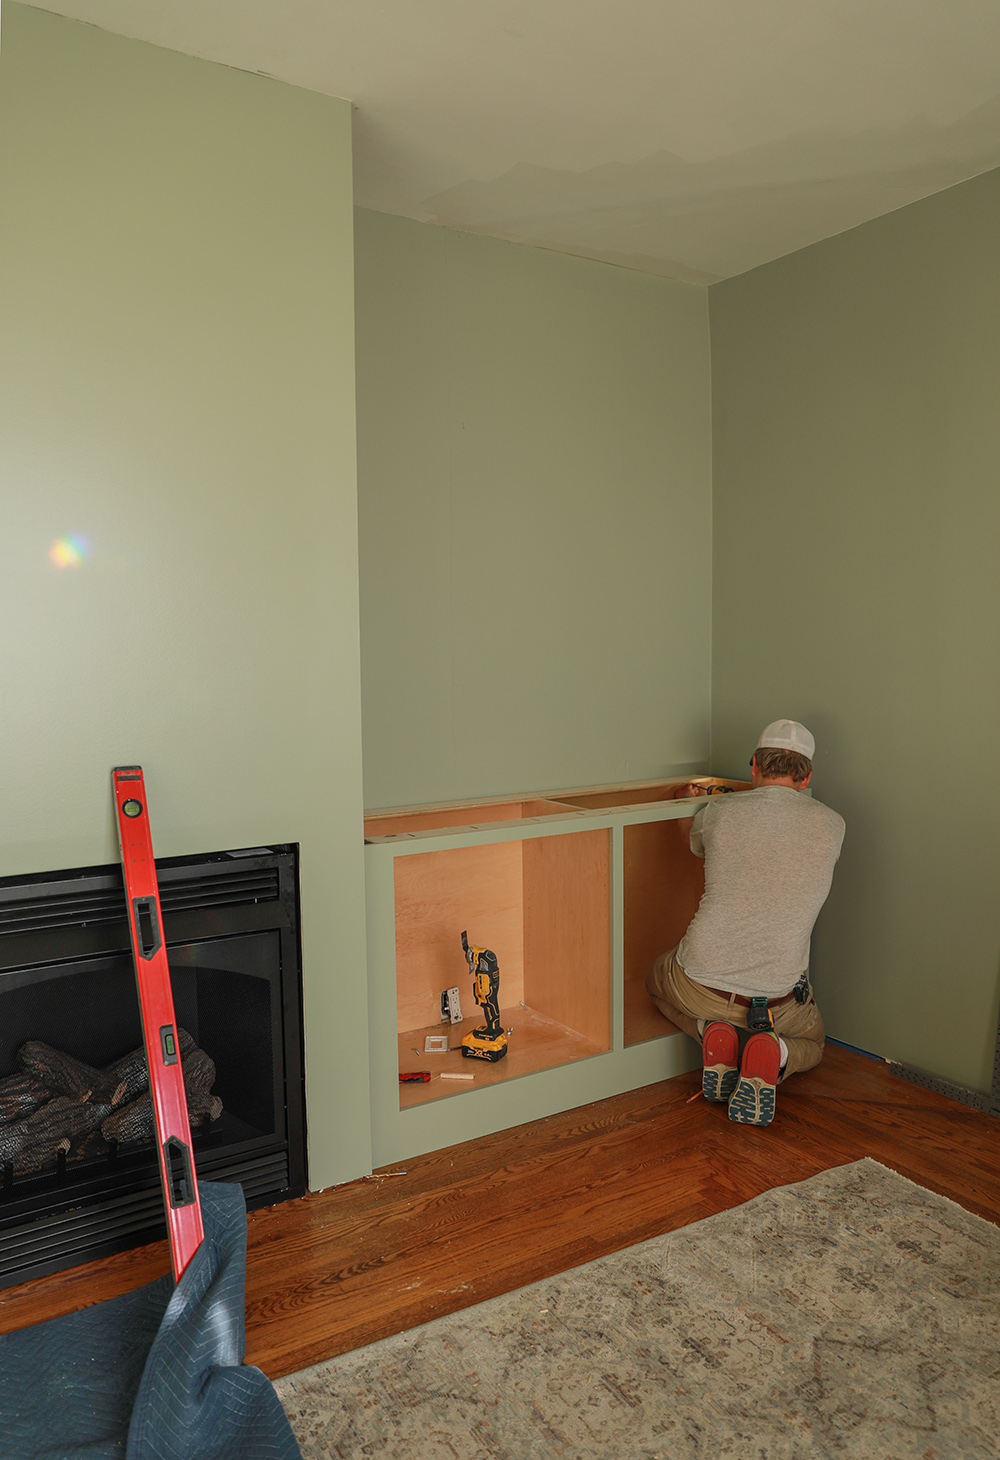
One thing about old homes – there is very minimal closets and storage (you were actually charged additional tax per square foot for closet space!). We decided to remove the diagonal wall, center the fireplace to the room, and build a support surround to allow more options for the room. You can actually see here where the only closet of the first floor is! It is a small closet that is in the front adjoining room.

We initially hoped to install the cabinets and shelving using IKEA units, but with some curved and bowed walls we knew it would be particularly challenging to install.
We decided to get some quotes from local contractors, one of which provided the drawings above! When we weighed costs of pre-fab from different cabinet companies as well as the time it would take to build and install ourselves, it wasn’t worth it to us to attempt ourselves. Granted, we are in a small town in Ohio now so I find prices very reasonable here vs. Nashville! We also knew the quality of these cabinets would last for many years.
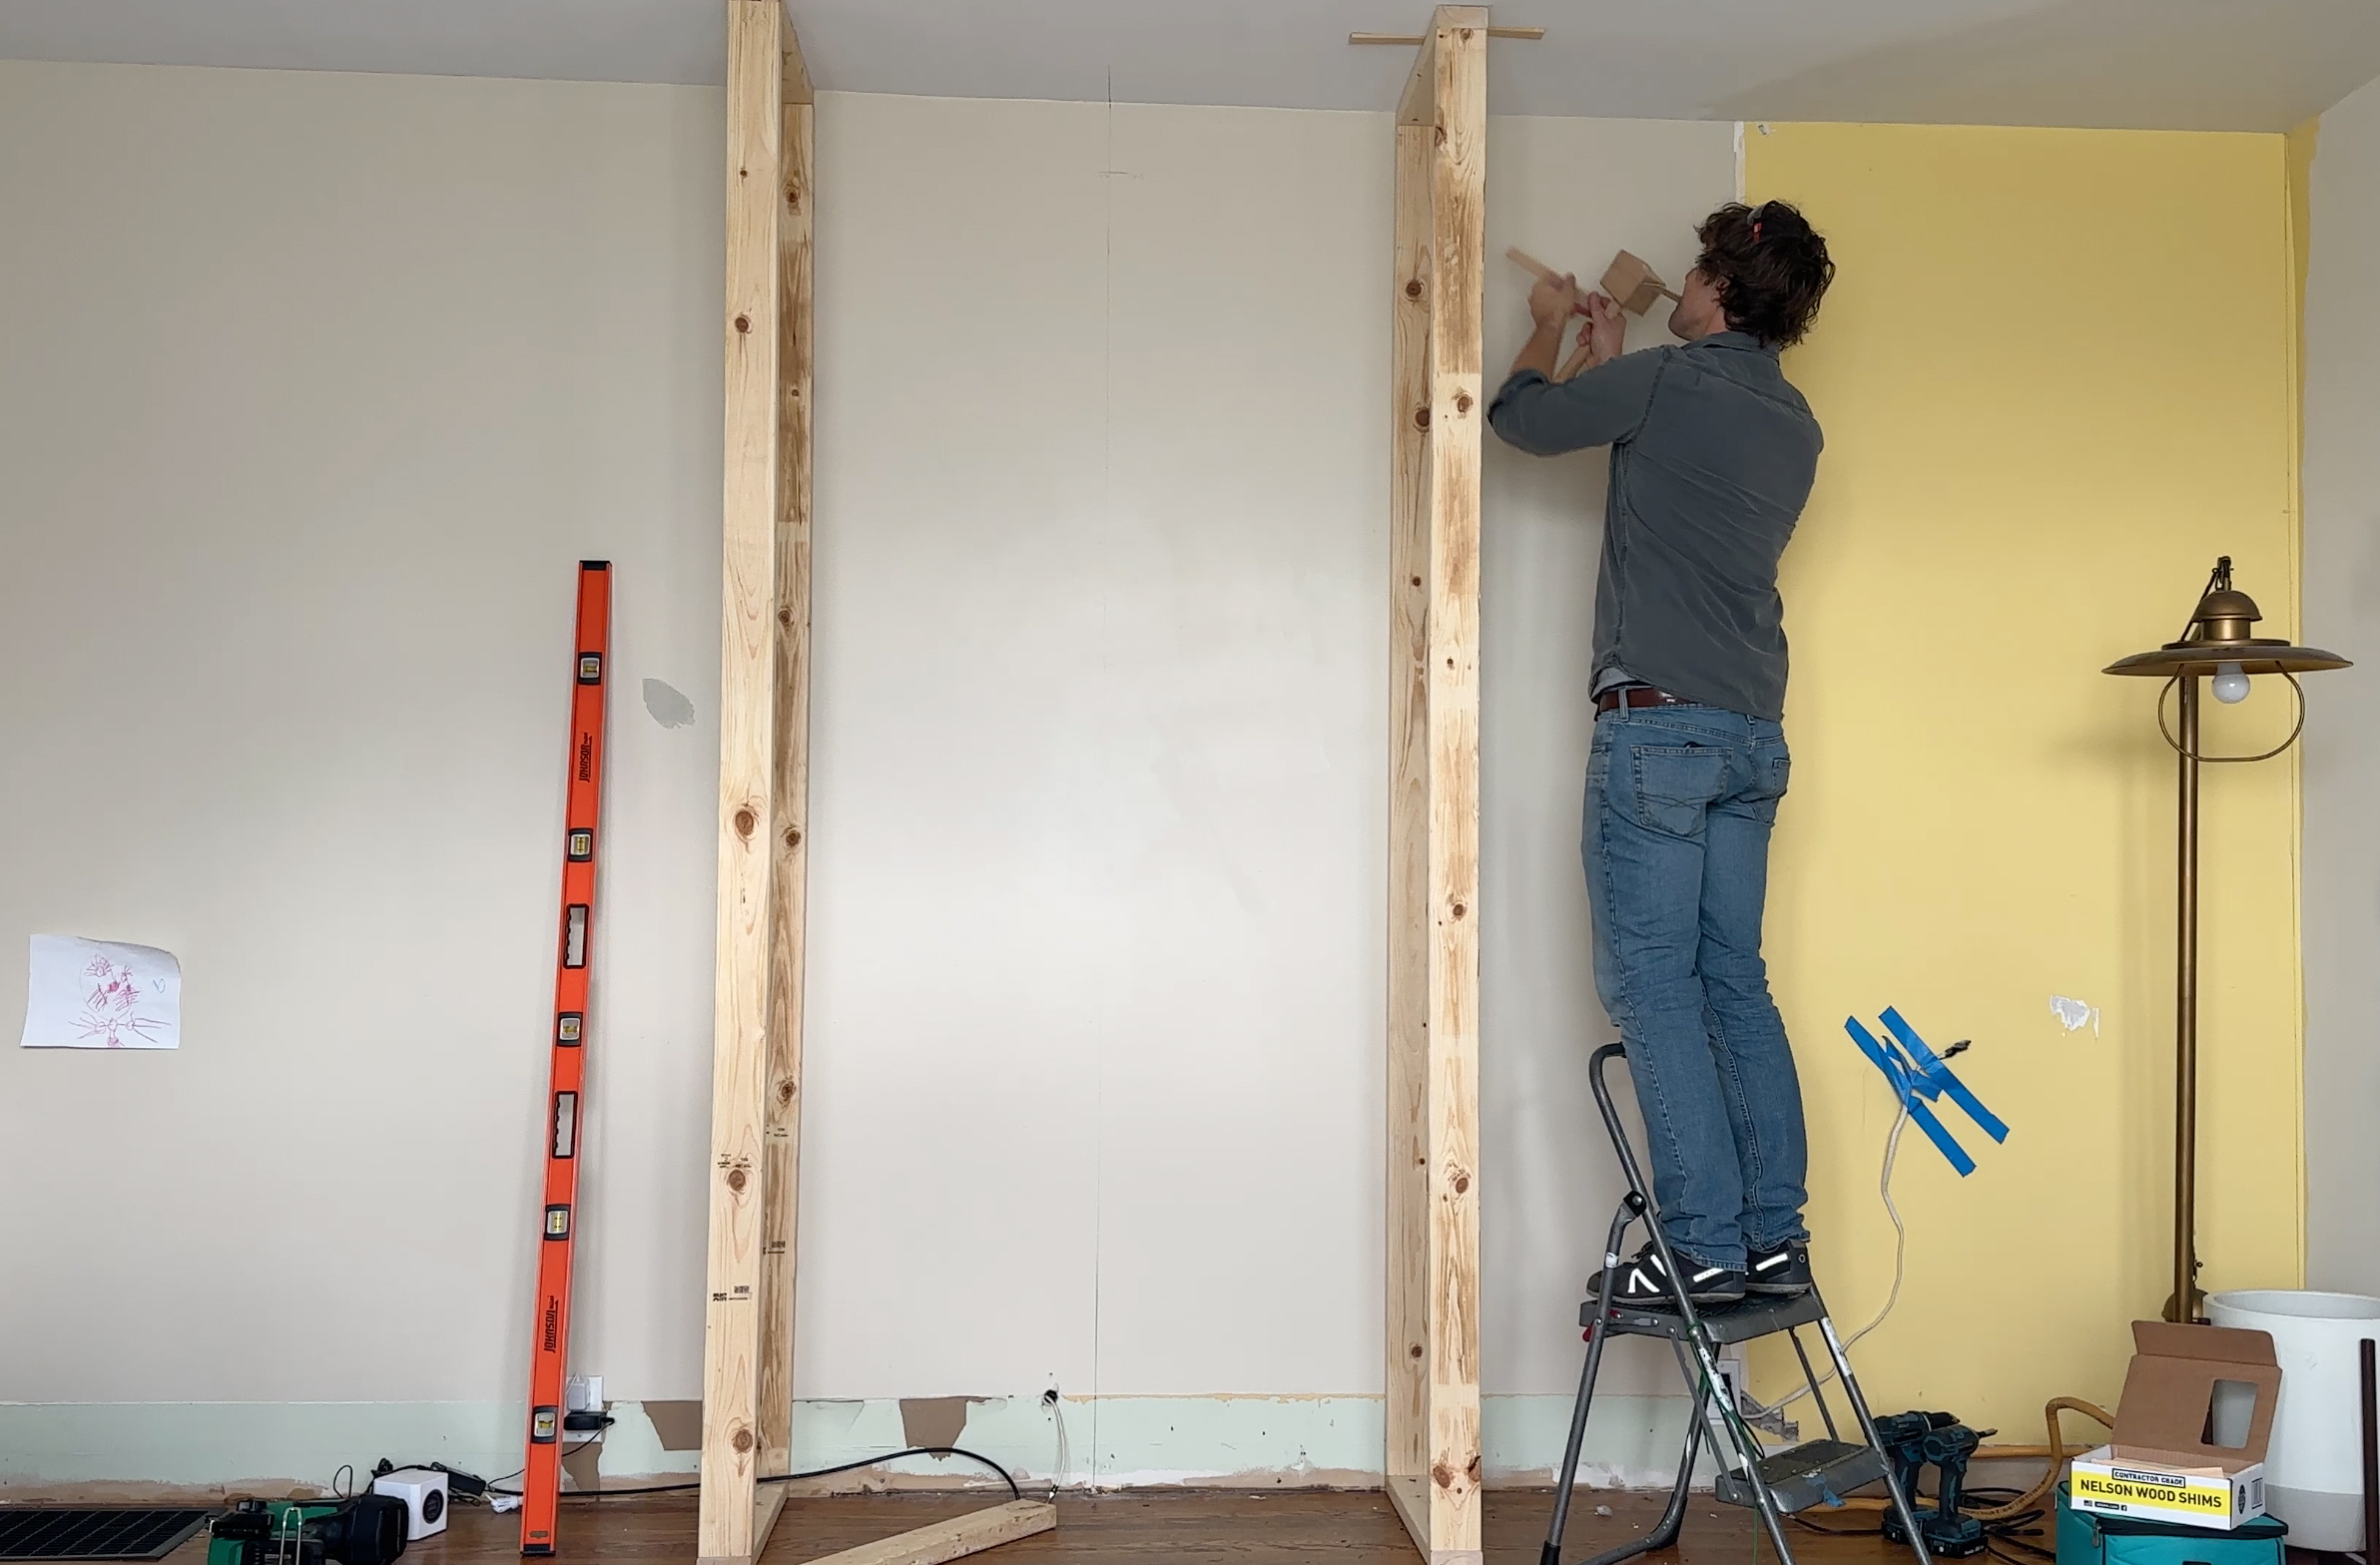
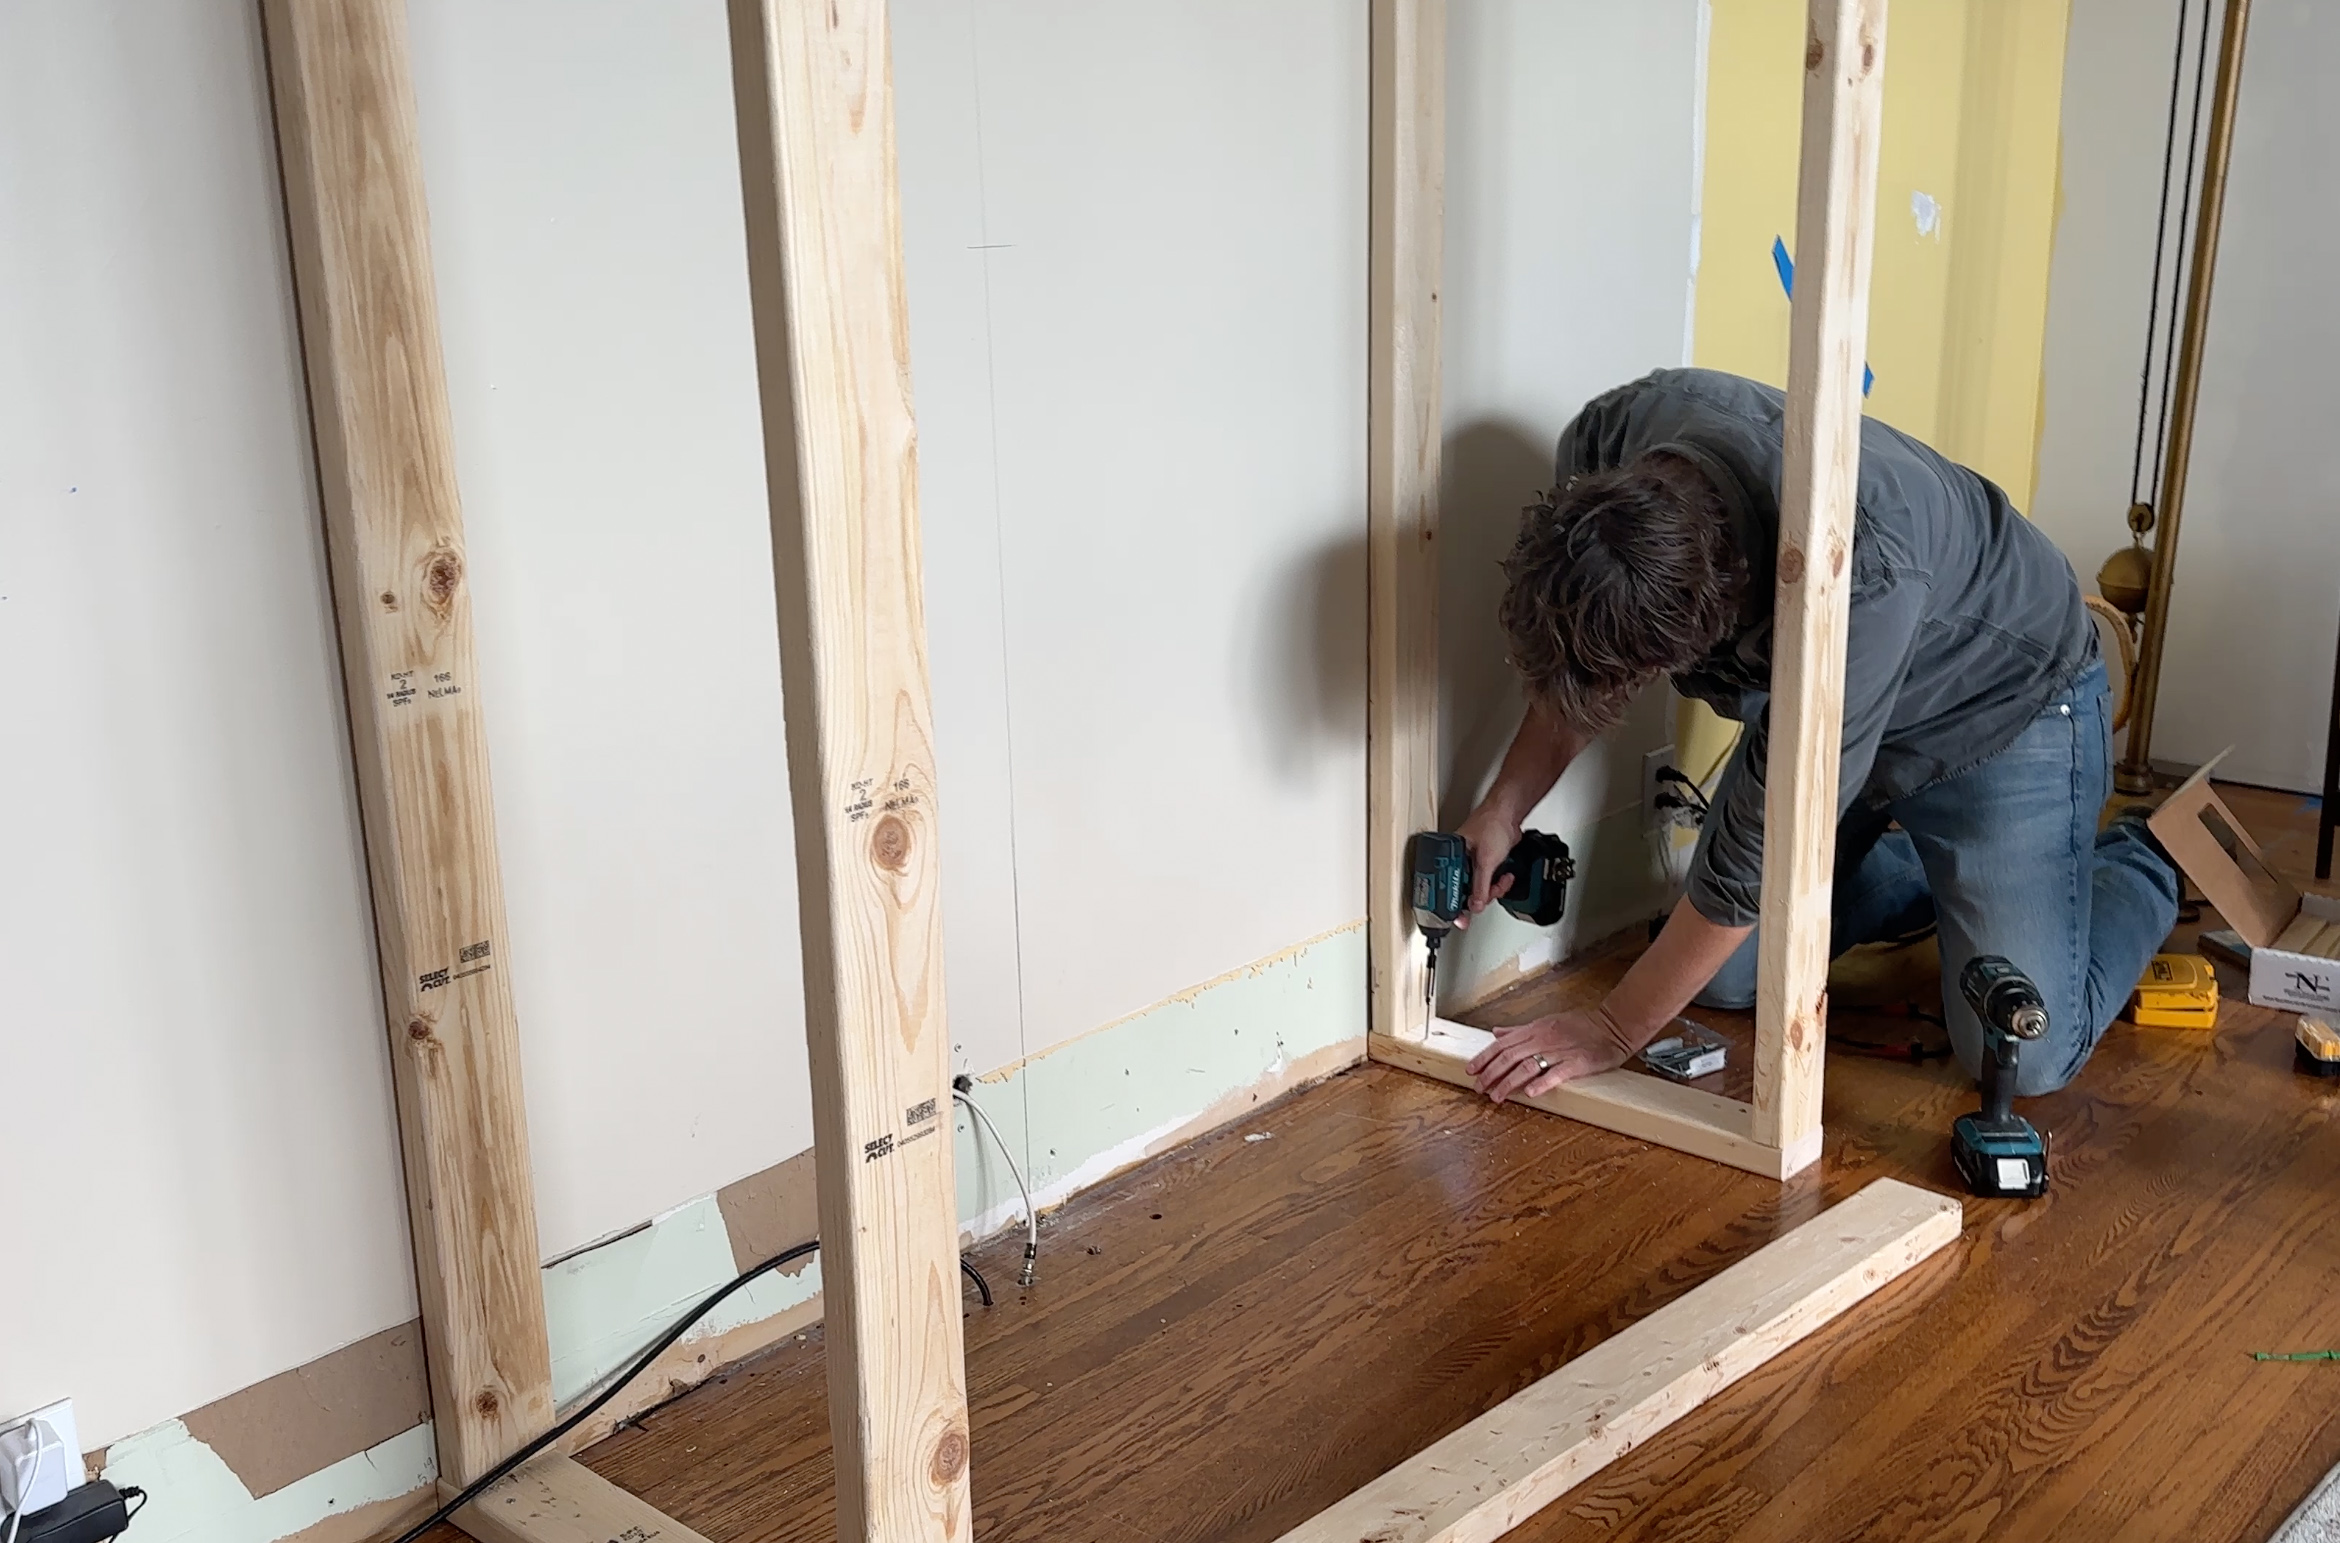

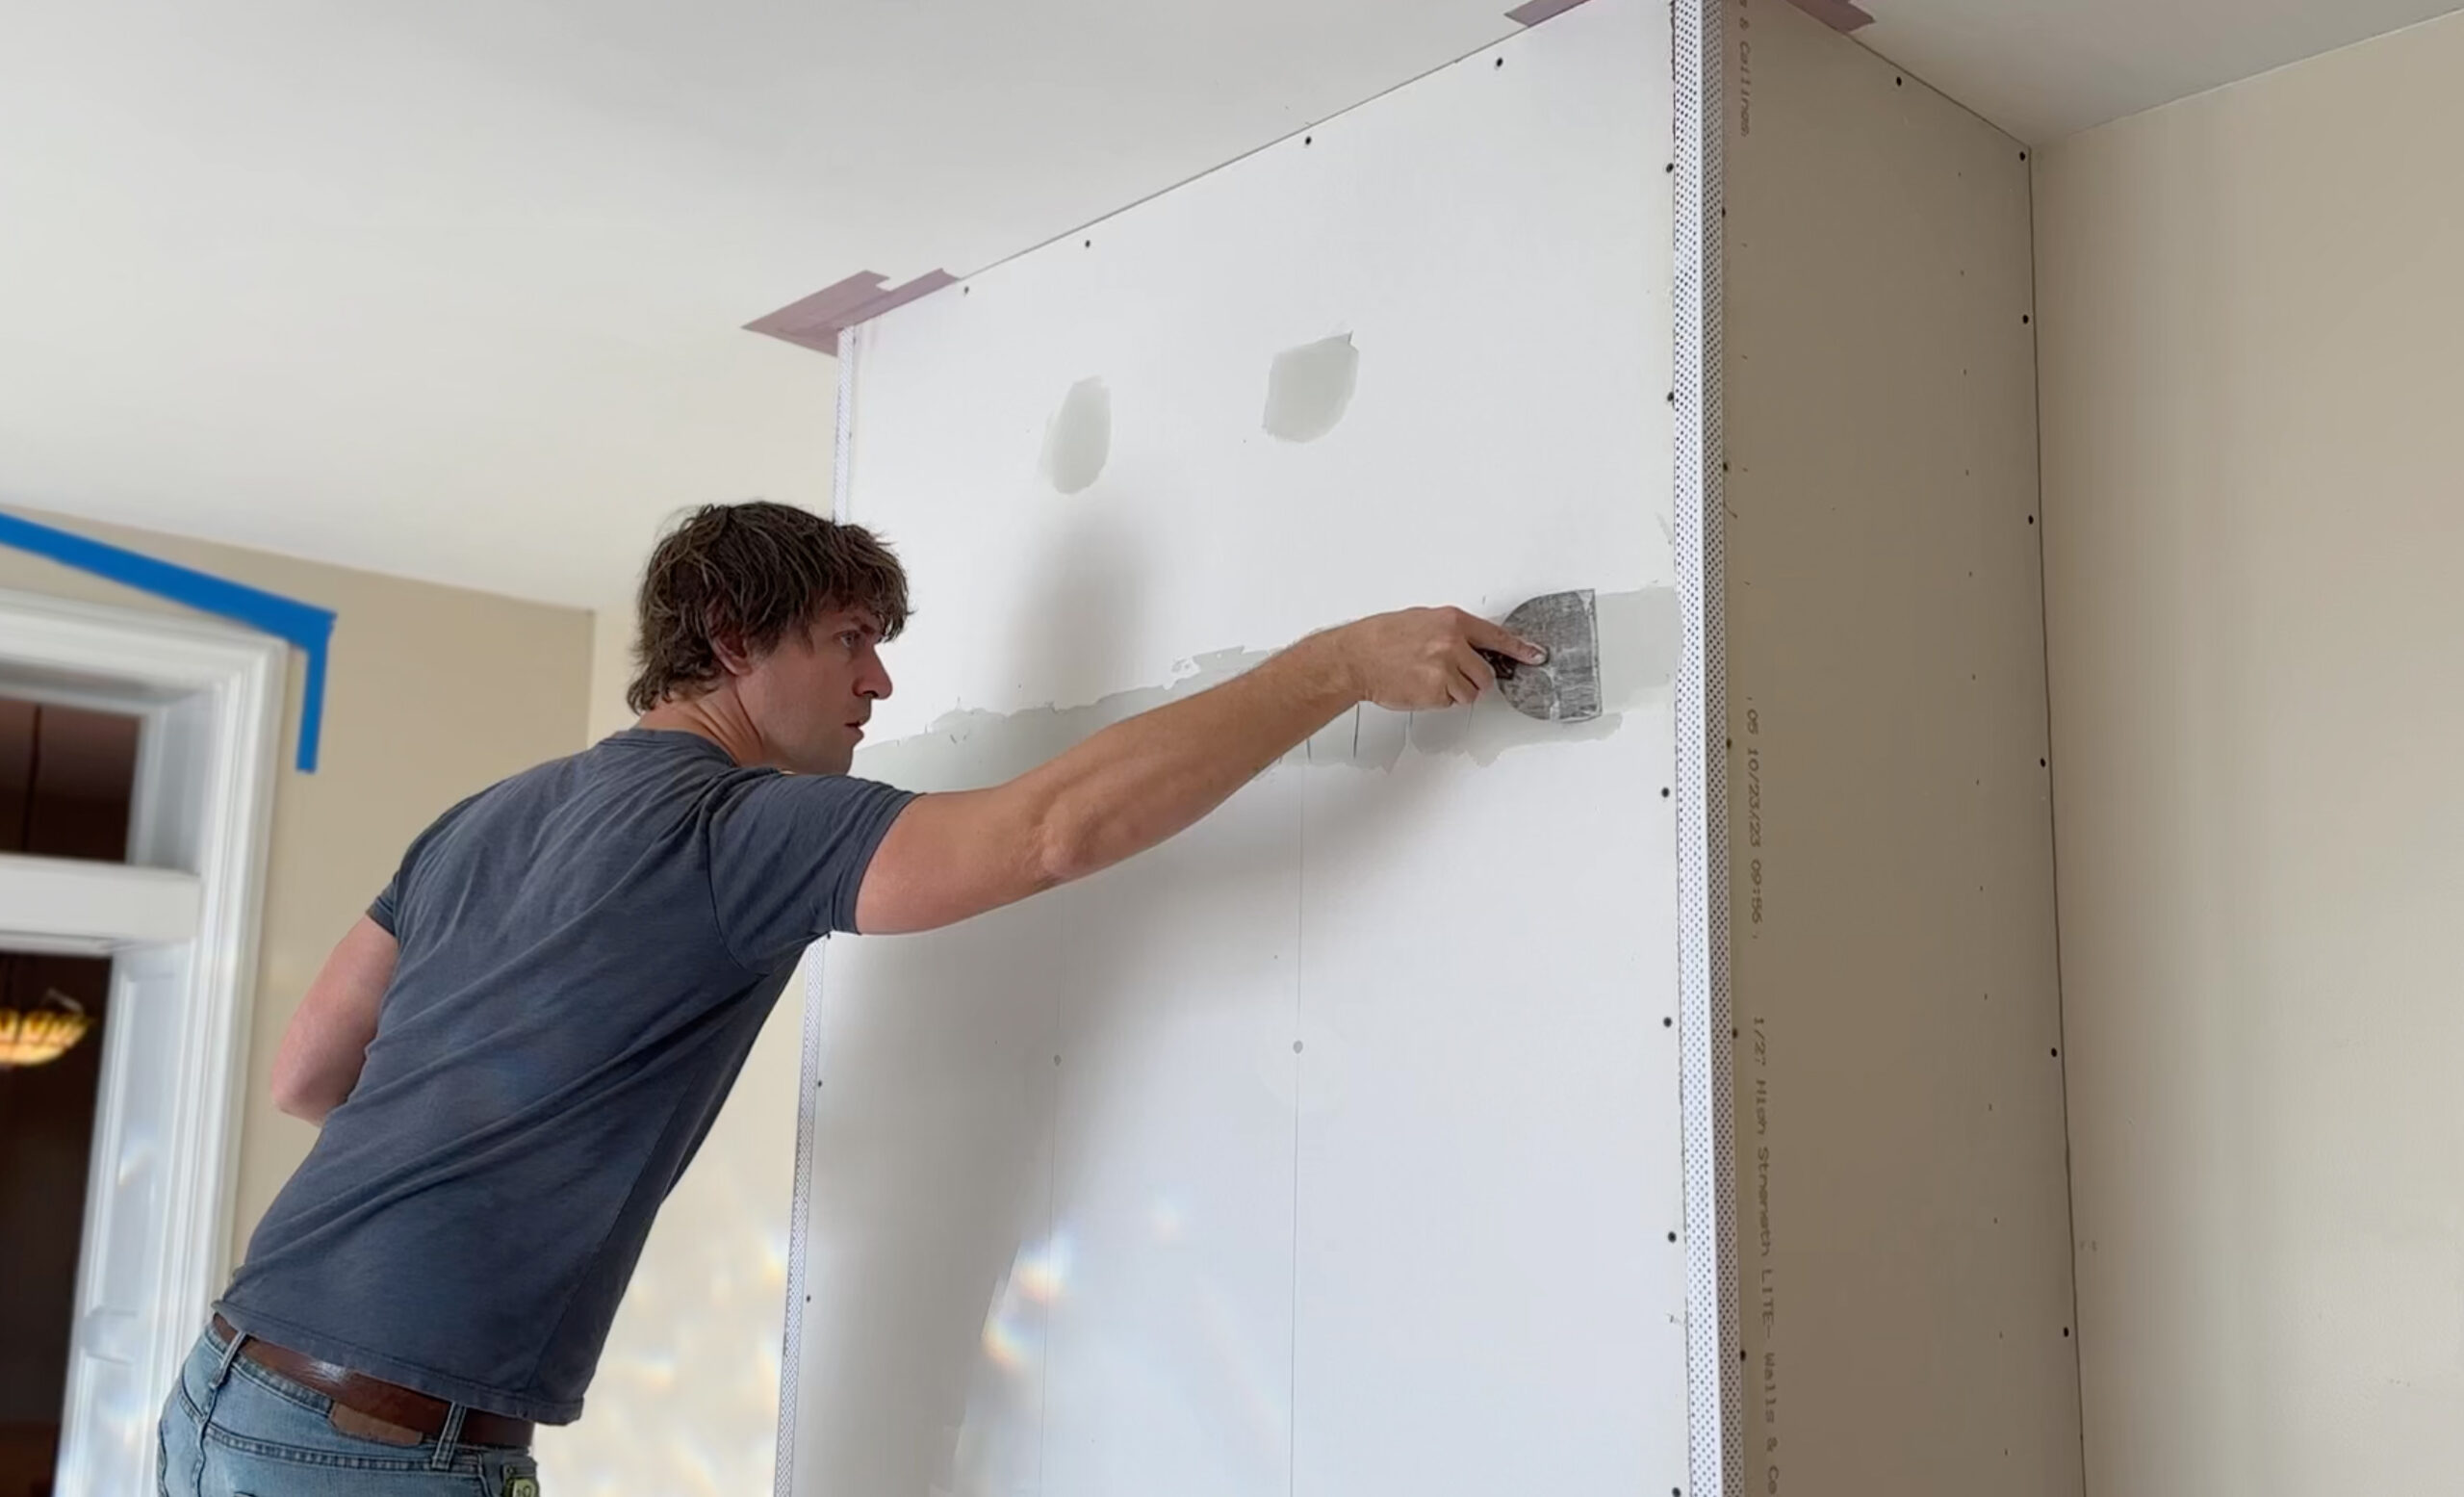
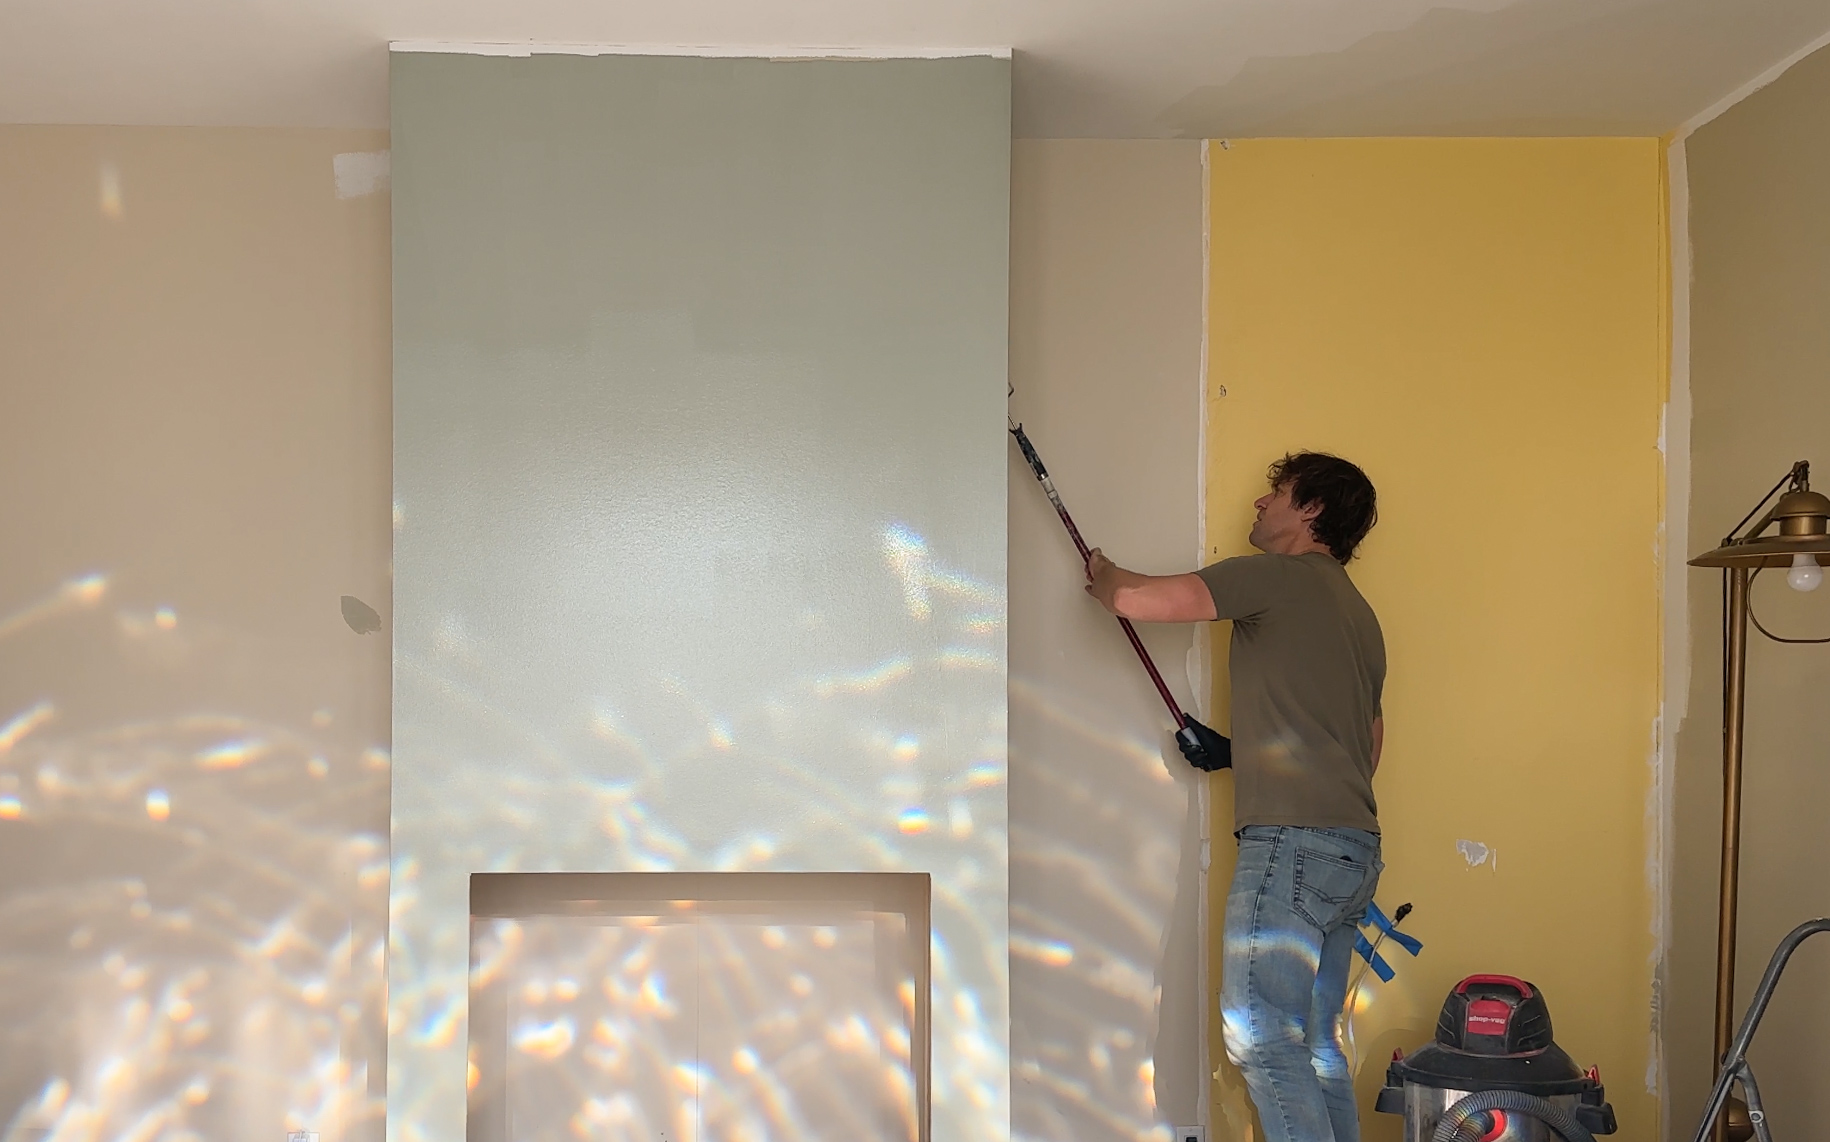
One thing that saved us a good deal of funds was taking on the center surround build ourselves. Gabe built the structural support using 2 x 4’s, drywalled and mudded (this is time consuming which is why companies will charge so high for this), and painted the room! We specifically measured the center supports around the gas insert we already had in order for it to easily slide in and connect when it was finished.
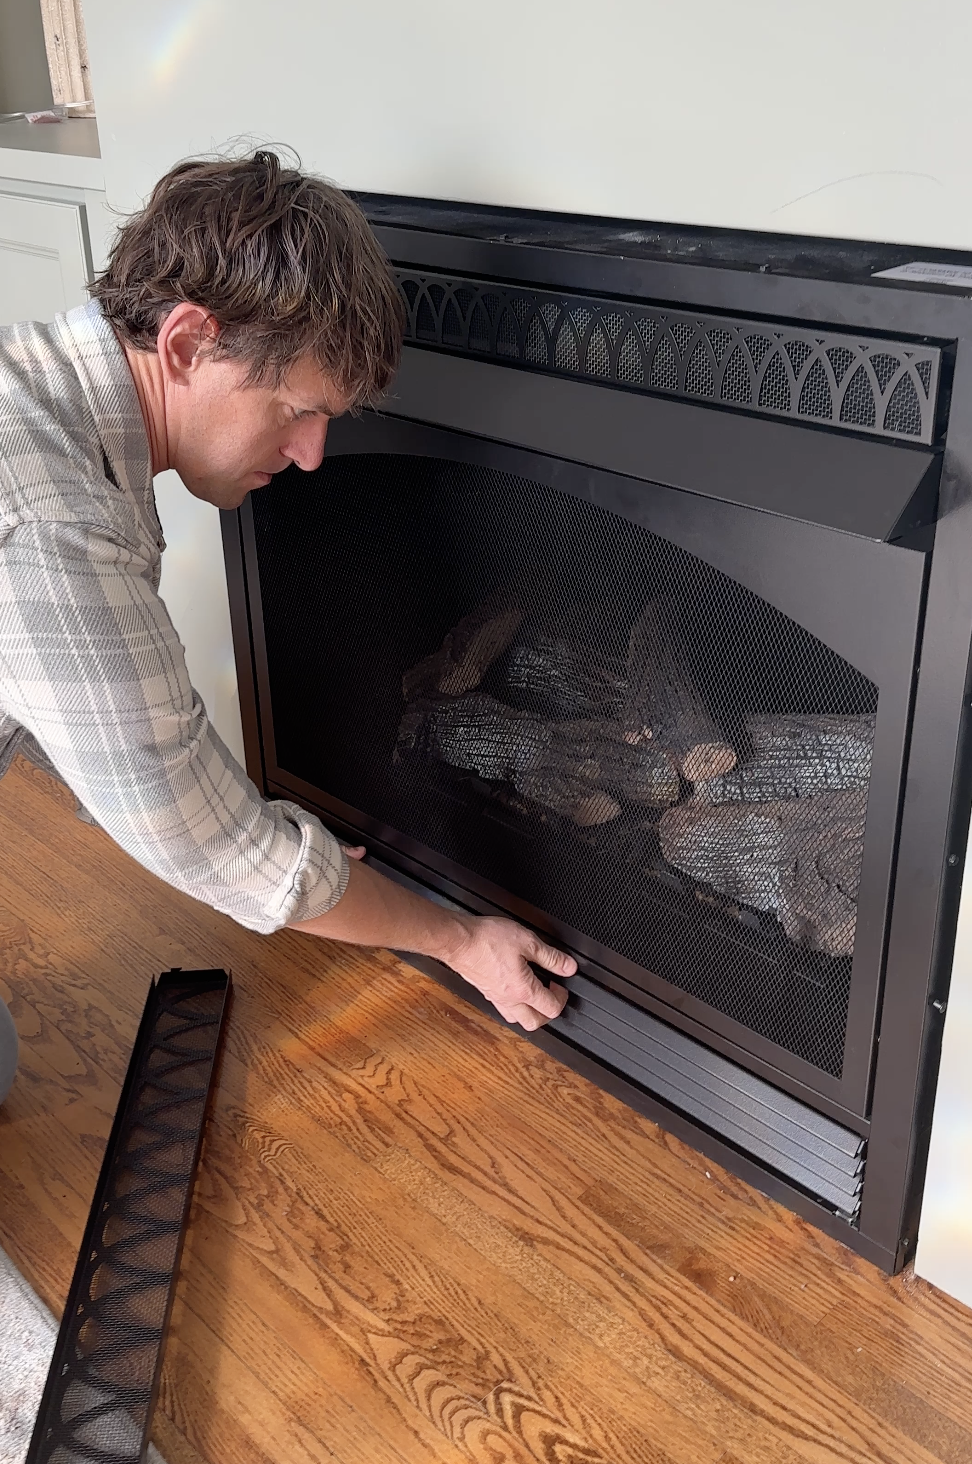
This vent free gas fireplace came with the home, and was brand new so we worked with this model! We were researching options for replacing the grates for a more ornate design that worked with the mantel we chose. Gabe found these decorative louvres which ended up working out really well! It was a simple change to update the look of the gas insert!
Important side note: We had an electrician come out to make sure our gas line and electric would be okay at the center of the room. Our gas line was very long fortunately so it was easy to connect. (It hides underneath the cabinets.)
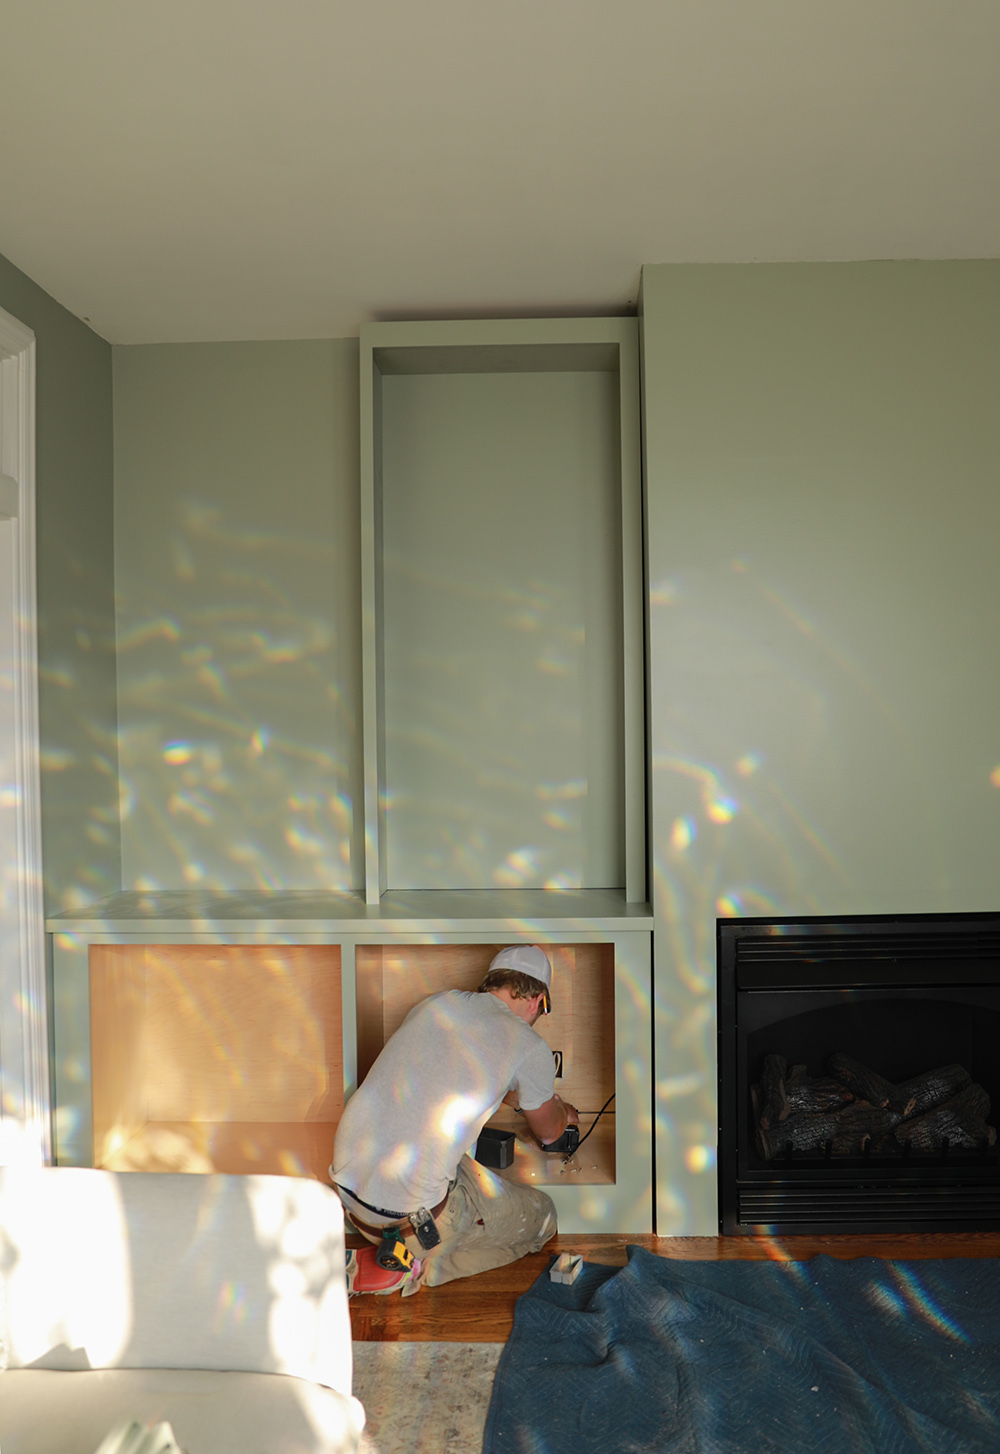
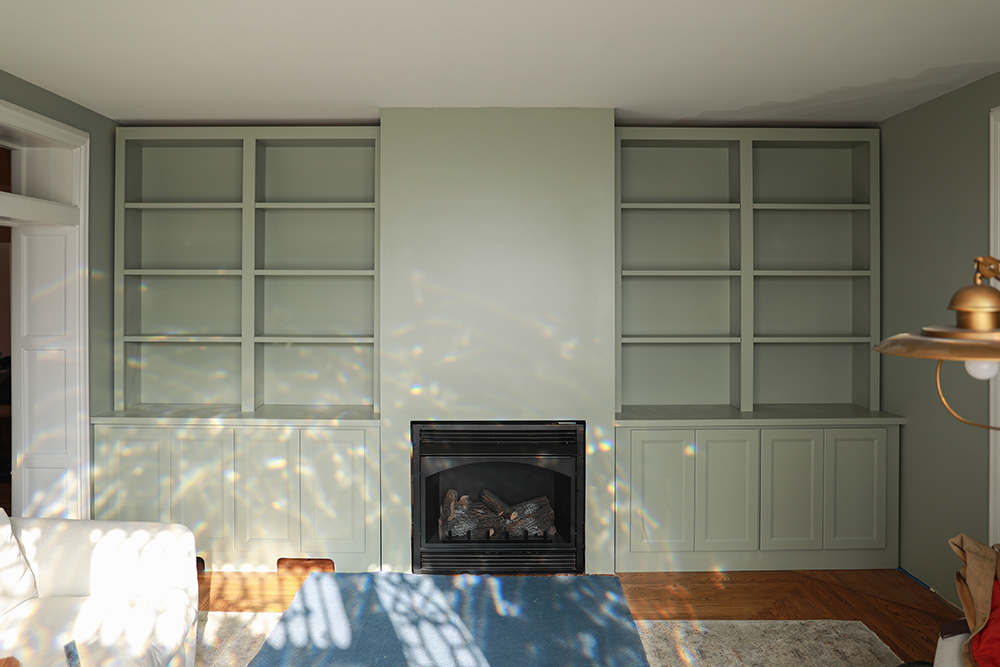
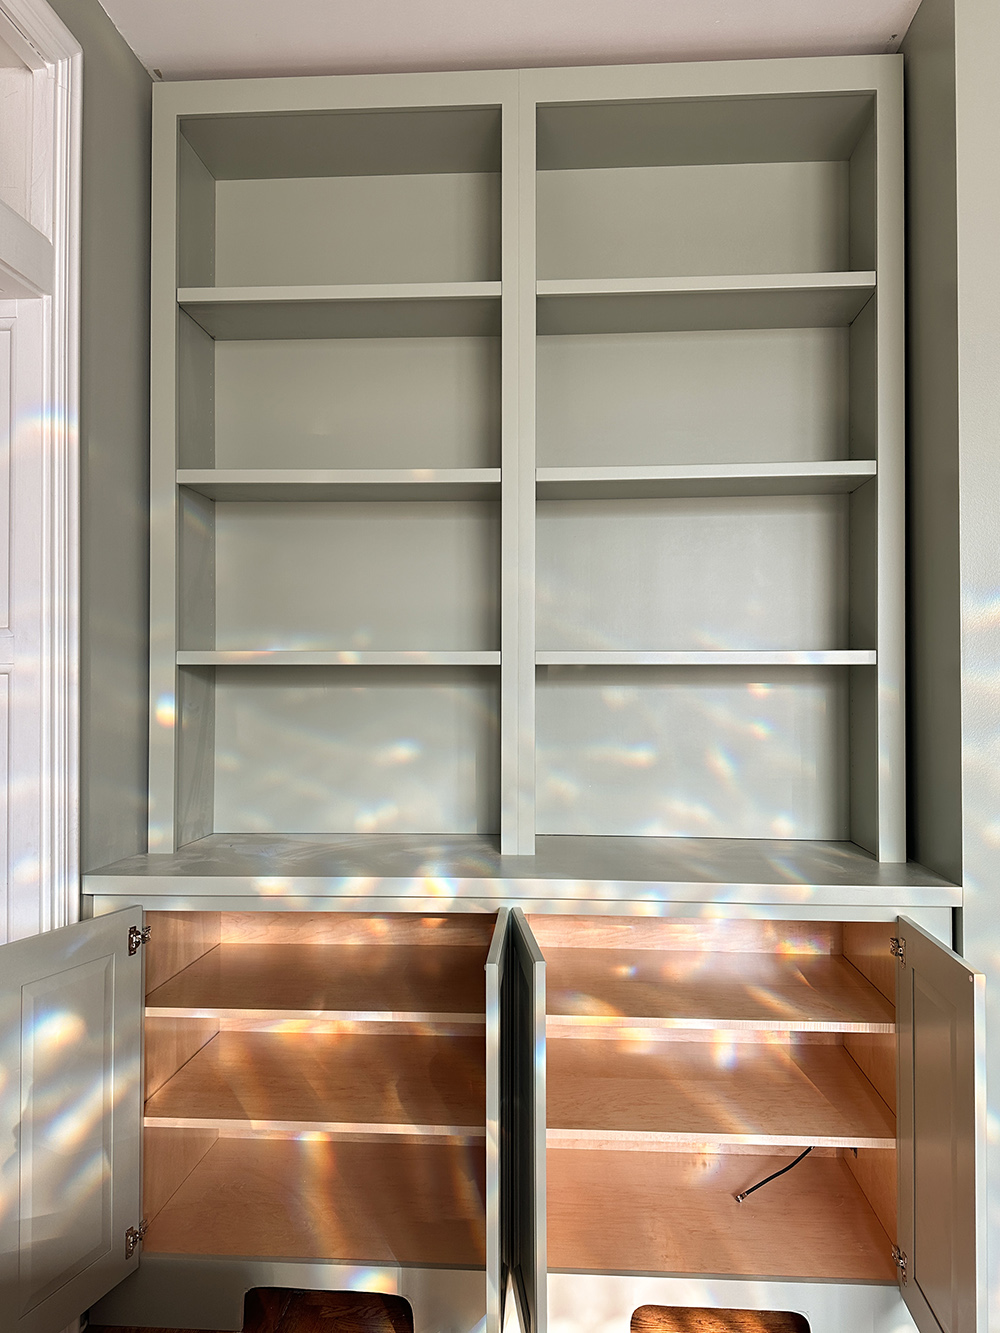
Okay back to the install! Once the structural support center was finished, our contractors were able to install the cabinetry and shelving. This was all pre-measured, made, and painted in their workshop. Install only took 2 days total which around the holidays was so refreshing! I know it would have taken us weeks on end with our choppy schedule! We chose to add an outer face frame that installed right over the double bookshelf units. This made it all look flush and seamless to the wall. The bookshelves are adjustable and the cabinet shelves are as well.

This room felt so open and inviting after a good coat of paint and the new layout. I knew how much I loved our old kitchen color, and chose a similar one for this room. It is a timeless and peaceful color called Blue Gray by Farrow and Ball.
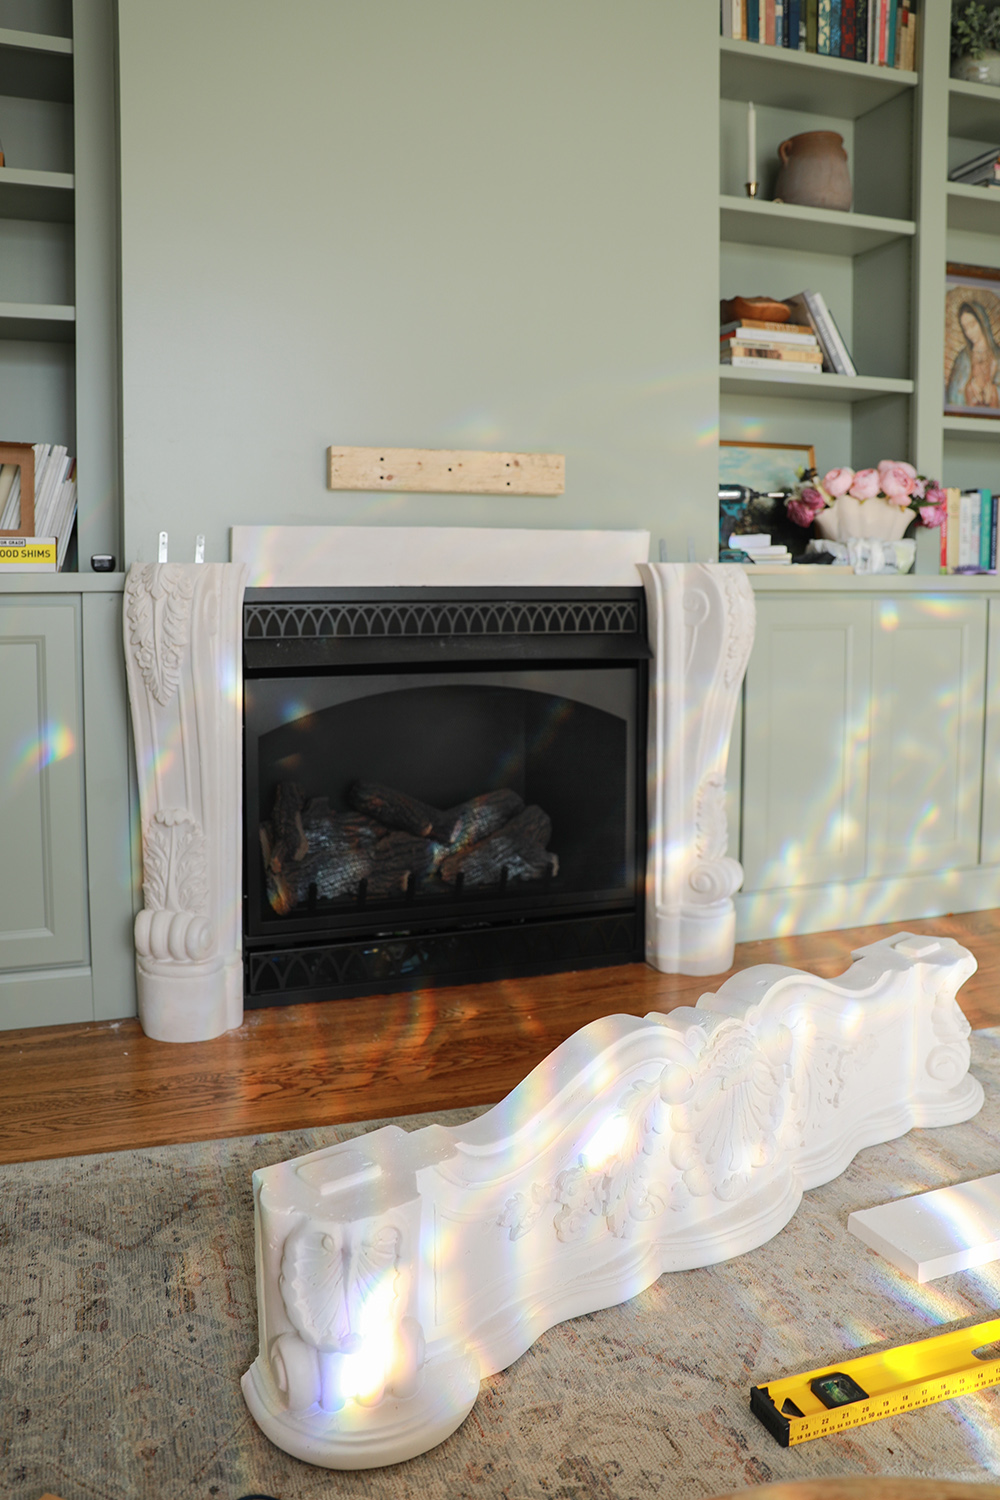
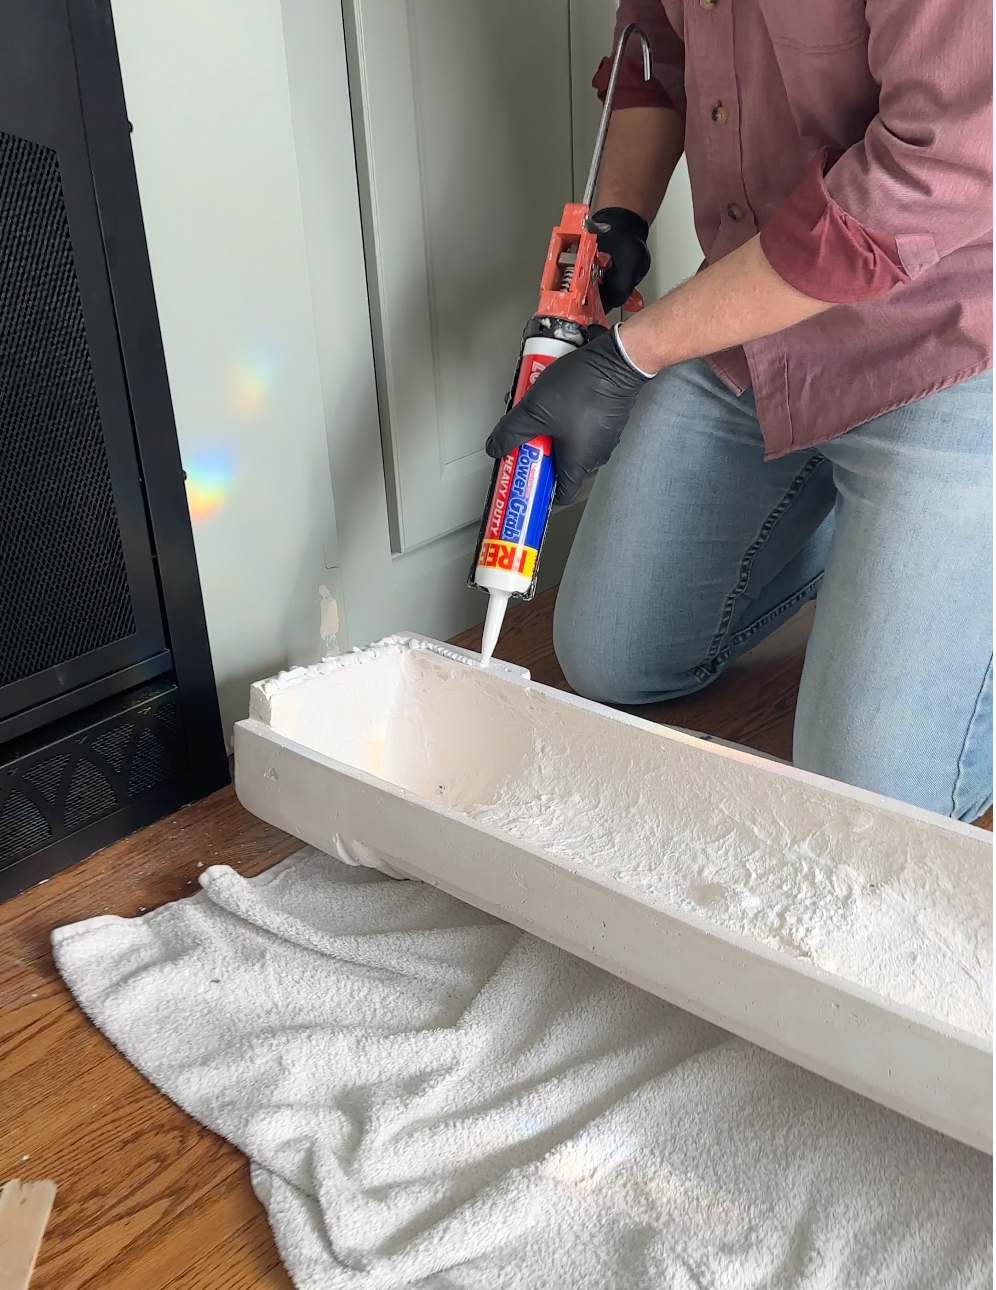
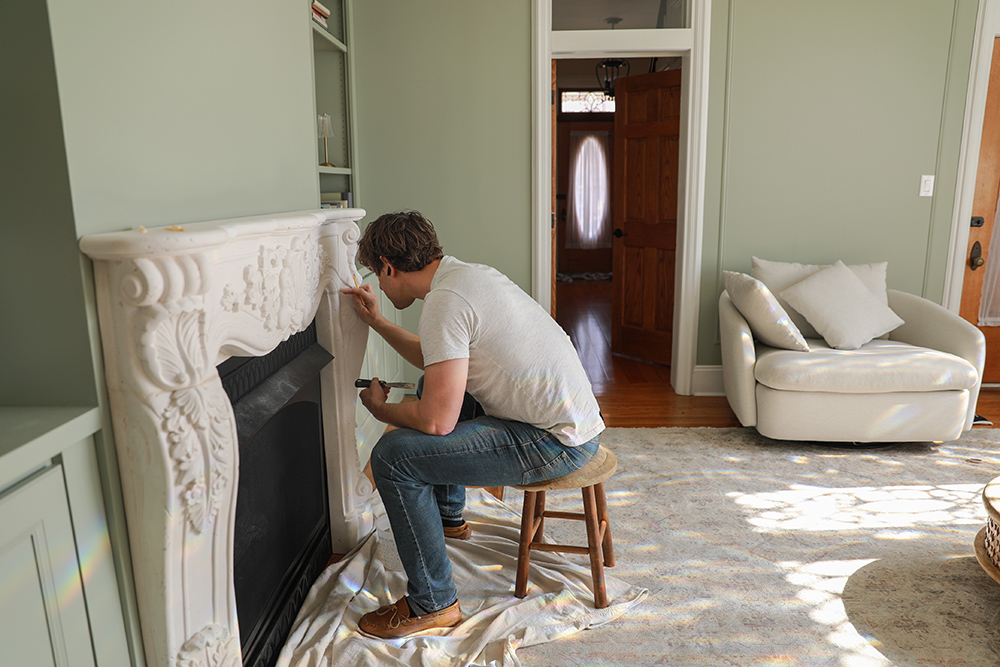
After bookshelves were installed we were able to proceed with adding the mantle and fireplace surround. In case you missed, we shared about historic inspired fireplace surrounds and where to find them here. The one we chose this pre-cast stone fireplace that came in three separate pieces. We purchased ours from Home Depot. It comes with an attachment kit, additional filler pieces, and a plaster mortar material to fill in the gap areas. It is pretty heavy so you may need an extra hand to get it inside upon delivery and for install.
Historic Fireplace Surround Installation Guide:
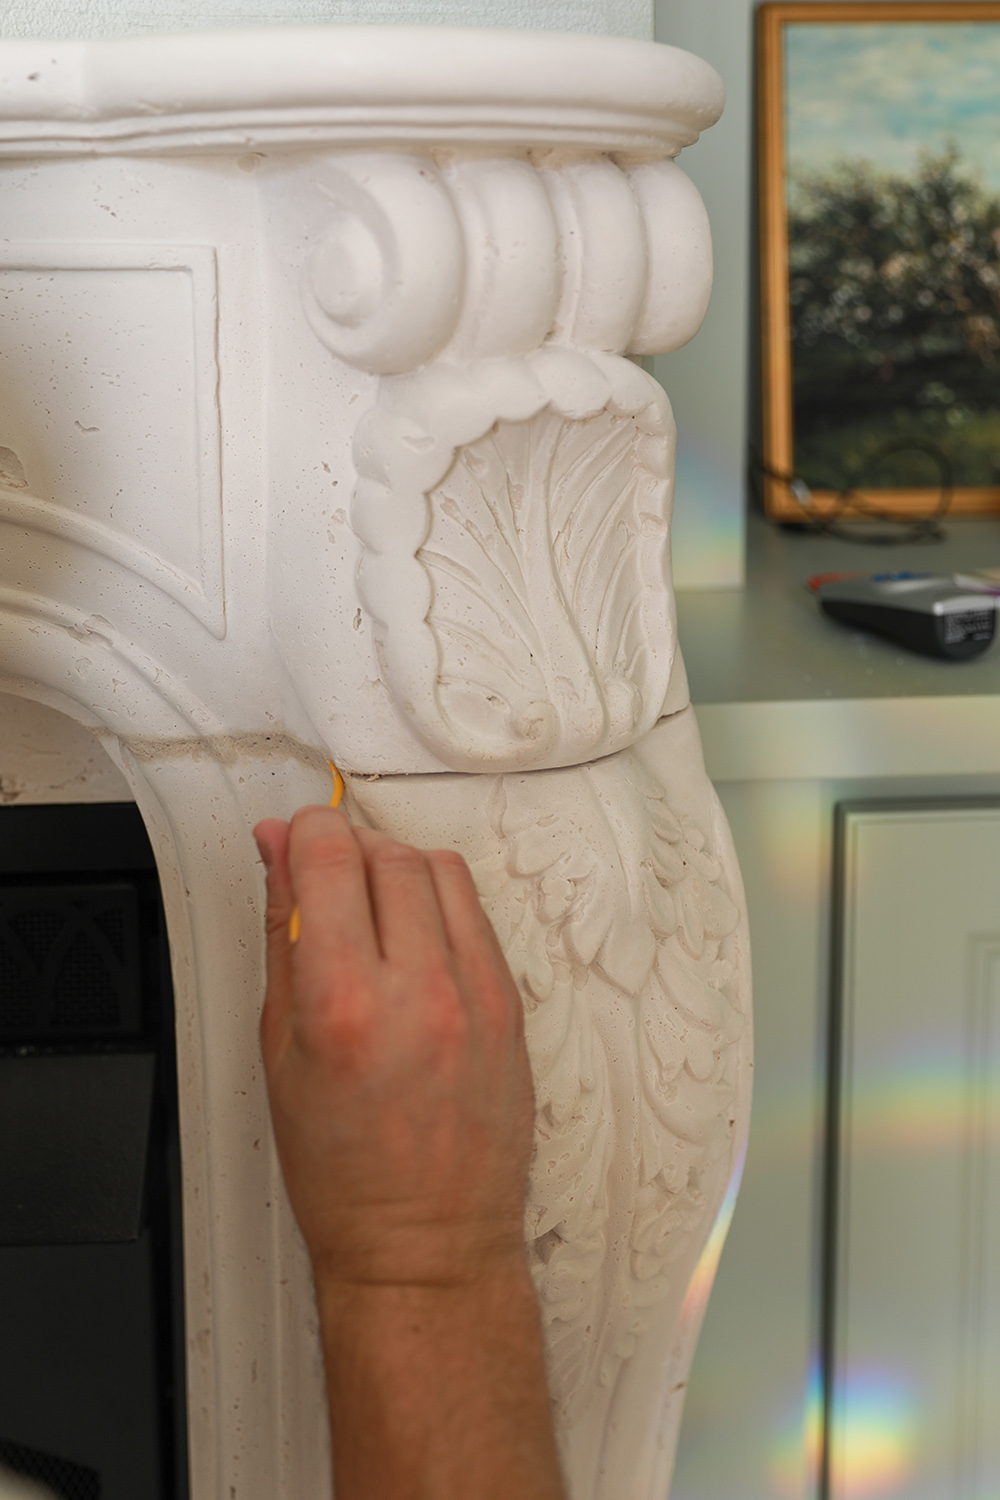
1. Lean your pieces against the place you wish to install to make sure everything will fit well around your gas insert. You can assess then if you will need the filler pieces. (We used one of three. You can see the filler piece behind the curves of the top of the fireplace surround.) This is also when you can make sure things are level and mark with a pencil where about the pieces meet the wall. We had to do some slight modifications to the back end of the surround so that the fireplace insert would fit tightly on against the surround. This was easily done with a common bastard file (yes that is the actual name of that type of file!).
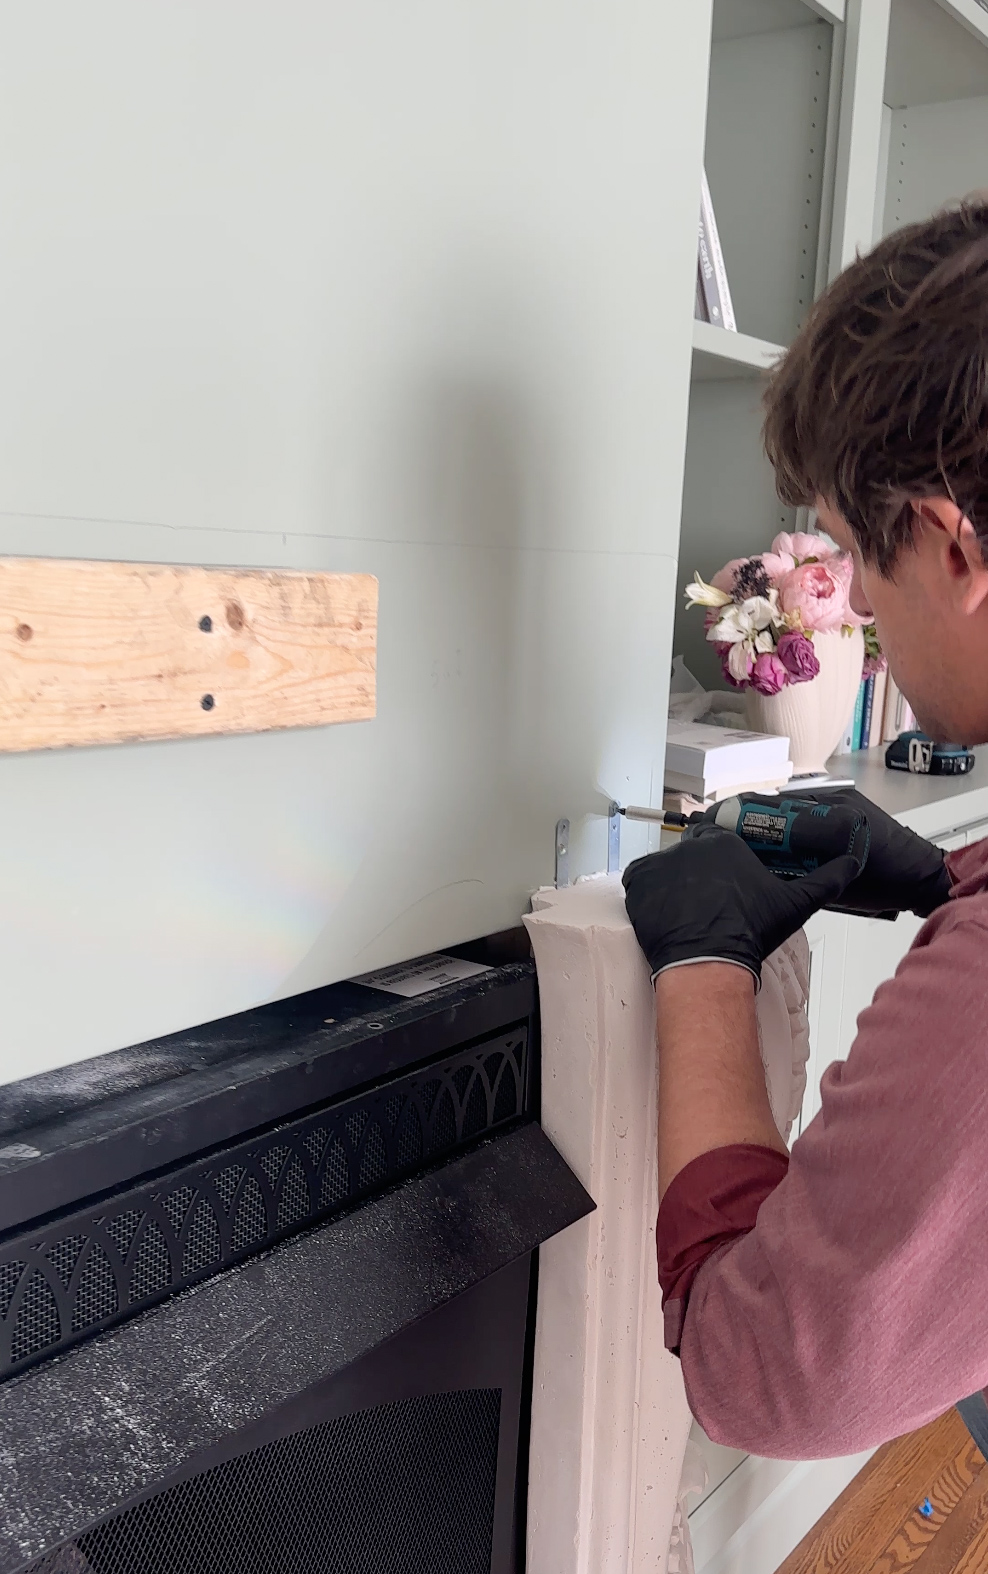
2. Install a 2 x 4 support block – Gabe chose to screw in a 2 x 4 piece to our support wall where the top piece of the fireplace surround could rest on for additional support and also helps to hold the mantle in place once construction adhesive is applied.
3. Using an angle grinder with a concrete cutting blade, trim any filler pieces to the needed size. Be sure to do this outside wearing a mast as it produces a lot of fine dust.
4. Apply a strong construction adhesive around the edges of your first side piece before lifting to set into place. Push against the wall to secure then using the power drill, secure the metal bracket pieces that are already attached to the top of each side piece to the wall. If you are using the side filler pieces, be sure to glue these to the legs before installing the legs to the wall. Repeat on the other side of the fireplace.
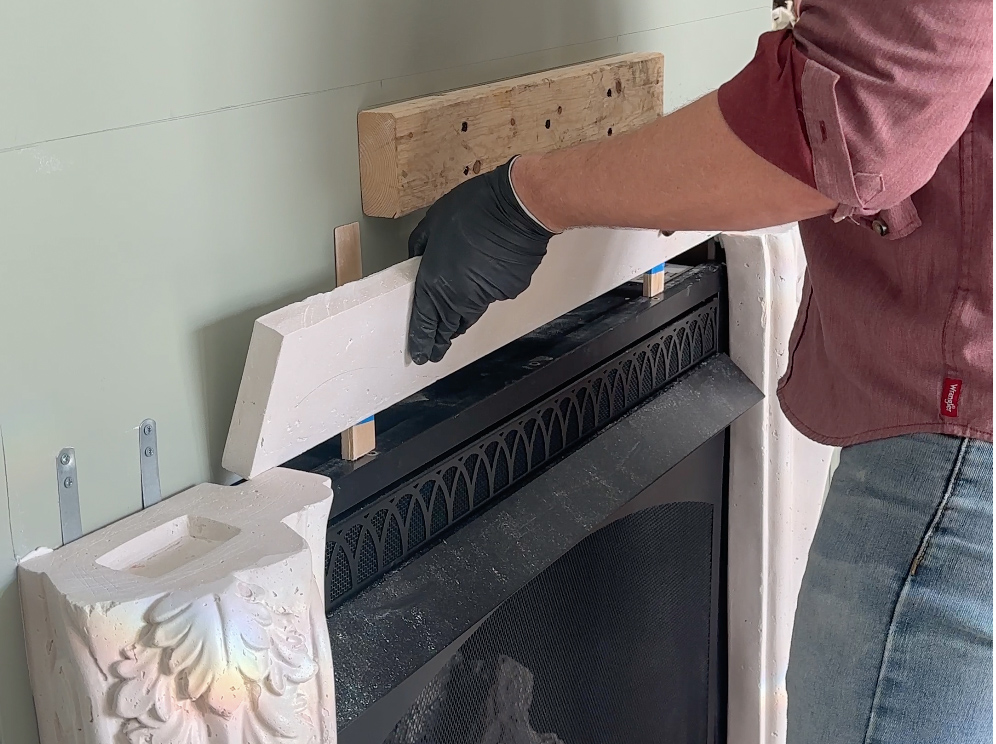
5. Once both pillar pieces are installed, slide the top filler piece into place. (Gabe had to file out a section of each of the side pieces here as well for the filler piece to slide in well due to the spacing we needed. You may not need to do this, but wanted to note.) We also used wood shims behind the top filler to ensure a tight fit, as seen in the photo above.
6. Apply additional adhesive to the top of each side piece, the top of the 2×4 support, as well as the front of the filler piece. This will ensure a good and secure installation of the top mantle.

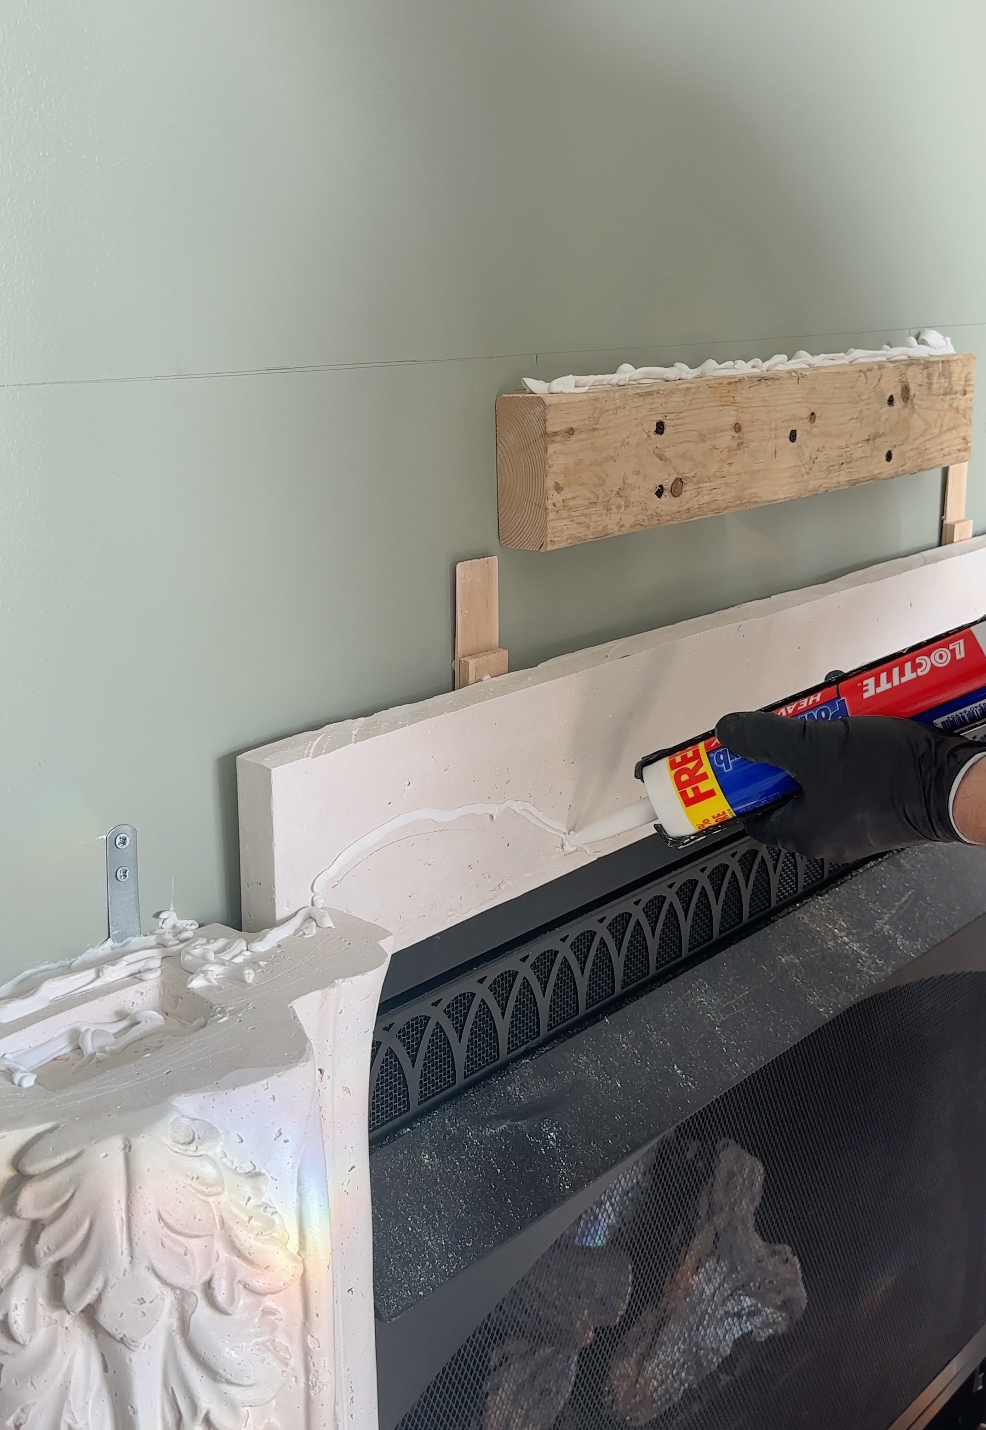
7. Apply adhesive to the back edges of the top mantle section and set in place on top of the two installed side pieces. Press firmly to the wall.
8. Insert two wood shims (one of each side) in the cracks where the pieces meet to make sure it dries nice and level. Let dry overnight if possible.
9. Mix the plaster mortar that came with the mantel with a cold black tea until it is a runny toothpaste consistency. This will help match the color of the filler to the mantle. Fill the cracks using a fine tipped clay tool. Add texture if you choose to make it blend well with the rest of the surrounding areas. Let dry overnight.
We still have the crown molding and the art to add above the mantel, but this room feels just about finished! It is the first full renovation we have done in the new old home, and it feels exciting to make it our own. I will be sure to share our decorative crown molding options soon as well! Let us know if you have any questions below.


