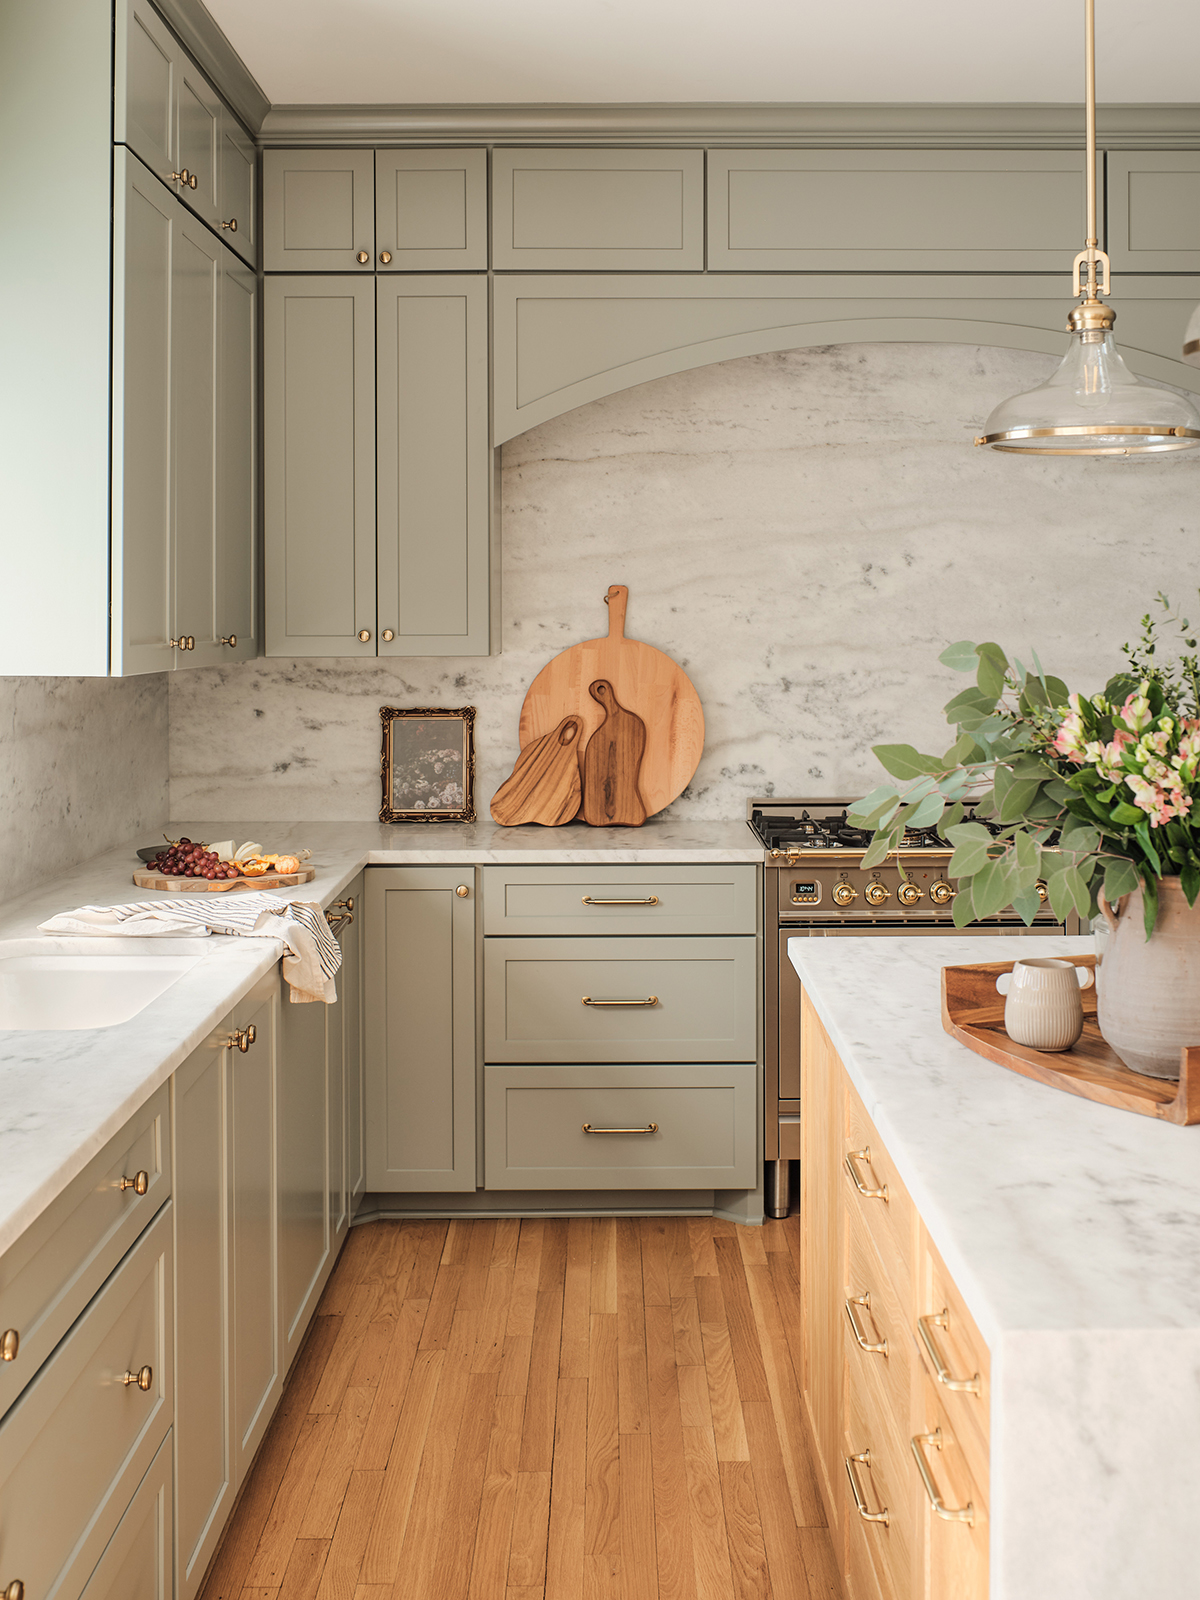
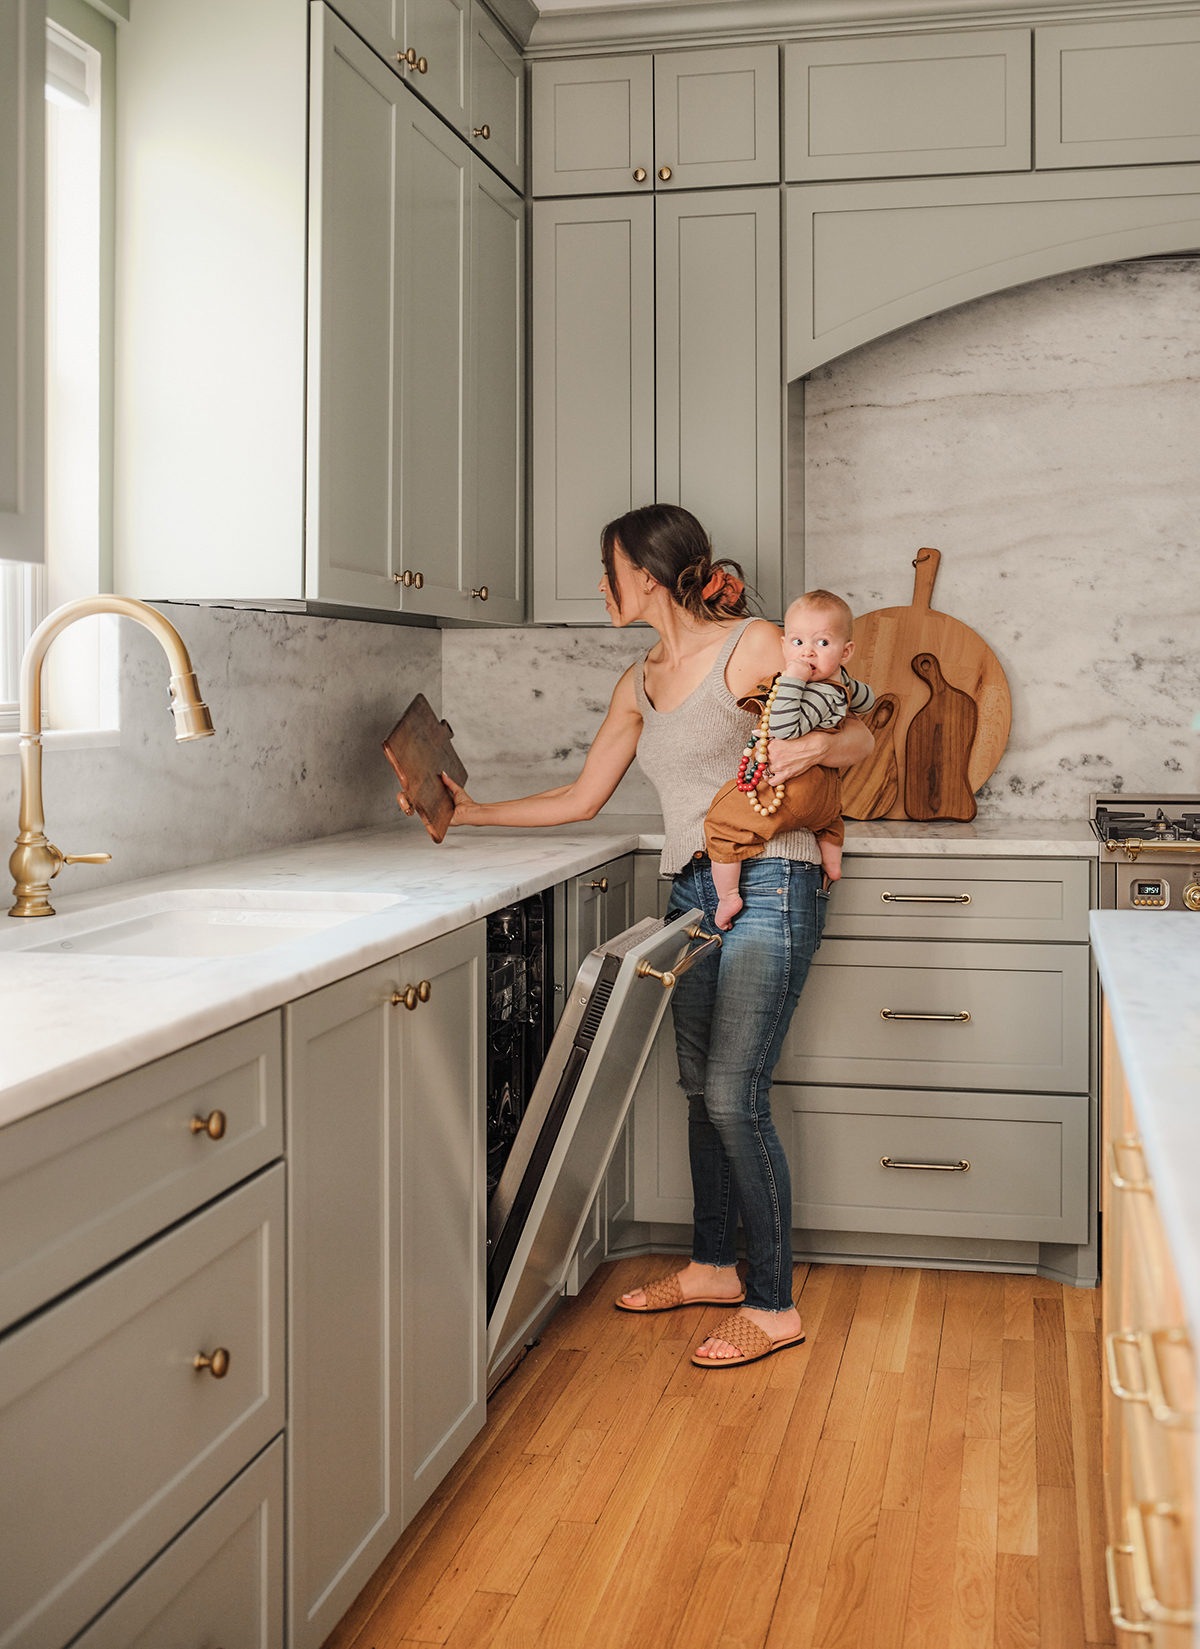
In many ways, this kitchen is the heart of our home. We spend hours a day here prepping meals, and an equal amount of time cleaning up. It’s where long conversations between Gabe and I happen late at night while we clean, and where we get the day started packing lunches before school in the morning. This is probably why it has been the most exciting project to see come to life. It hasn’t been without hurdles, intensive problem solving, and many nights in a makeshift kitchen. It’s been something we have really valued getting to share with our IHOD community, and we hope you feel like you learned something along the way! Today we are giving you the official tour, sources, and contractor info. It’s a hefty post so grab a cup of your favorite beverage and cozy up!
If this is your first blog visit, you can catch our previous updates in our kitchen series where we covered paint selection, all about appliances, countertop pros and cons, hardware, and the timeline and planning process. We knew going into the purchase of this home that we would be doing a gut renovation with the kitchen. We started the plans from scratch, but I had so many of the ideas already tucked away from years of dreaming and scheming. We worked with my mother- in-law who is an architectural designer to create the elevations, and made sure we had every square inch of the space figured out. My goal was to re-think the space and design a layout that provided better flow, organization, storage, and an atmosphere that tricks you into thinking you like to make dinner. (It’s working so far.)
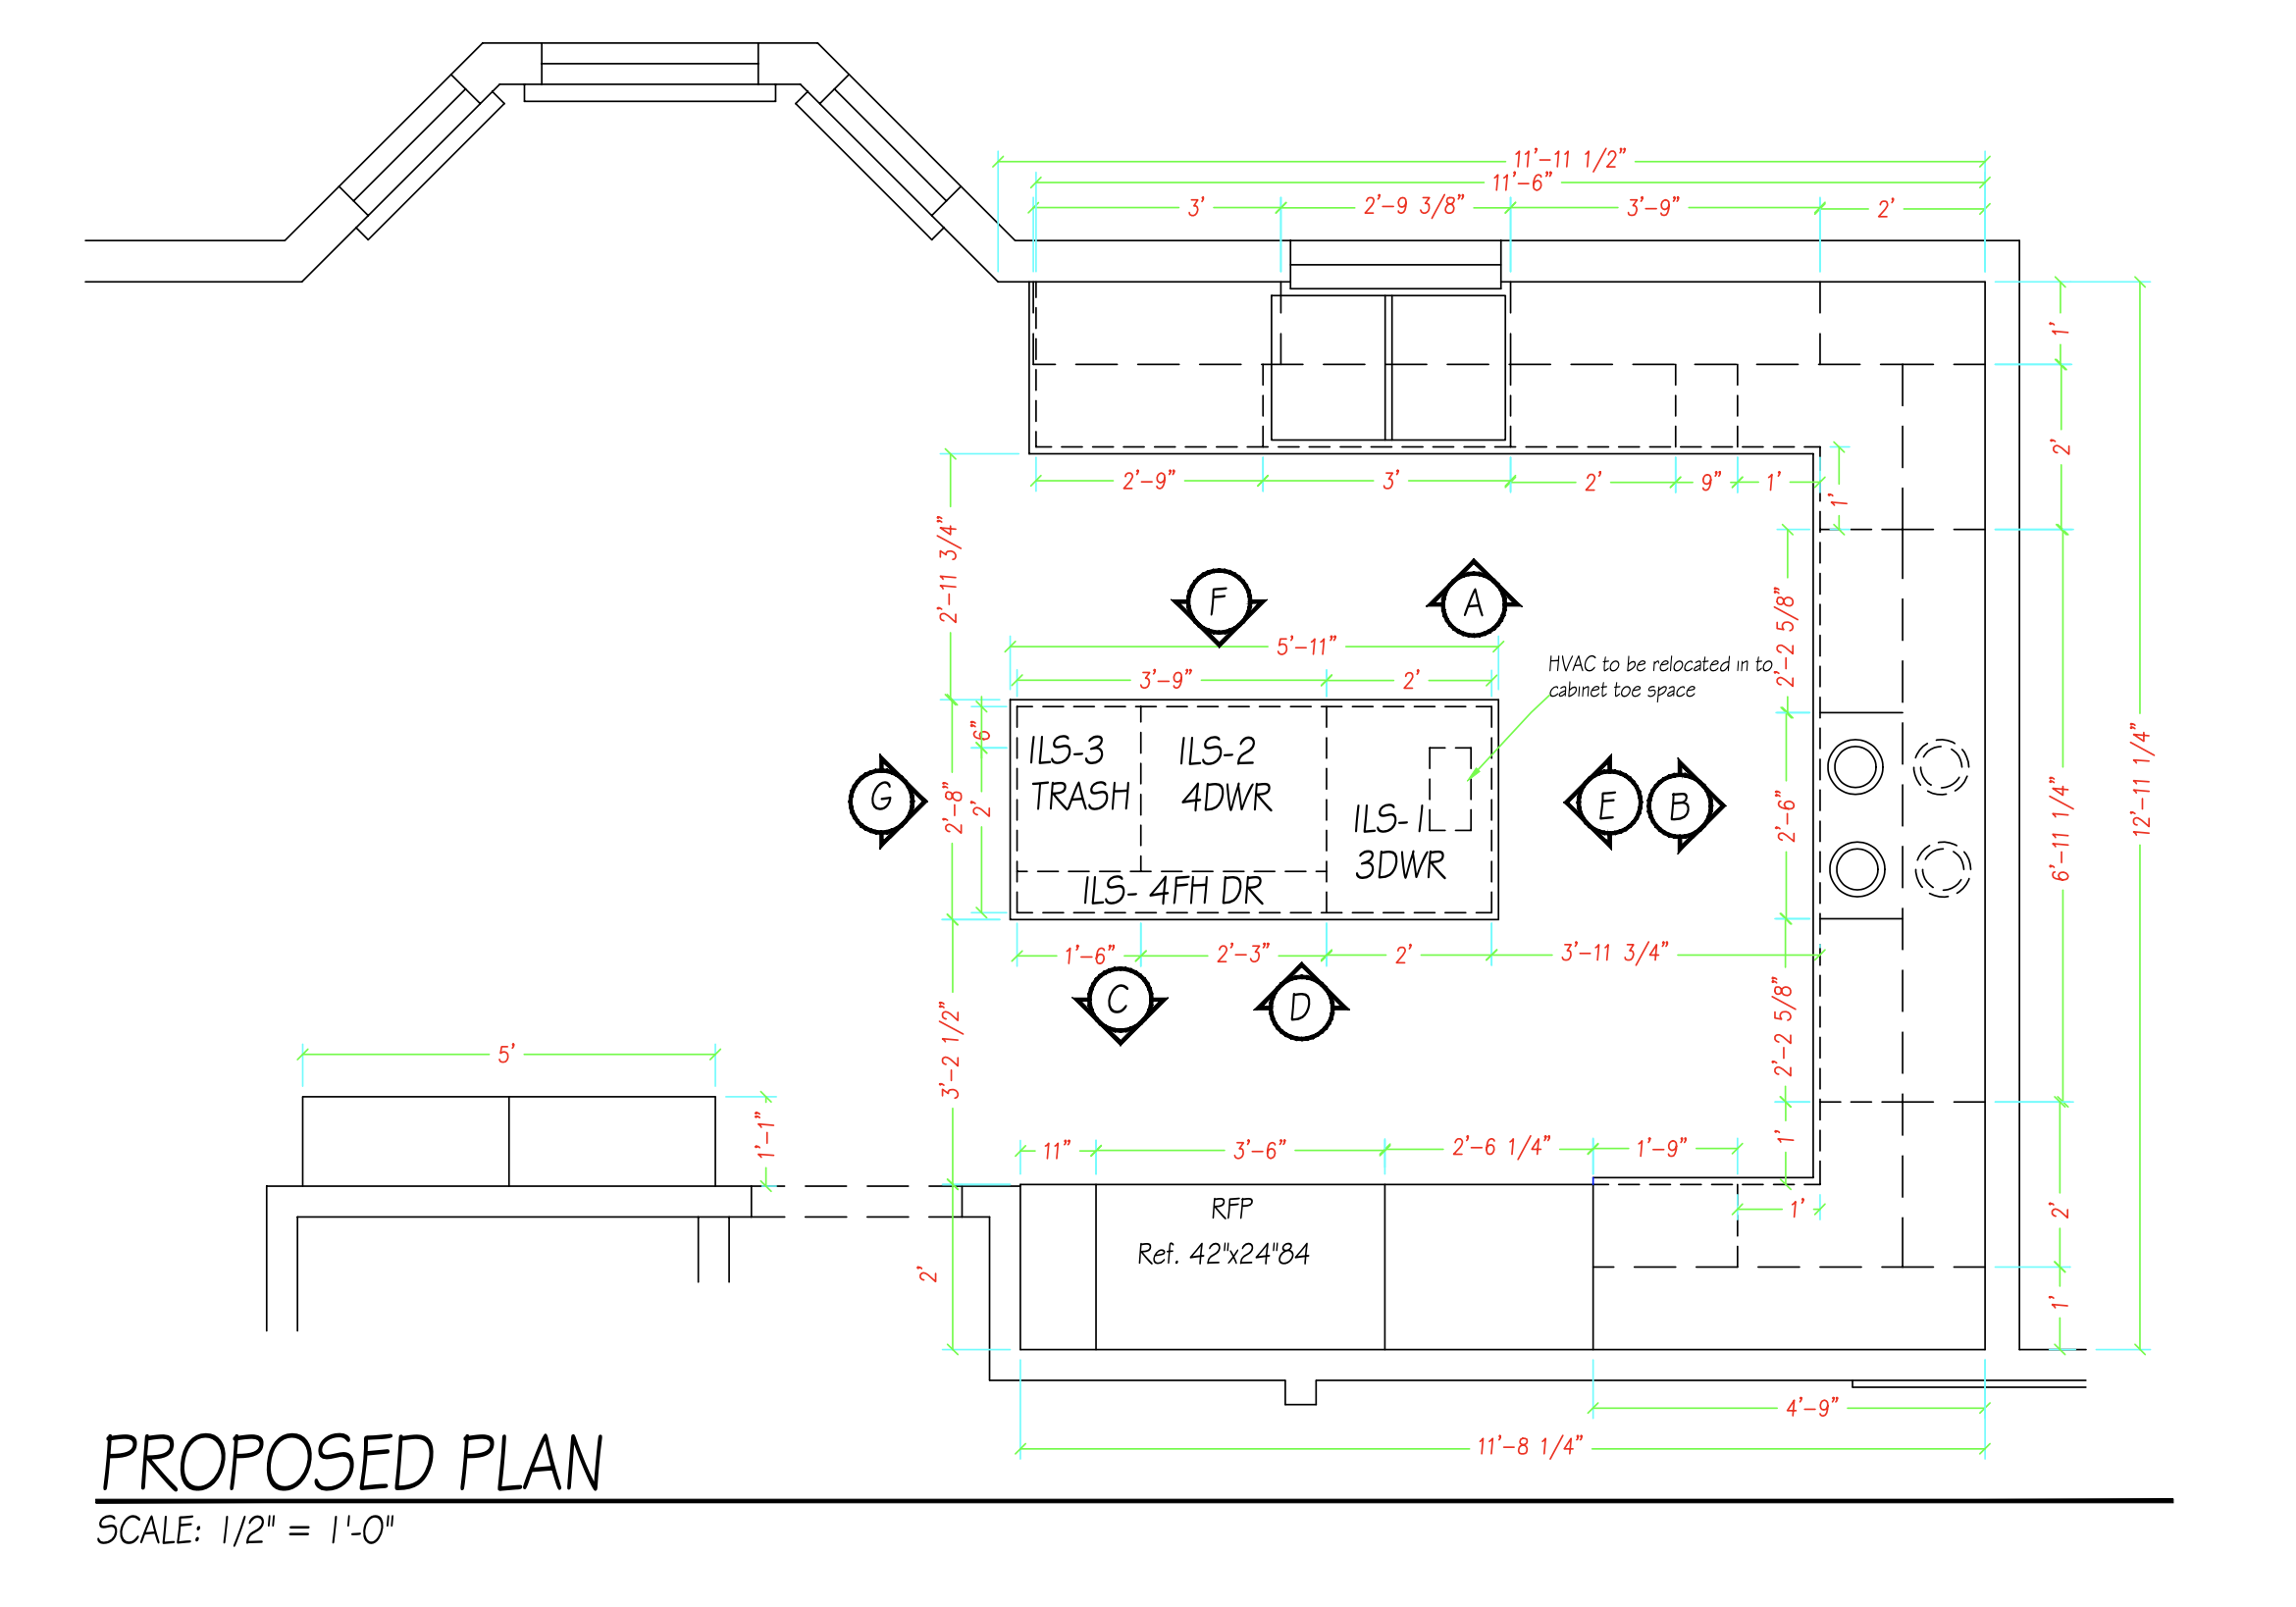
Our kitchen elevations with measurements for reference.
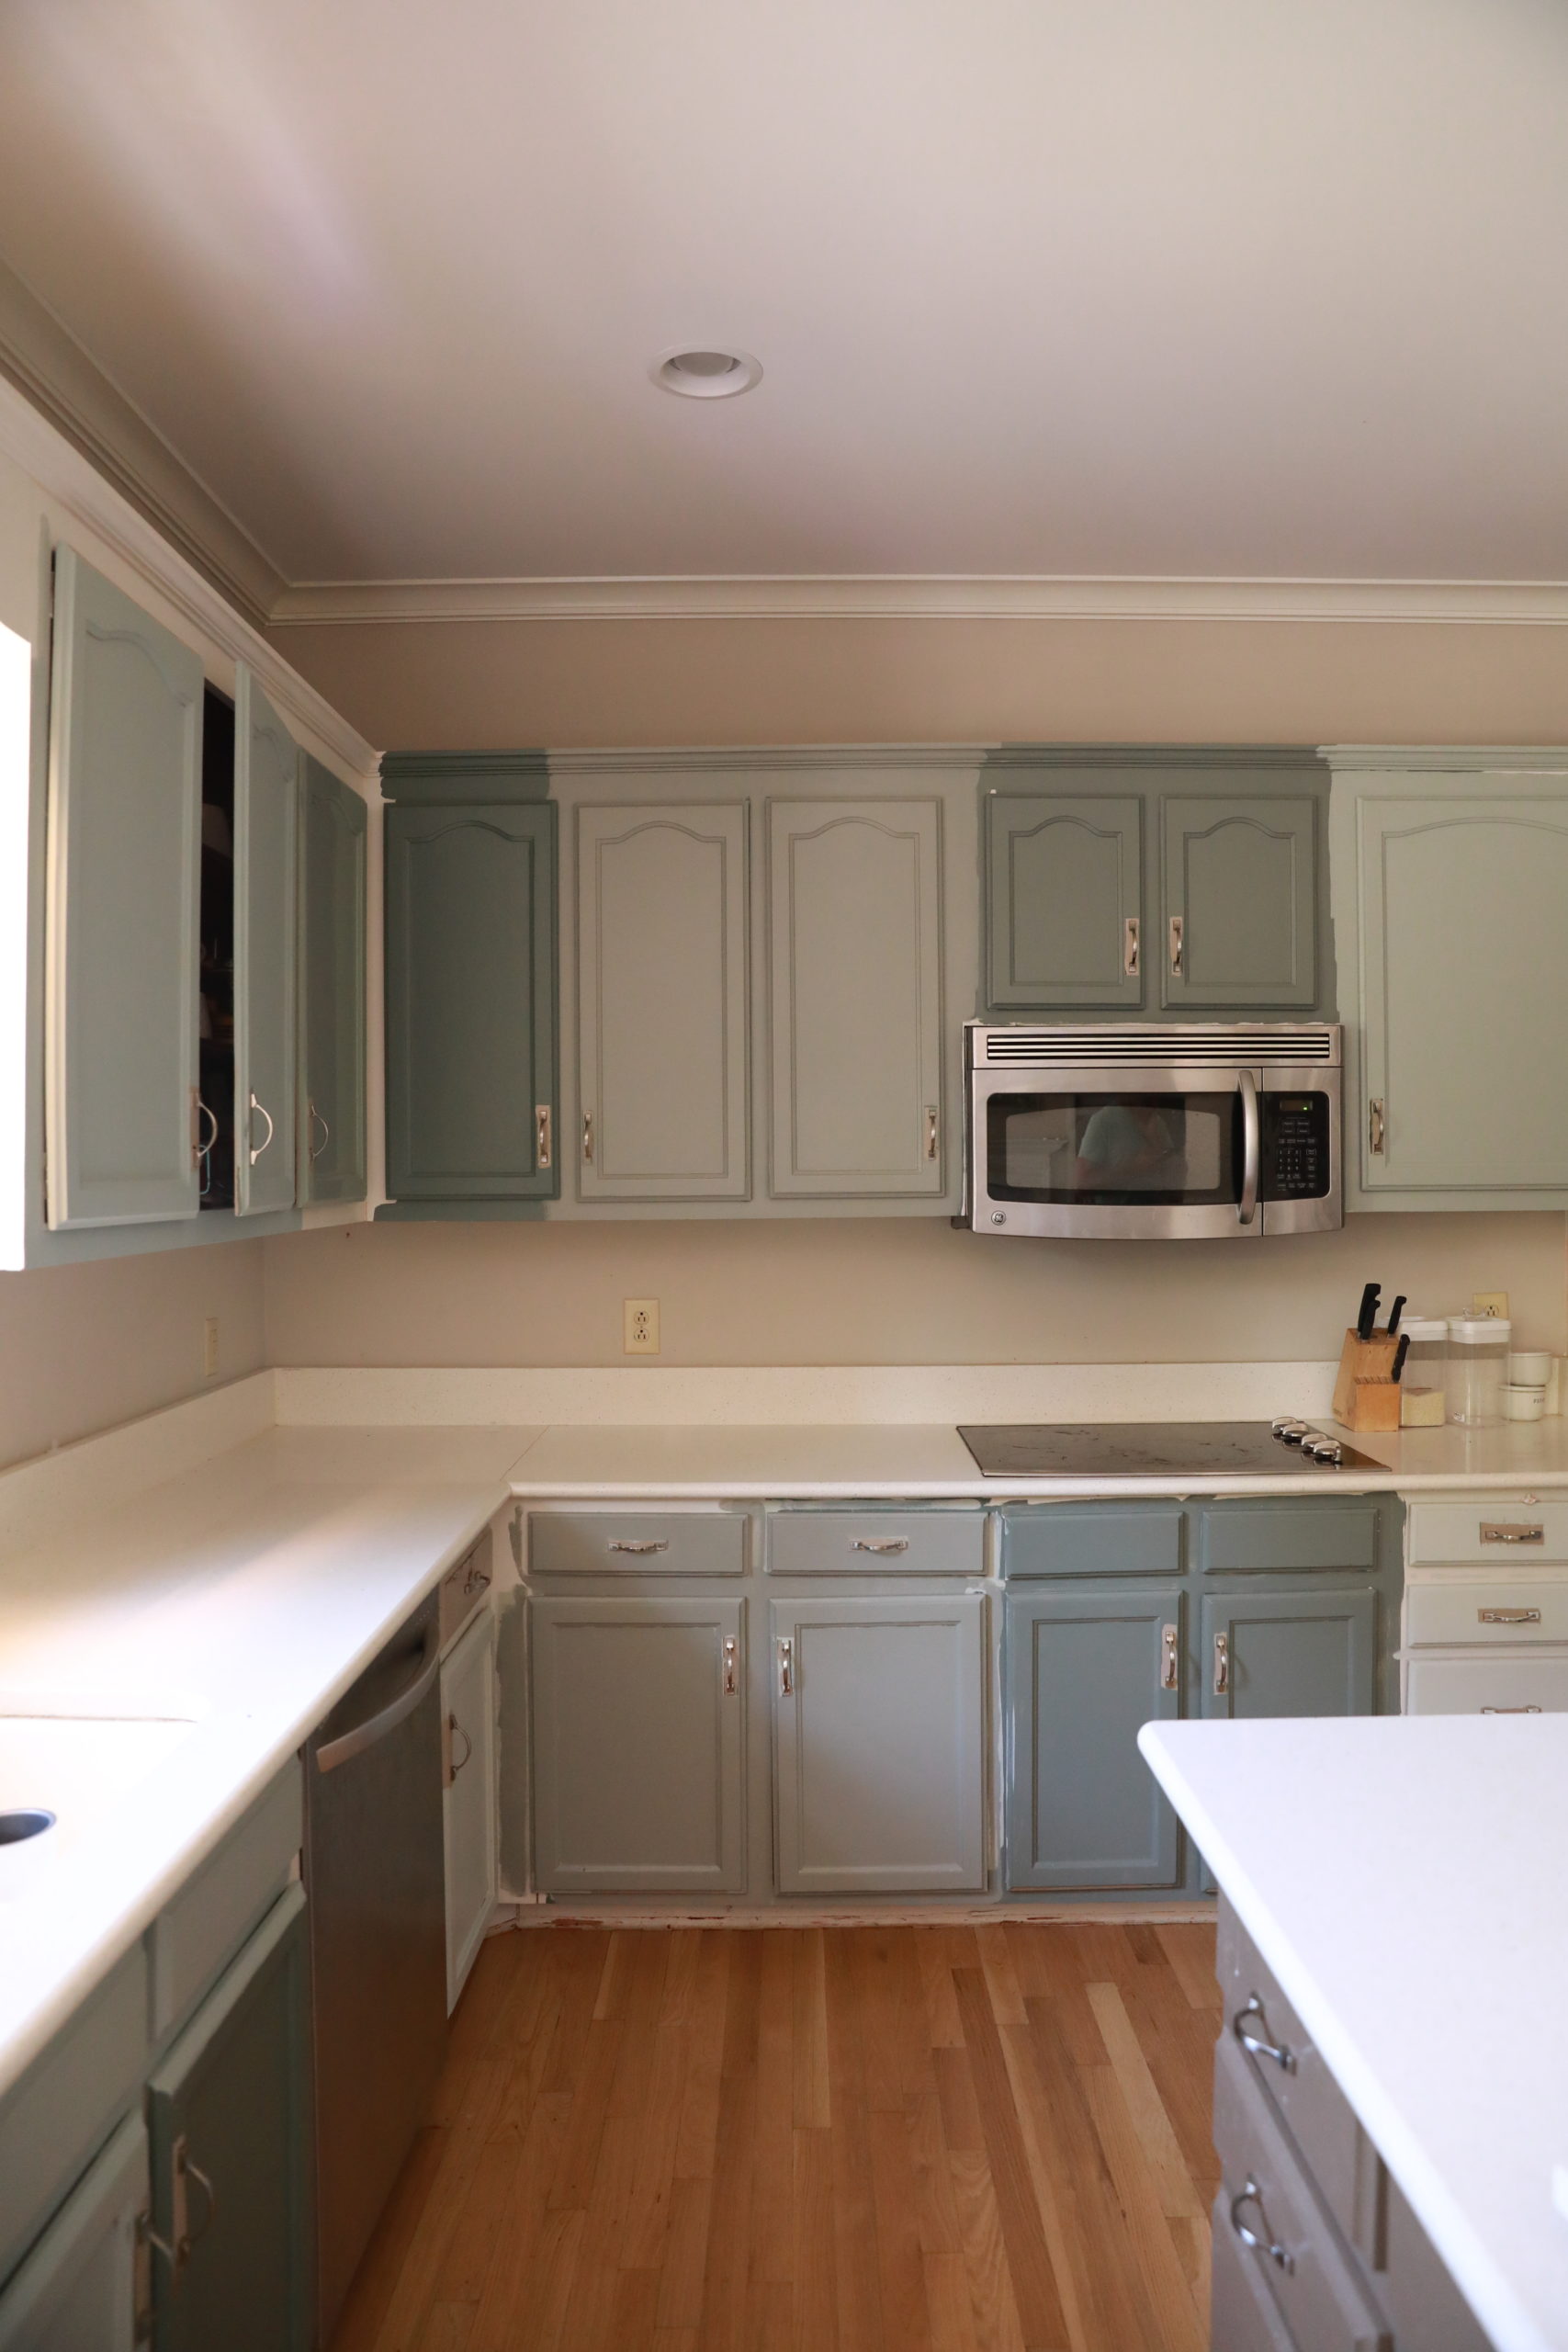
(After the painfully long process of picking the right shade of green.)
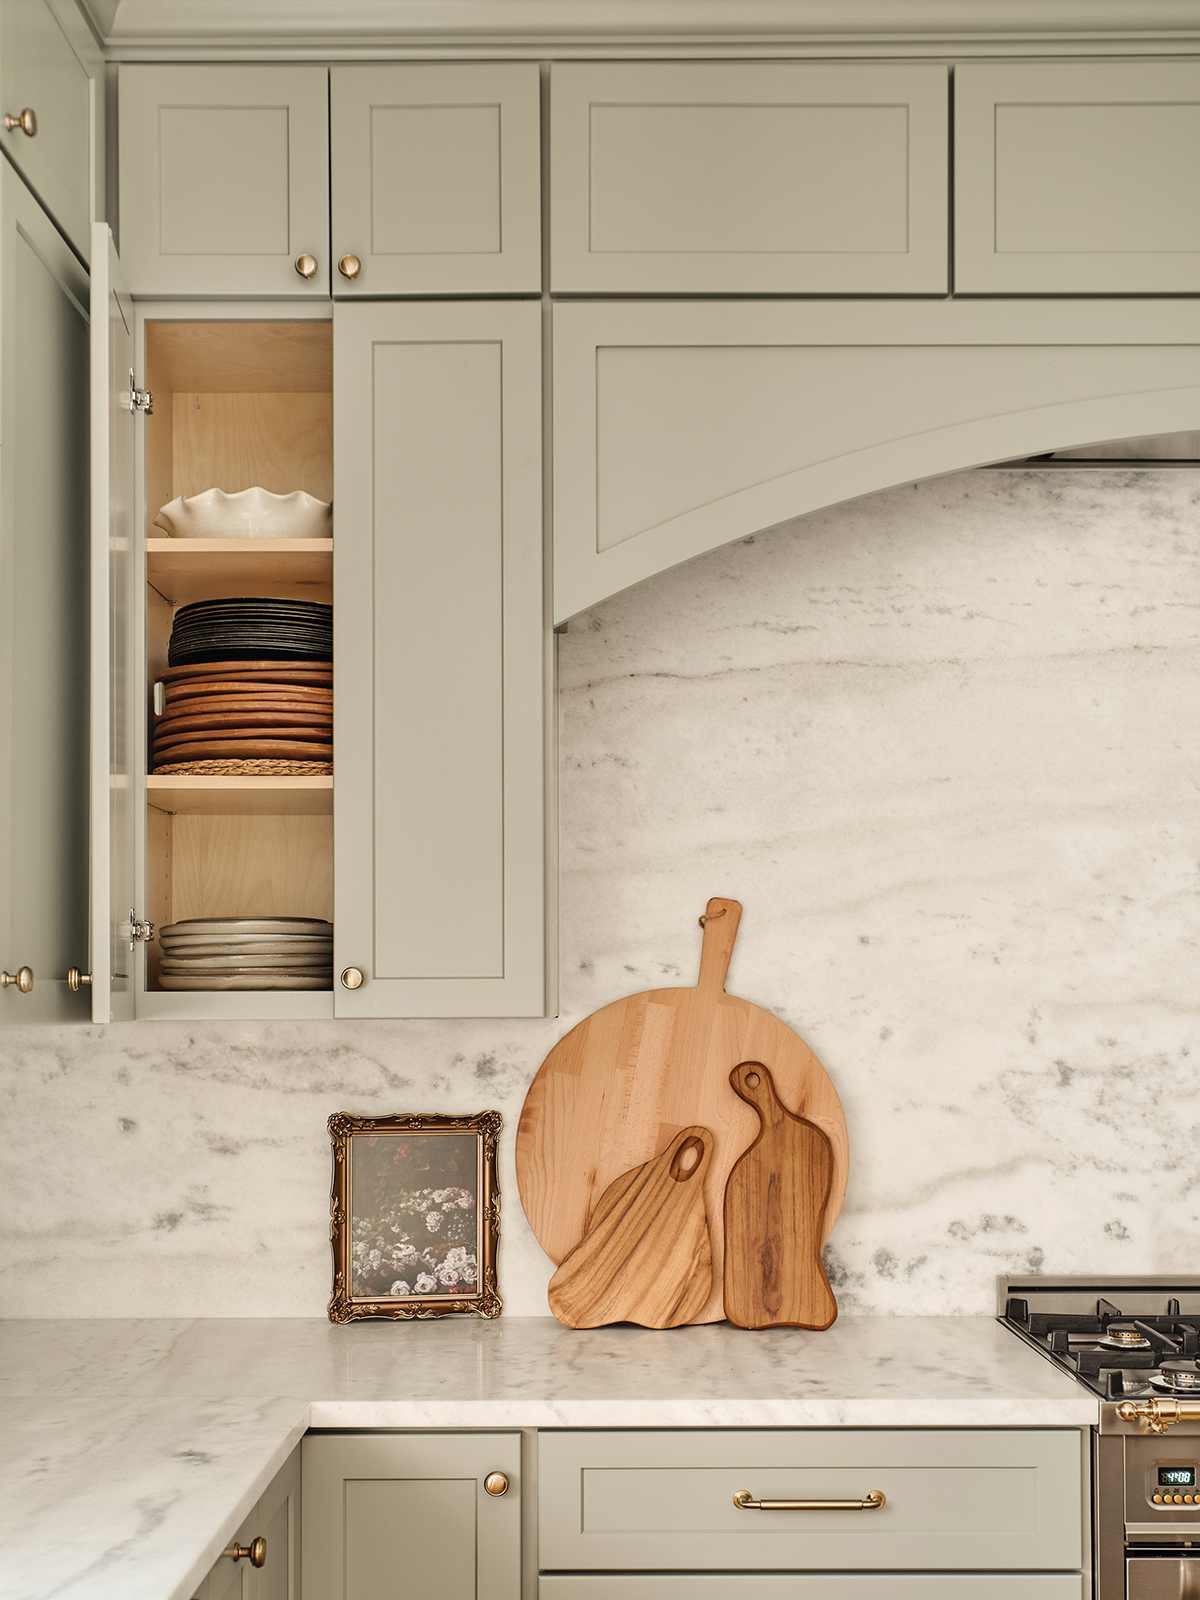
The Cabinet Color – Our kitchen cabinet color ended up being an unintentional custom color. After debating many many nuanced shades of green, I decided on Pigeon by Farrow and Ball. F & B paint is a very difficult formula to color match. When our contractors brought by the sample cabinet door to approve it looked different from our original paint sample from a different store, and we realized that we had two different colors on our hands. We ultimately went with the sample that was a little darker and more sage than Pigeon, but it is very similar! I truly love how it turned out. It is such a peaceful and calm color, and I know I will never grow tired of it. The color shifts throughout the day, and is beautiful in the sunlight. These images by Joseph Bradshaw do a much better job capturing the color than my iphone ever has, so consider this your first true look! (Shout out to the colorist at Benjamin Moore in Green Hills Nashville that was able to match our original sample!)
Side note – I do find it humorous that after agonizing over the shade of green to avoid a trendy color, I decide on a shade that ends up being announced by every paint company as the color of the year only months later. Still can’t believe it, but still no regrets.
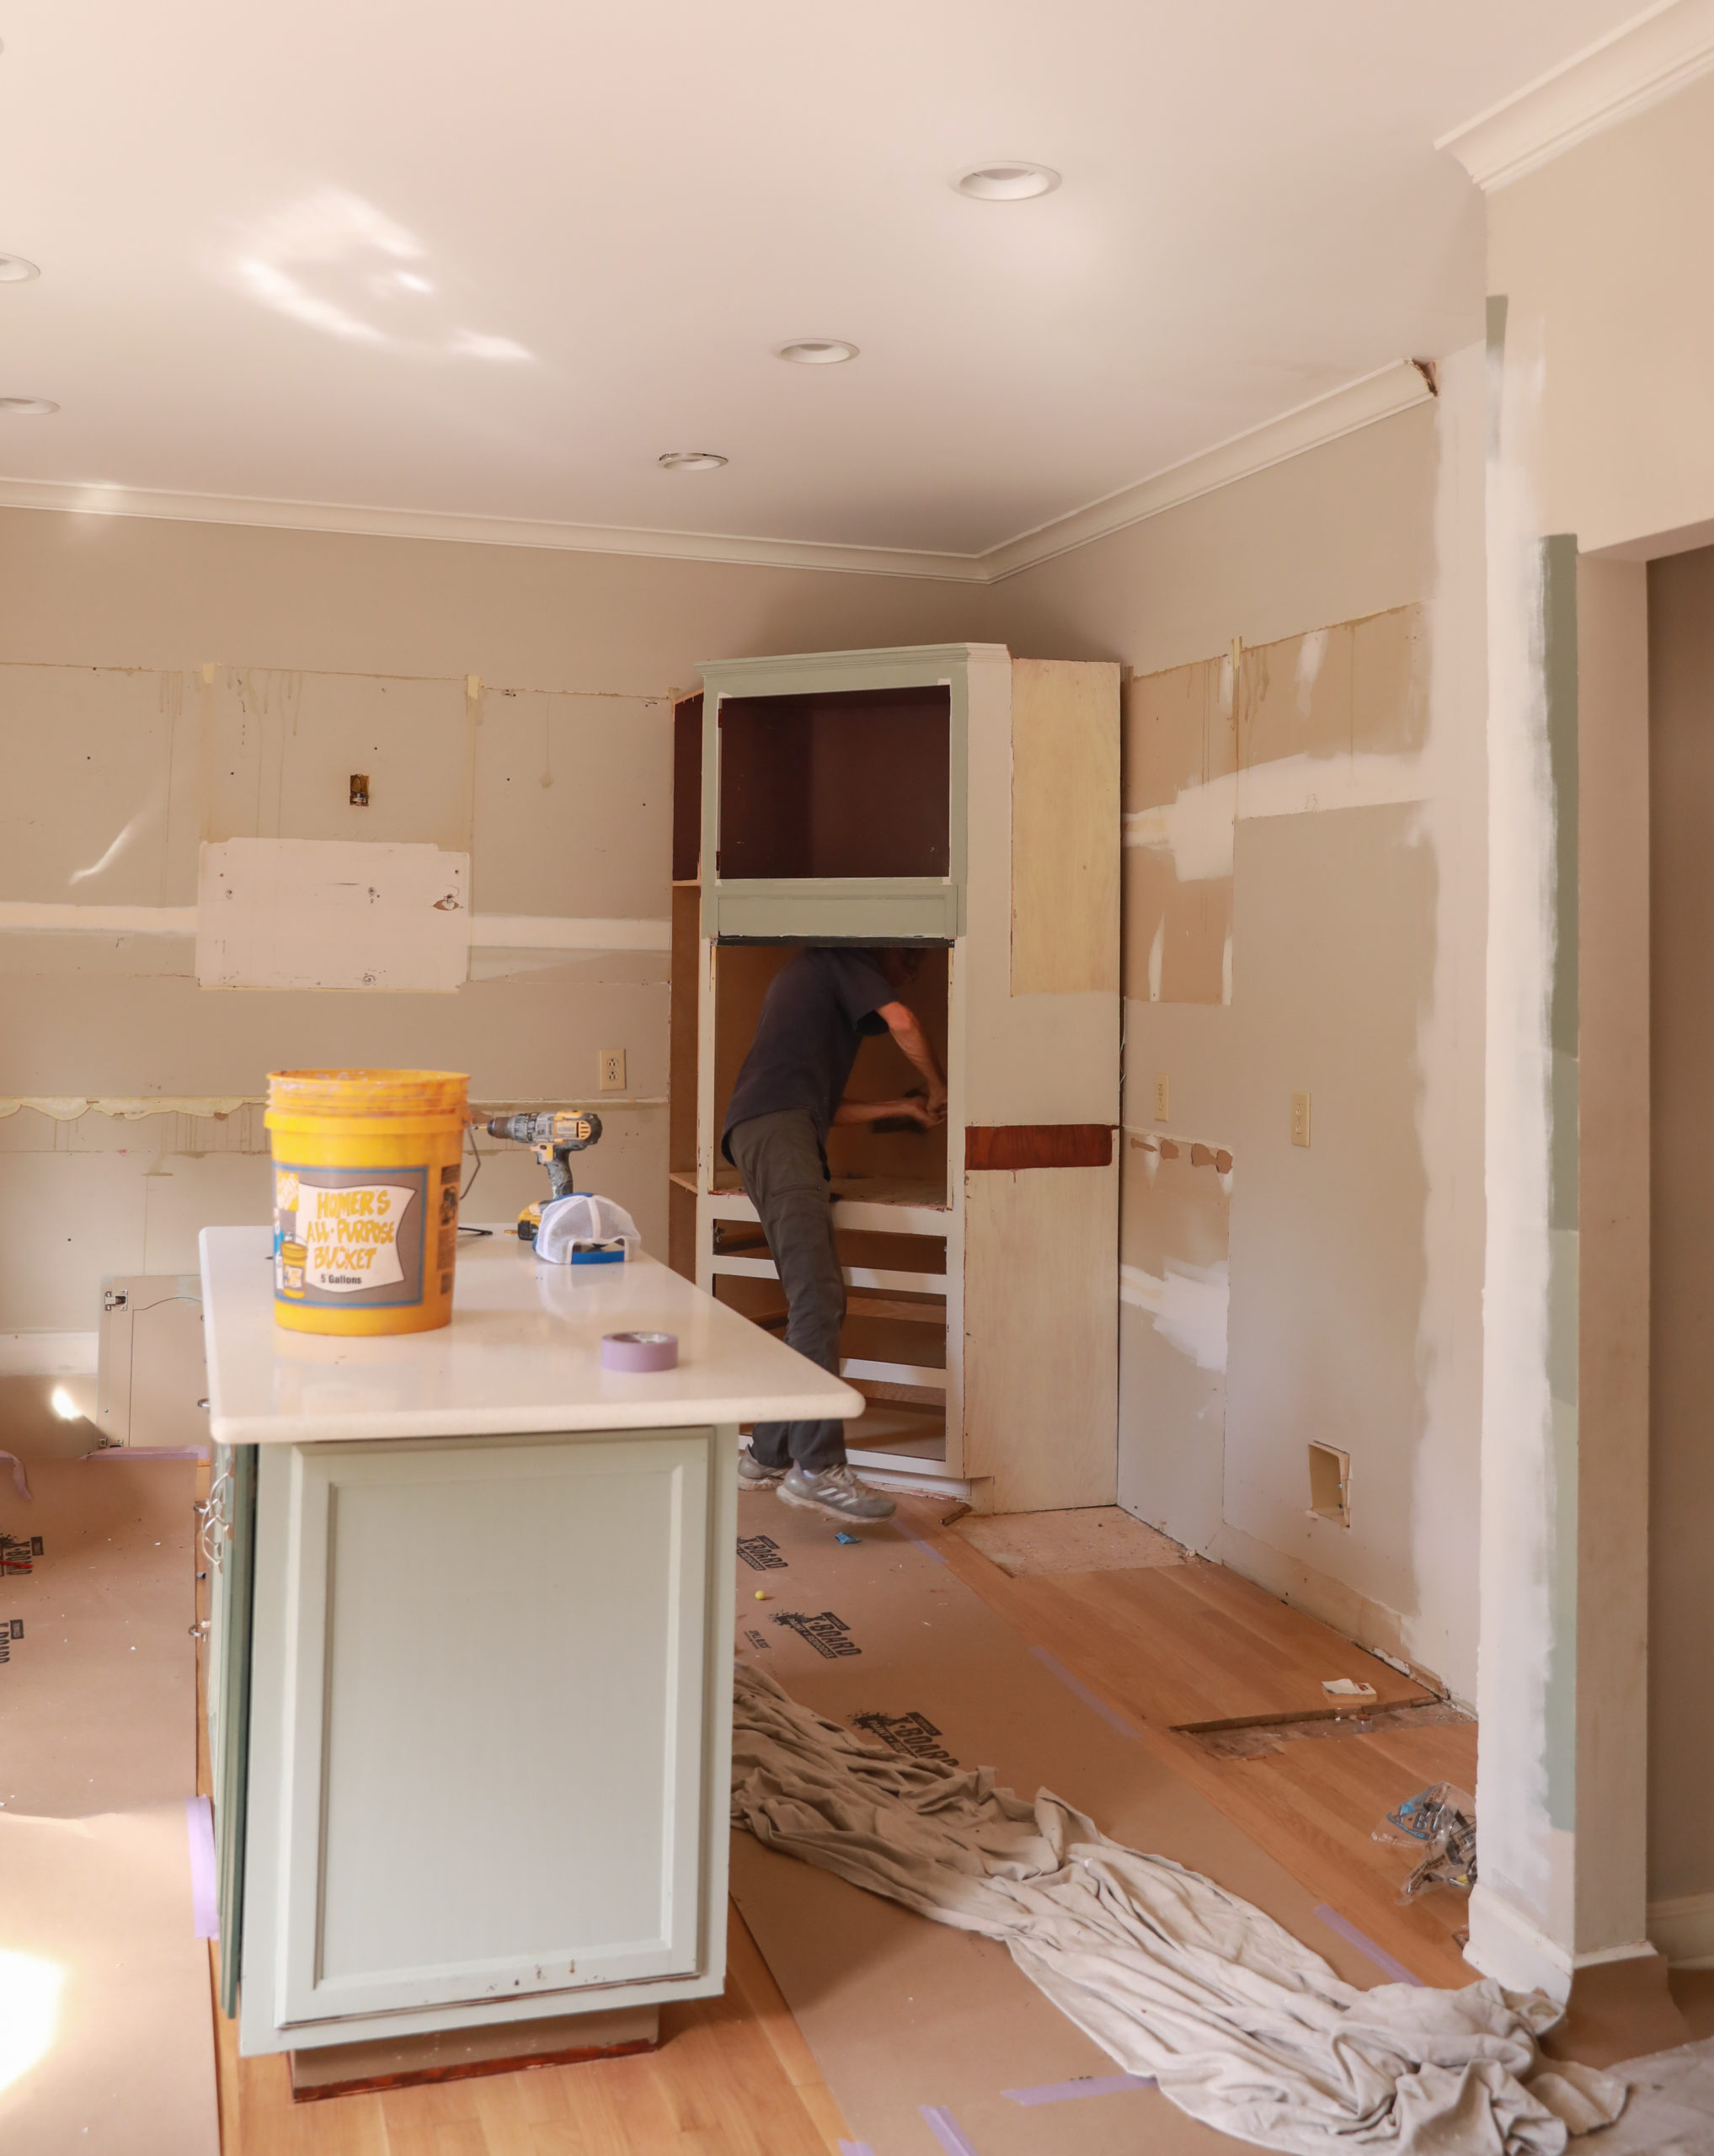
Day 1 of the renovation process – old cabinets were moved to the garage to be used for
a makeshift workshop for Gabe.
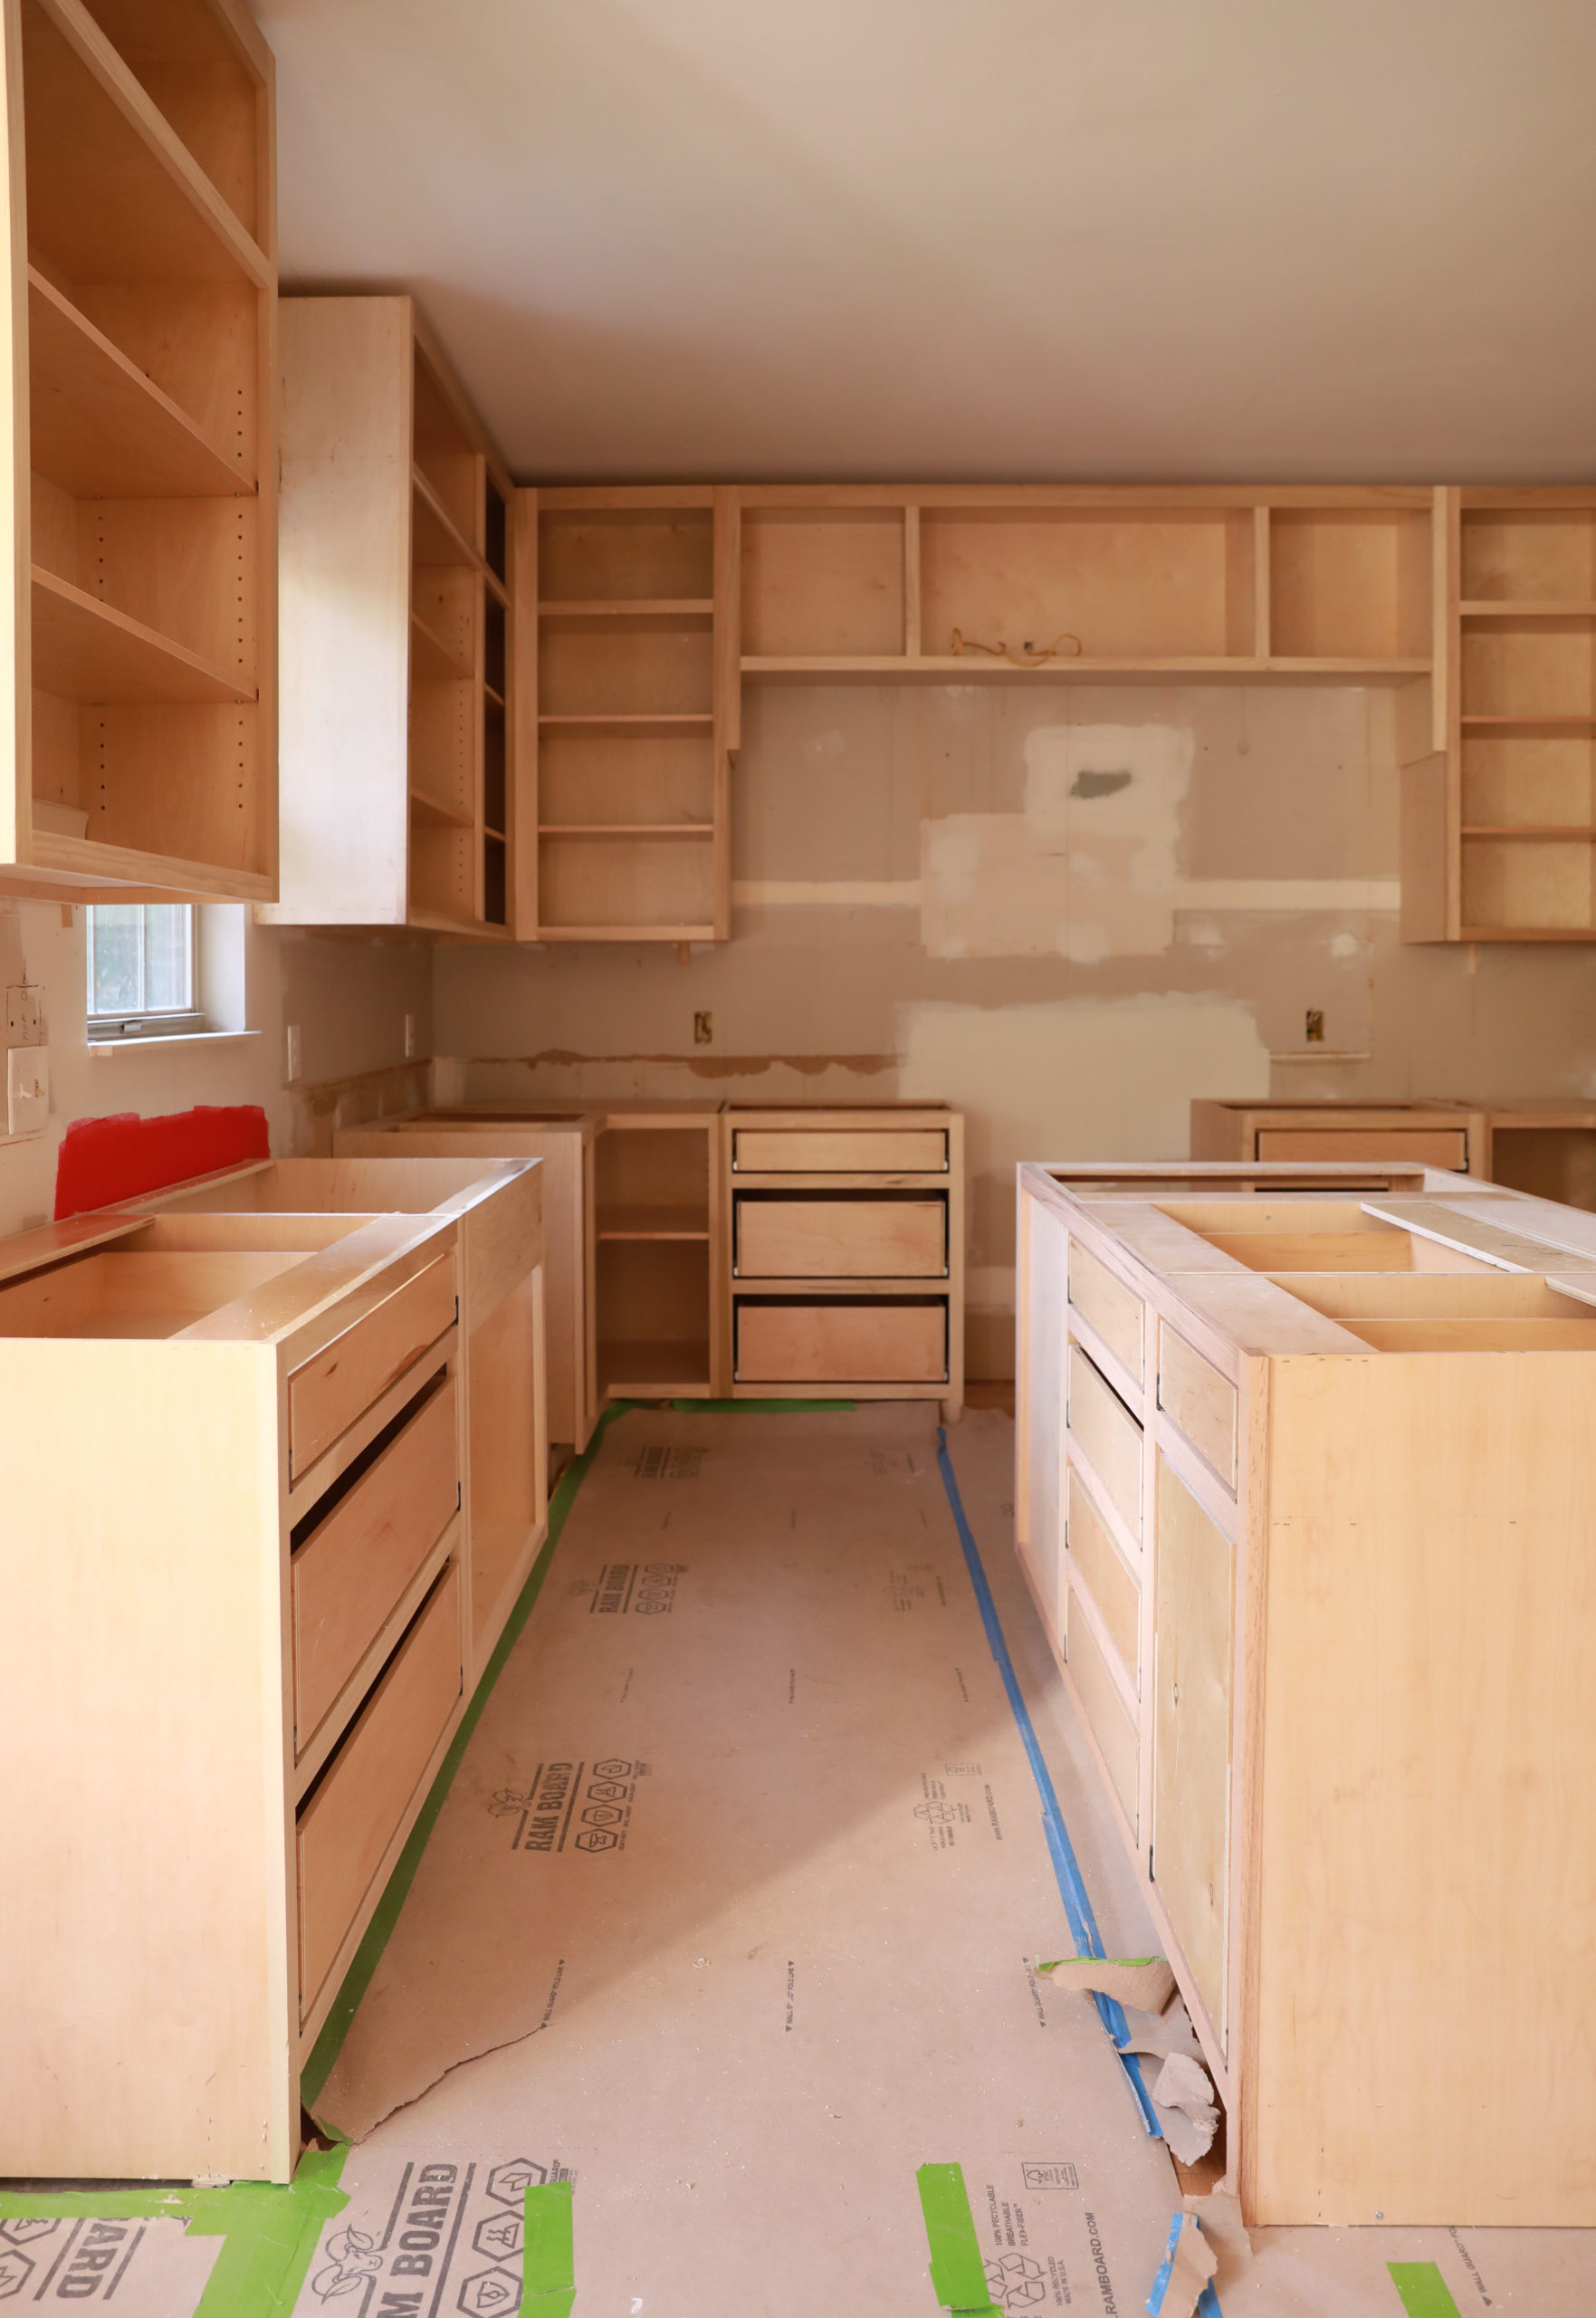
Choosing custom cabinetry – One of the first steps we took was getting a few quotes from different cabinet companies in the area. We chose to do custom cabinetry in order to maximize the space we had to work with. We knew one of the operating project managers over at Cabinet Makeovers, and we chose to work with them based on their great reviews and feedback we heard from neighbors and friends. They have years of cabinetry experience, and have worked with all shapes and budgets for kitchens. (Quotes for cabinetry can range drastically based on wood costs or specific cabinetry builds, so always make sure you are getting a few quotes in your area.)
We want to take a moment to recommend the company Cabinet Makeovers. They were exceptional at making sure we had everything in place before demo began, and made sure they followed the proposed timeline. I can’t say enough good things about their service, expertise, and craftsmanship. I am pretty sure they are booked solid for months to come, but it’s worth reaching out to them to get an estimate! Our old cabinets are currently living on in their ombré green glory in the garage.
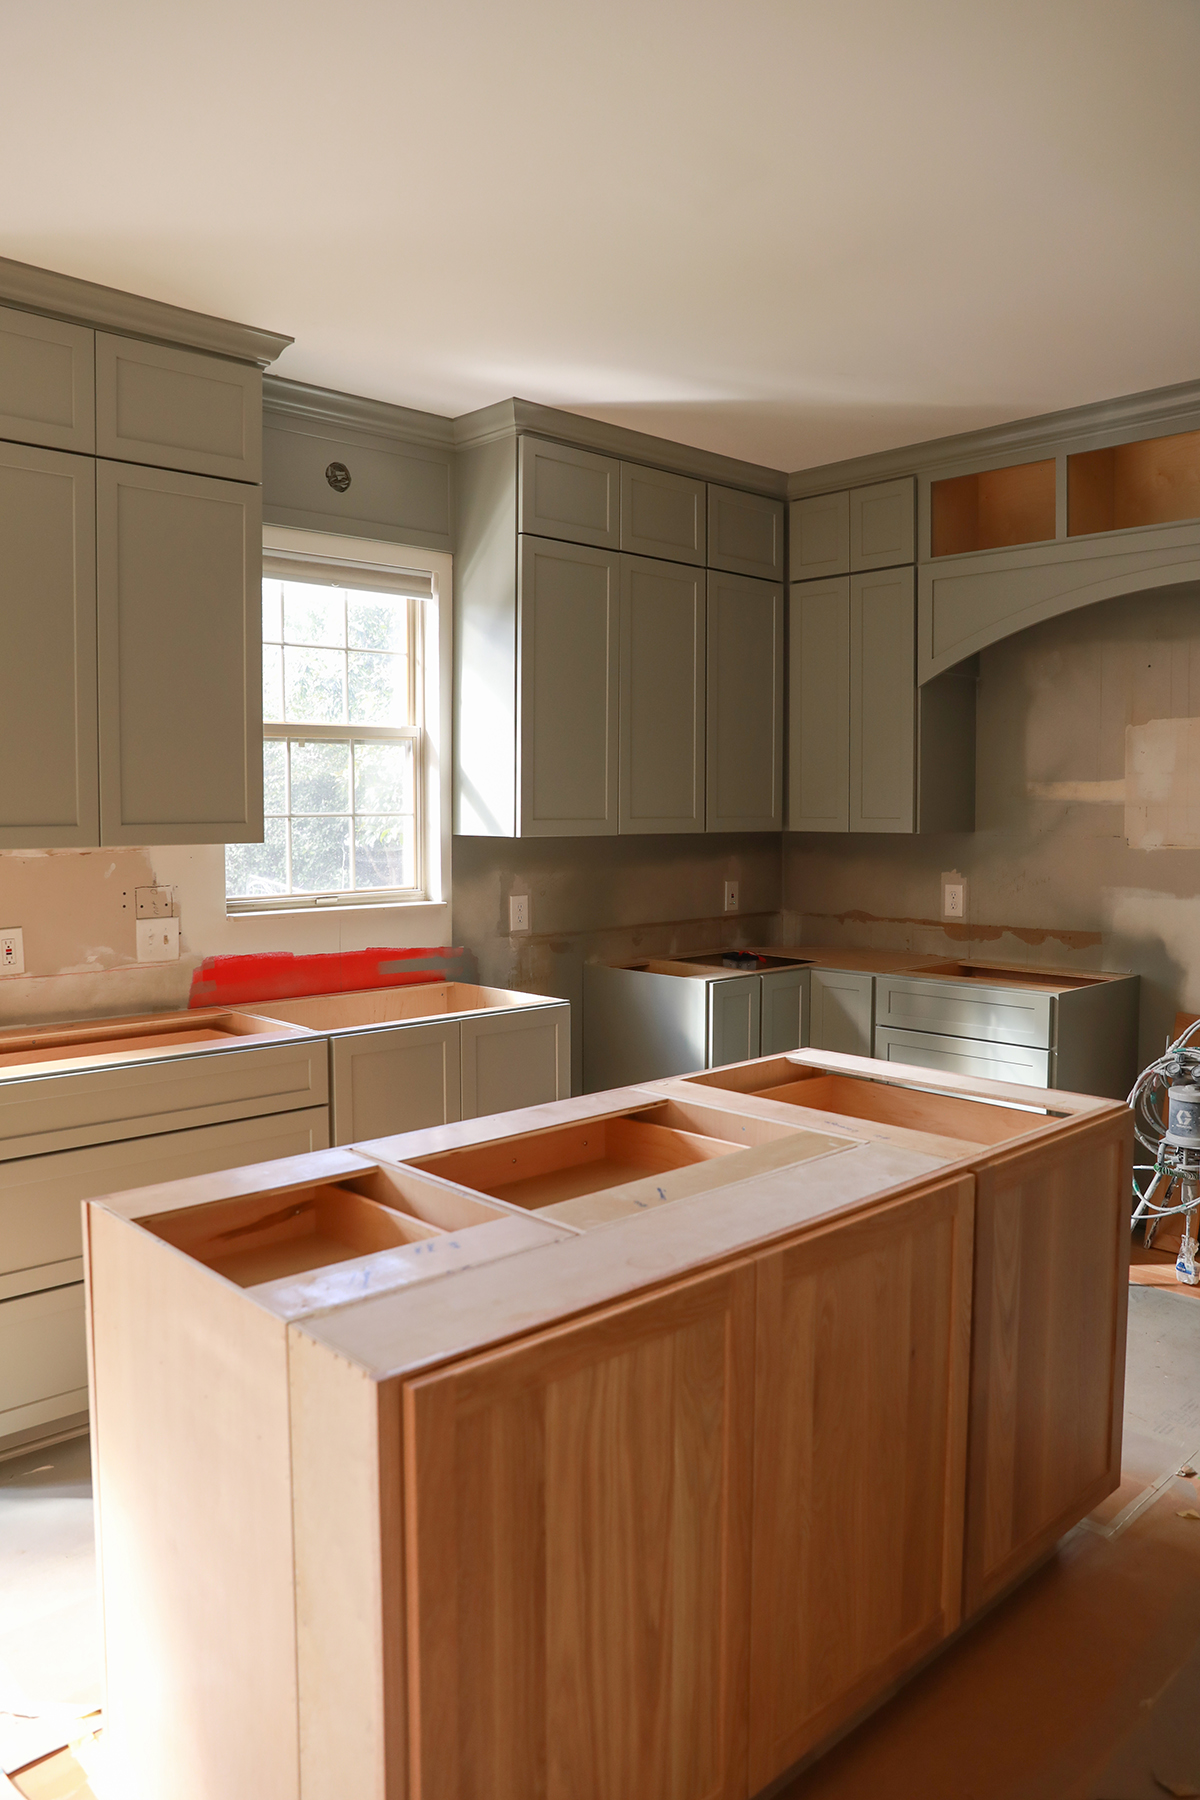
Electric and plumbing – Gabe was basically the general contractor for this project, and co-ordinated everyone’s schedules. We had all of our electrical and plumbing worked out in a few days time through one contracted company called J & L Electric and Plumbing. This made it much faster and smoother than working with multiple people. They came in after cabinetry was installed and before countertops. We had a long task list they were able to go through such as installation of the garbage disposal, hood range, oven, and island light prep. They installed electric strip units below the upper cabinets which gave us more units + USB plugs to work with around the kitchen. We chose under cabinet lighting that is able to be controlled by one remote and one switch. I love the lower light option at night, and it really does a great job dispersing light well. There is so much that goes into the plumbing and electrical, and we were relieved to have someone handle it all for us. We also highly recommend Jomero and his team.
Temporary kitchen setup – During the renovation we set up a makeshift kitchen in our dining room with an electric skillet, toaster, coffee maker, electric kettle, and bins for dishes. We used our outdoor grill and patio seating a ton, and somehow survived the chaos. (I may be blocking it out of my memory for a while.) We have a utility sink in our garage thankfully that helped with hand washing dishes while ours was out of commission. Our time without a functioning kitchen was pretty minimal since we had everything ready to be installed, all plans to contractors, and schedules aligned.
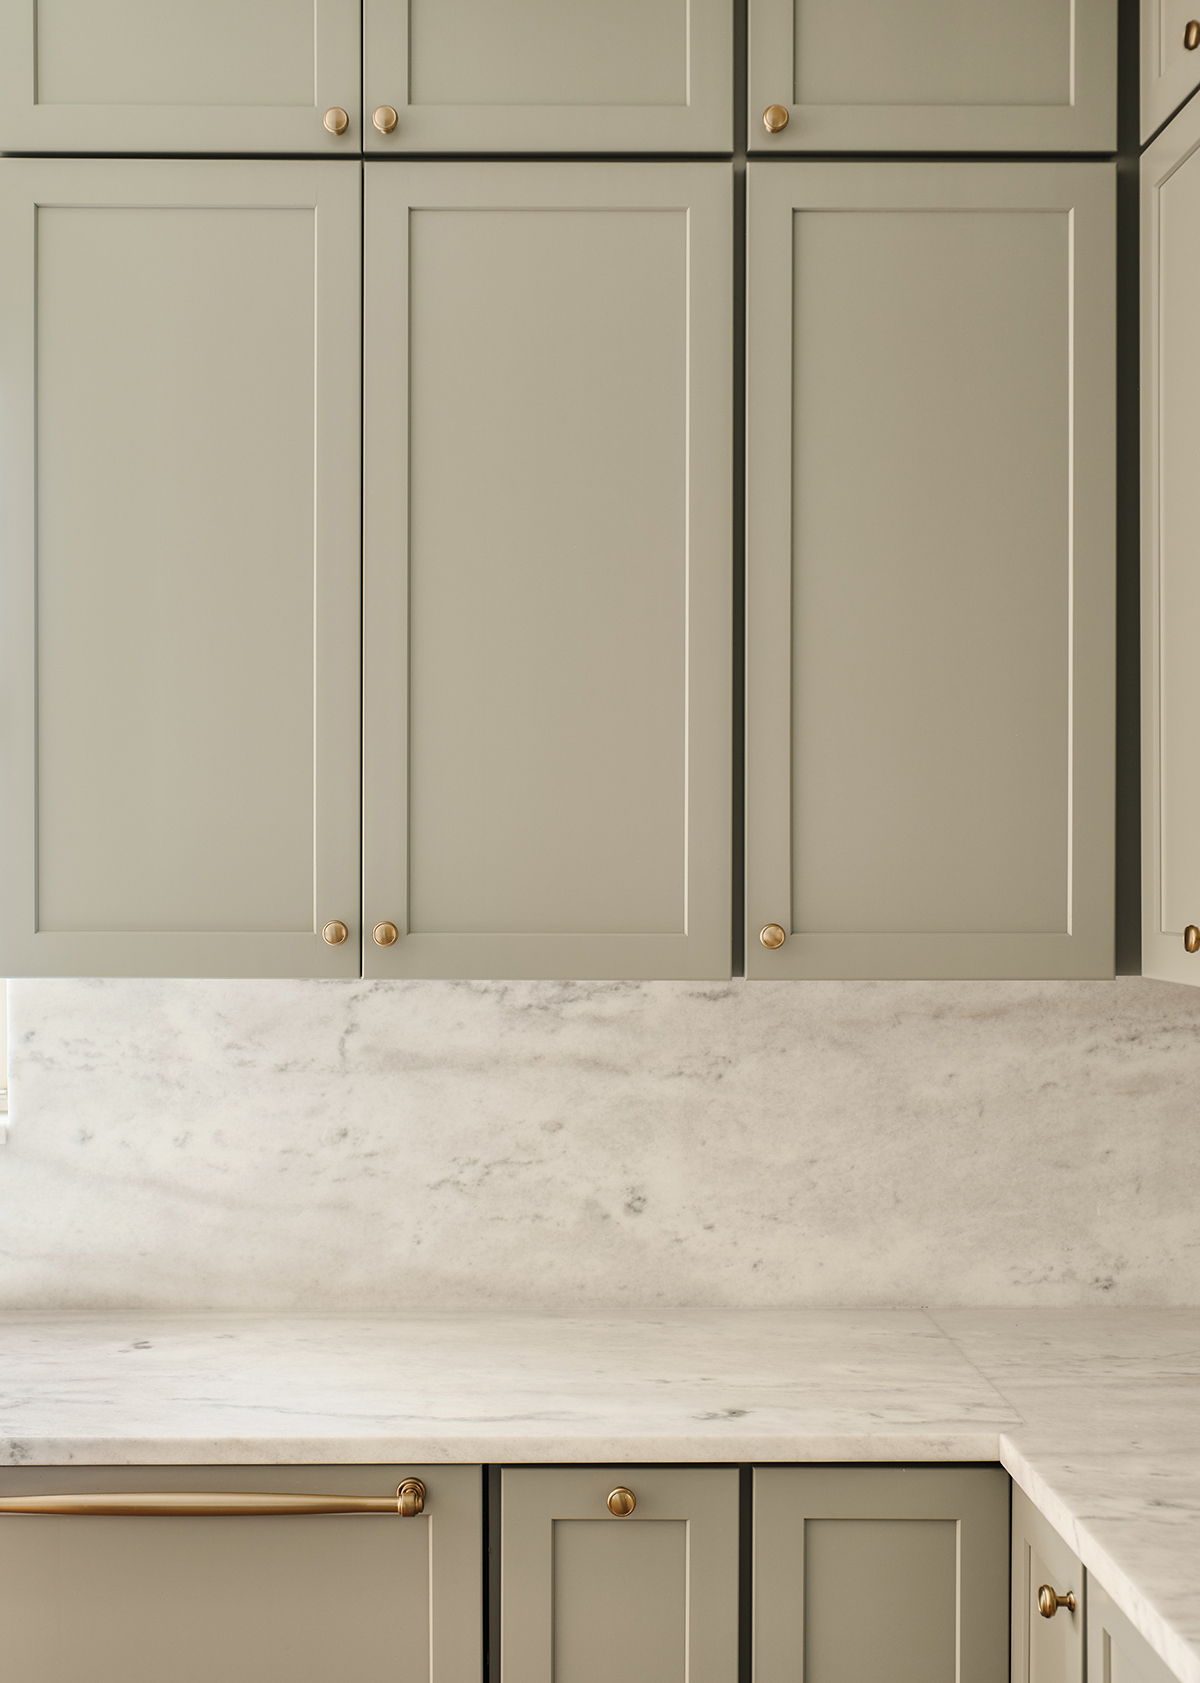
The Hardware Scoop – I shared all about our hardware sources in this post. (Also linked below!) I ordered a few different hardware samples initially to test finishes against the color palette. I love the warmth of antique brass, and it really brought out the warmer undertones in the paint. It can be quite a challenge right now to find all of the parts you need in stock on line for almost everything kitchen related. I ended up finding our hardware in a few different places, and managed to get a hold of the amount we needed. You can absolutely use more than one type of finish in a kitchen, and sometimes it adds more visual interest! (Our stove range is an unlacquered brass.)
Knobs vs. Pulls – I wanted a variation, but chose knobs vs. pulls based on sizes of the drawers. We did knobs for all of the upper cabinets, pulls for the standard size drawers, and knobs for the small or large drawers. Due to the weight of the larger drawers, two knobs or a larger pull was needed. (Sources for everything we used below!)
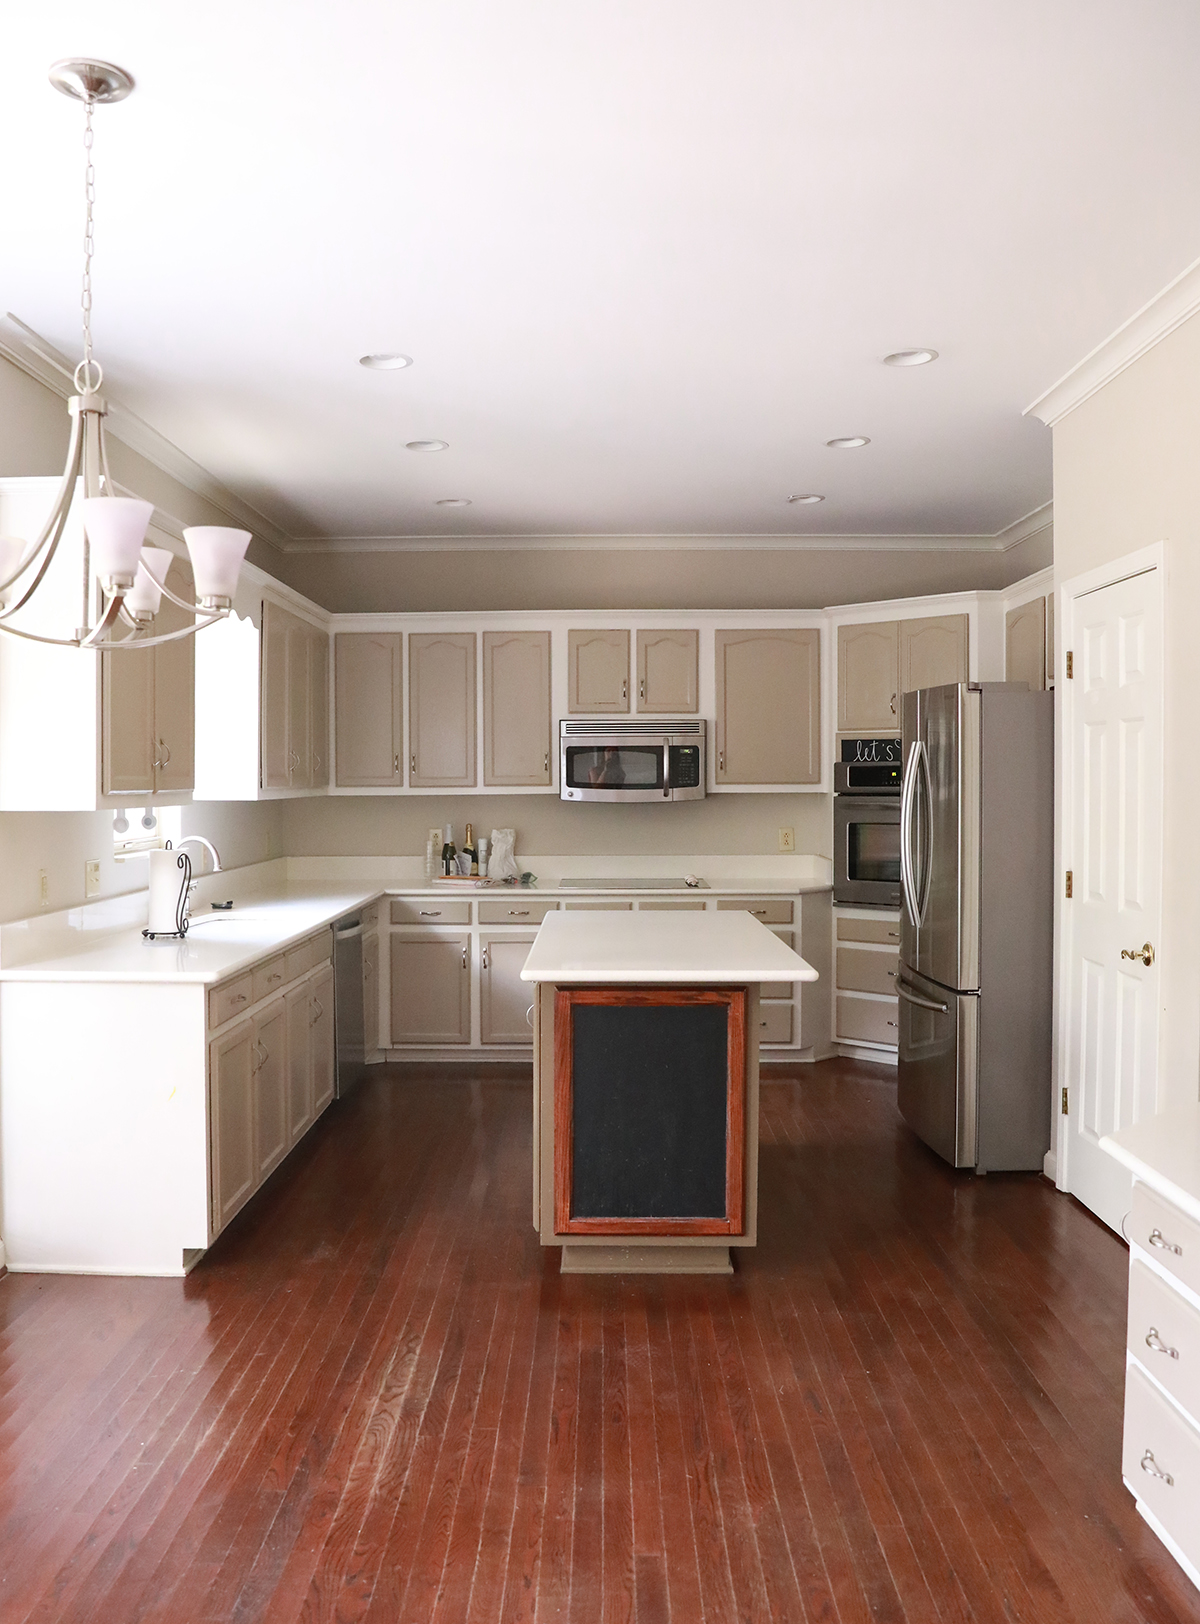
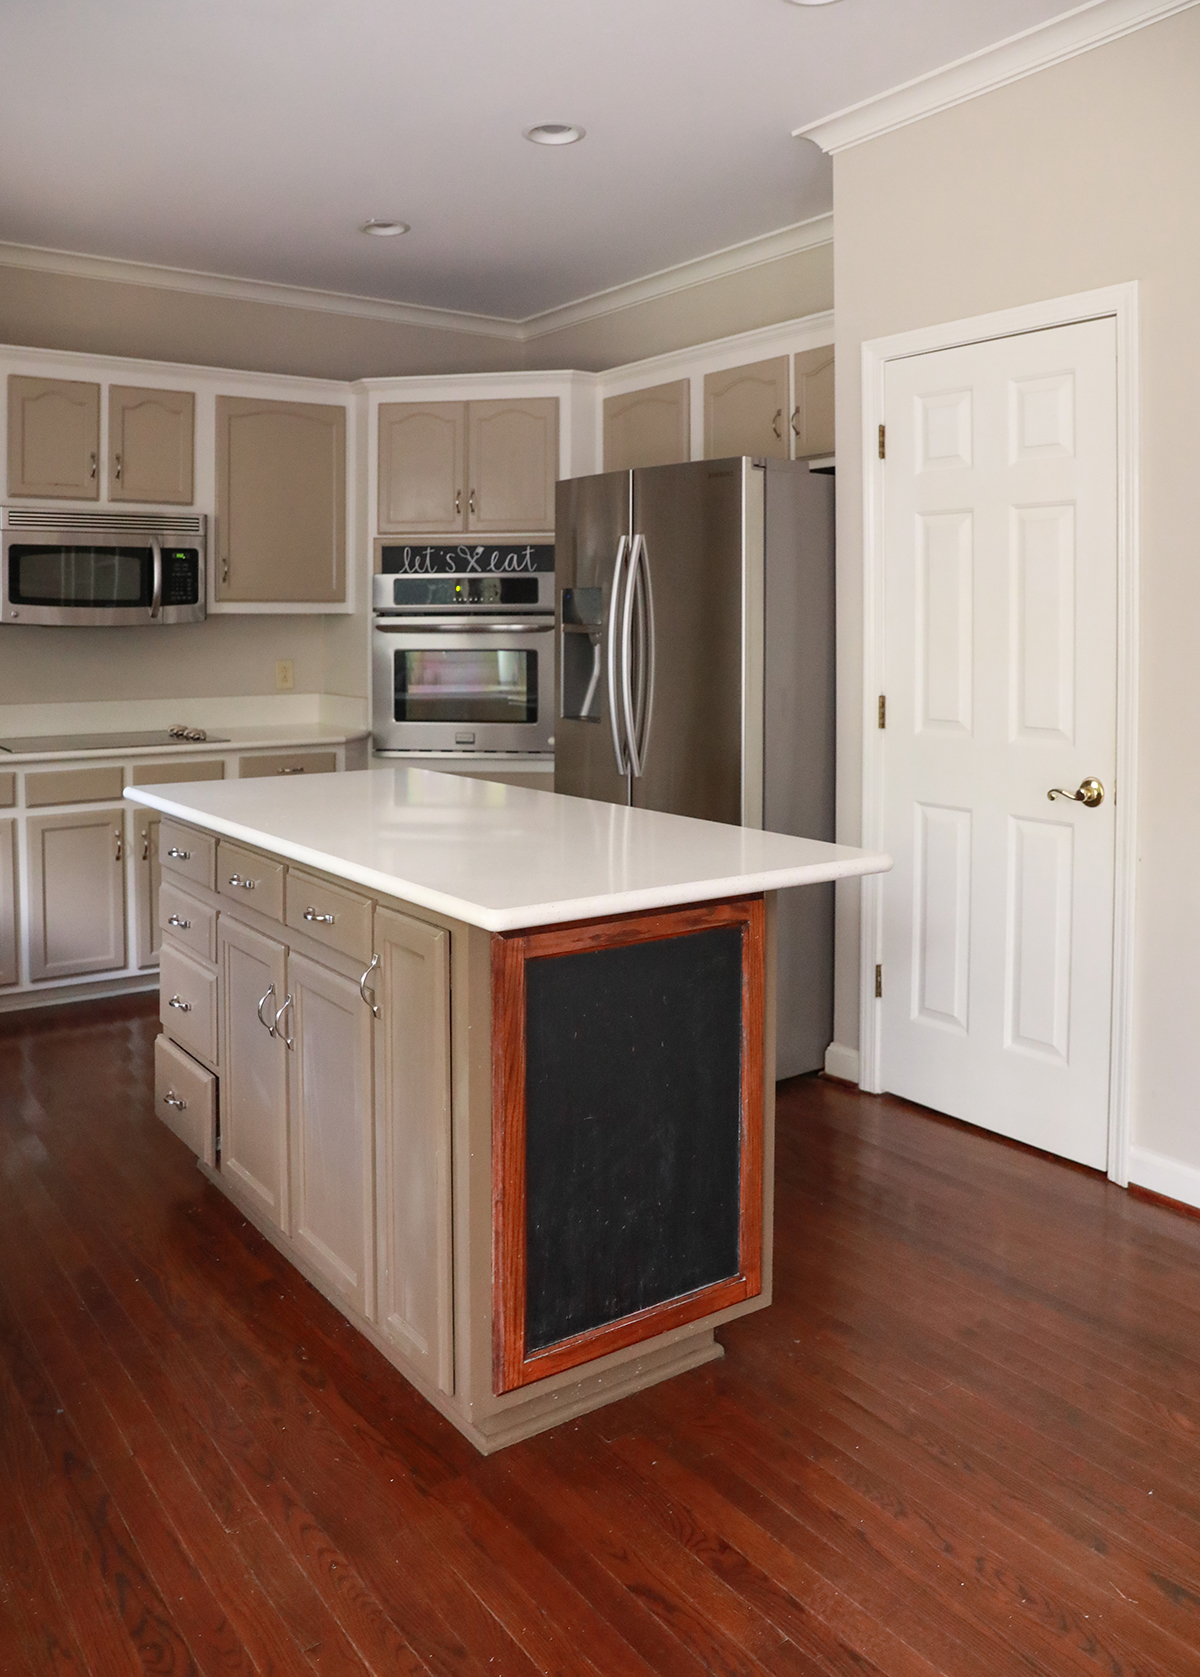
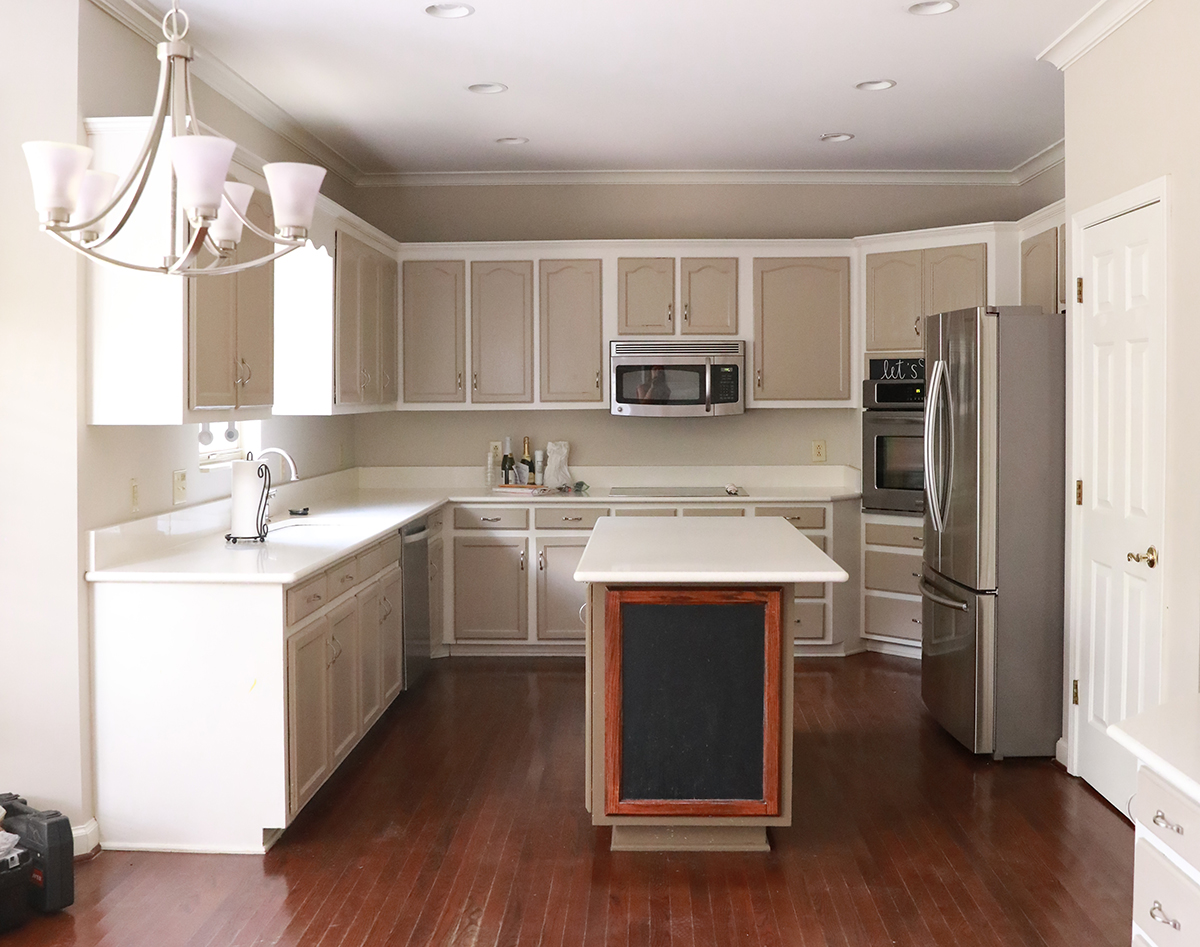
(Our kitchen on move in day July 2020)
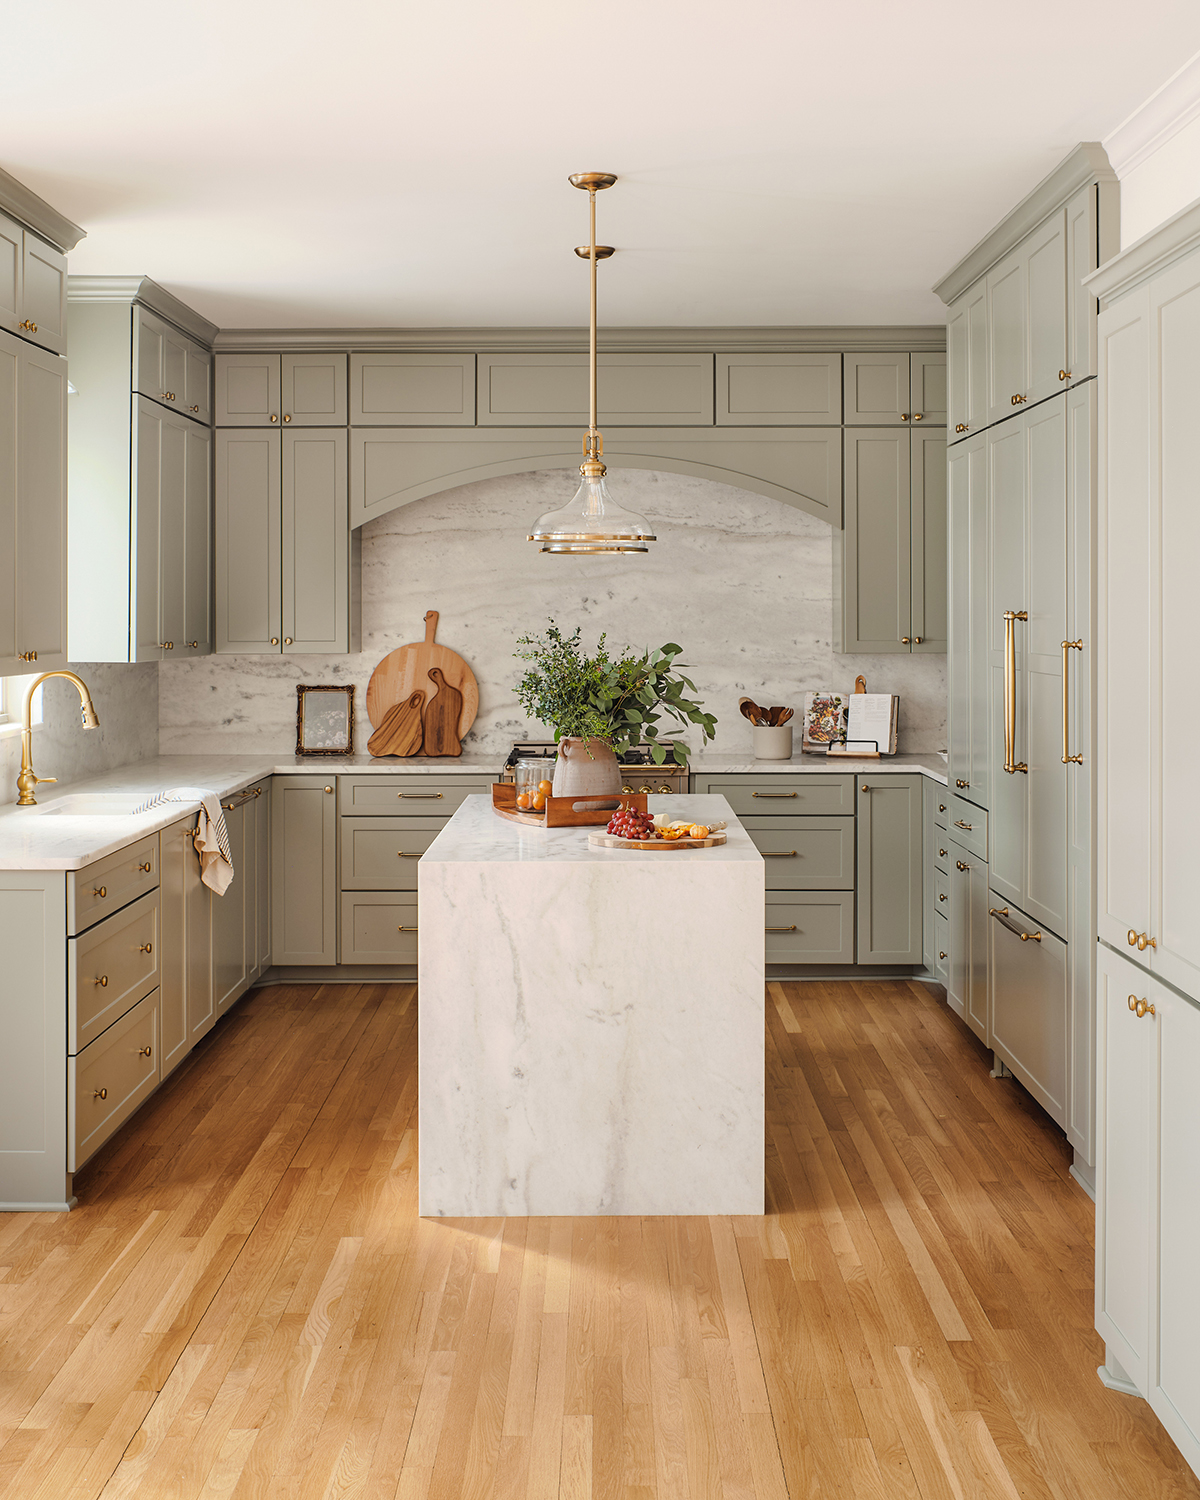
Marble countertops and backsplash – We shared more about why we chose marble in this post. It surprised me that some marble is a better price point than quartz. The decision to keep a larger open area above the stove was to balance out the heavy cabinetry and make it feel more feel more spacious. It also lifts a lot of the shadows that this kitchen gets. Continuing the marble up as a backsplash felt risky to me, but I knew it would add so much visual balance. Marble stone is like its own work of art, and the waterfall edge was meant to reflect that. I am also happy to report it has been really easy to take care of thanks to the pre-sealing. No stains or etching so far.
We found bookended marble slabs (when the pattern of one slab continues into the next) at CRS Granite here in Nashville. We used 4 total slabs for this space, and type of marble was called shadowstorm. It had subtle warm hues in between the grey pattern that paired so well with the cabinetry. We chose Smokey Mountain Tops to fabricate and install based on the recommendation of our cabinet makers, and as you witnessed on instagram – they did not disappoint! I love getting to witness people who are skilled at their craft. Every person who showed up to help install this heavy marble gave 110%, and worked with such diligence and care. Pop quiz for those who watched it unfold: how many men did it take to install that back slab? 😉
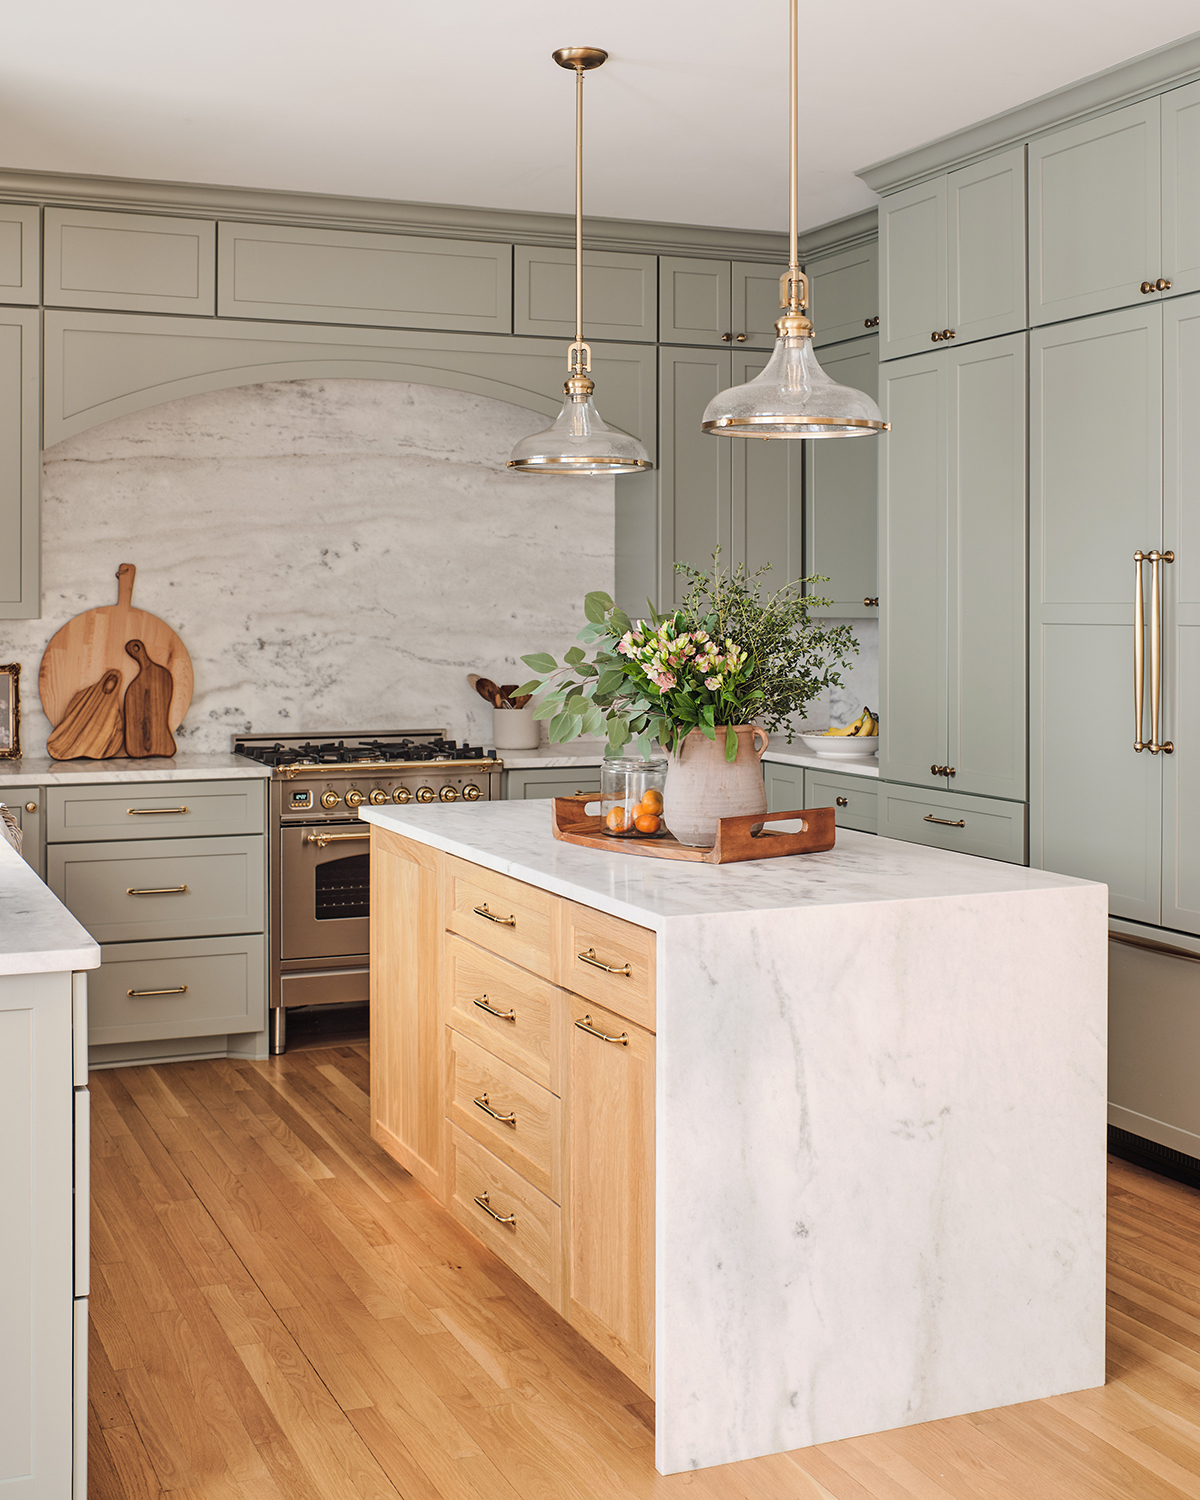
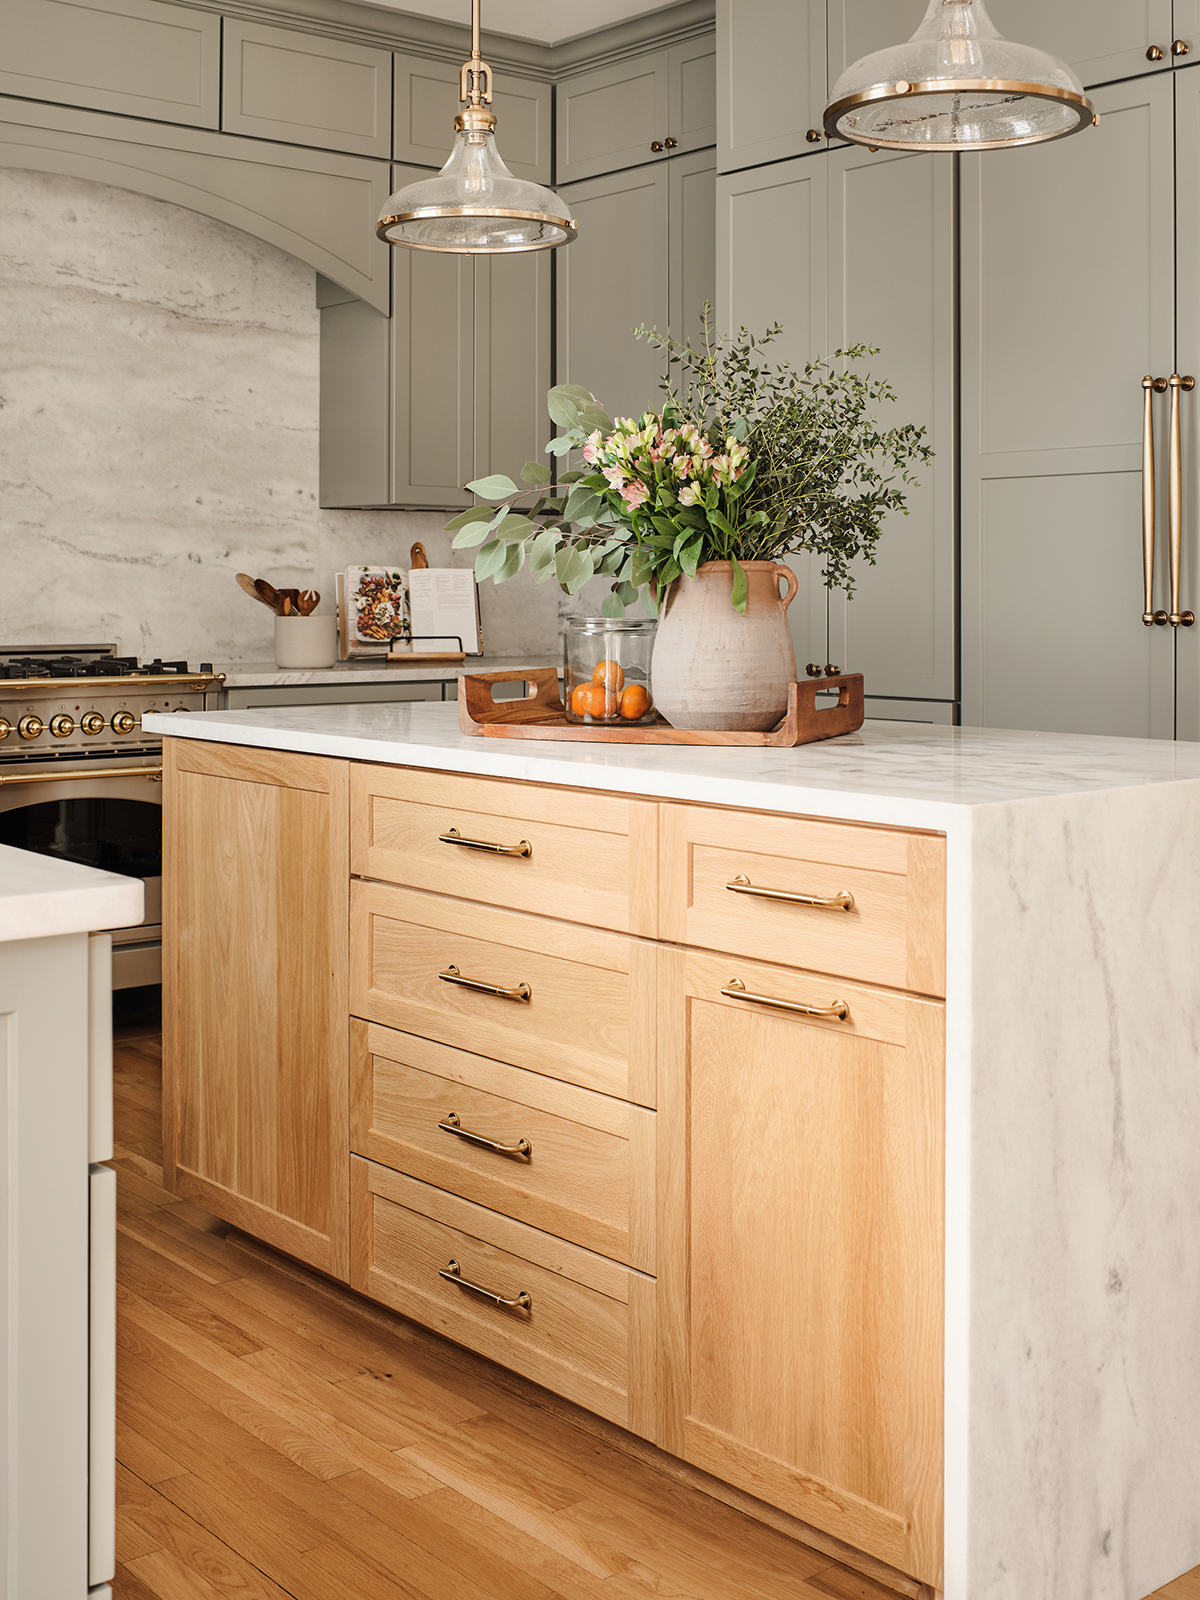
We maximized the island space as well adding storage on all three sides! The trash drawer is on the end closest to the marble. We added 5 drawers on this side as well as 3 large drawers on the other end hold our skillet, grill tools, cooking bowls, knife drawer, etc. The opposite side is a more shallow cabinet that we are using as a mini canned goods pantry. Gabe and I both really wanted to incorporate some natural white oak on the island, and it really warmed up the colors in the space!
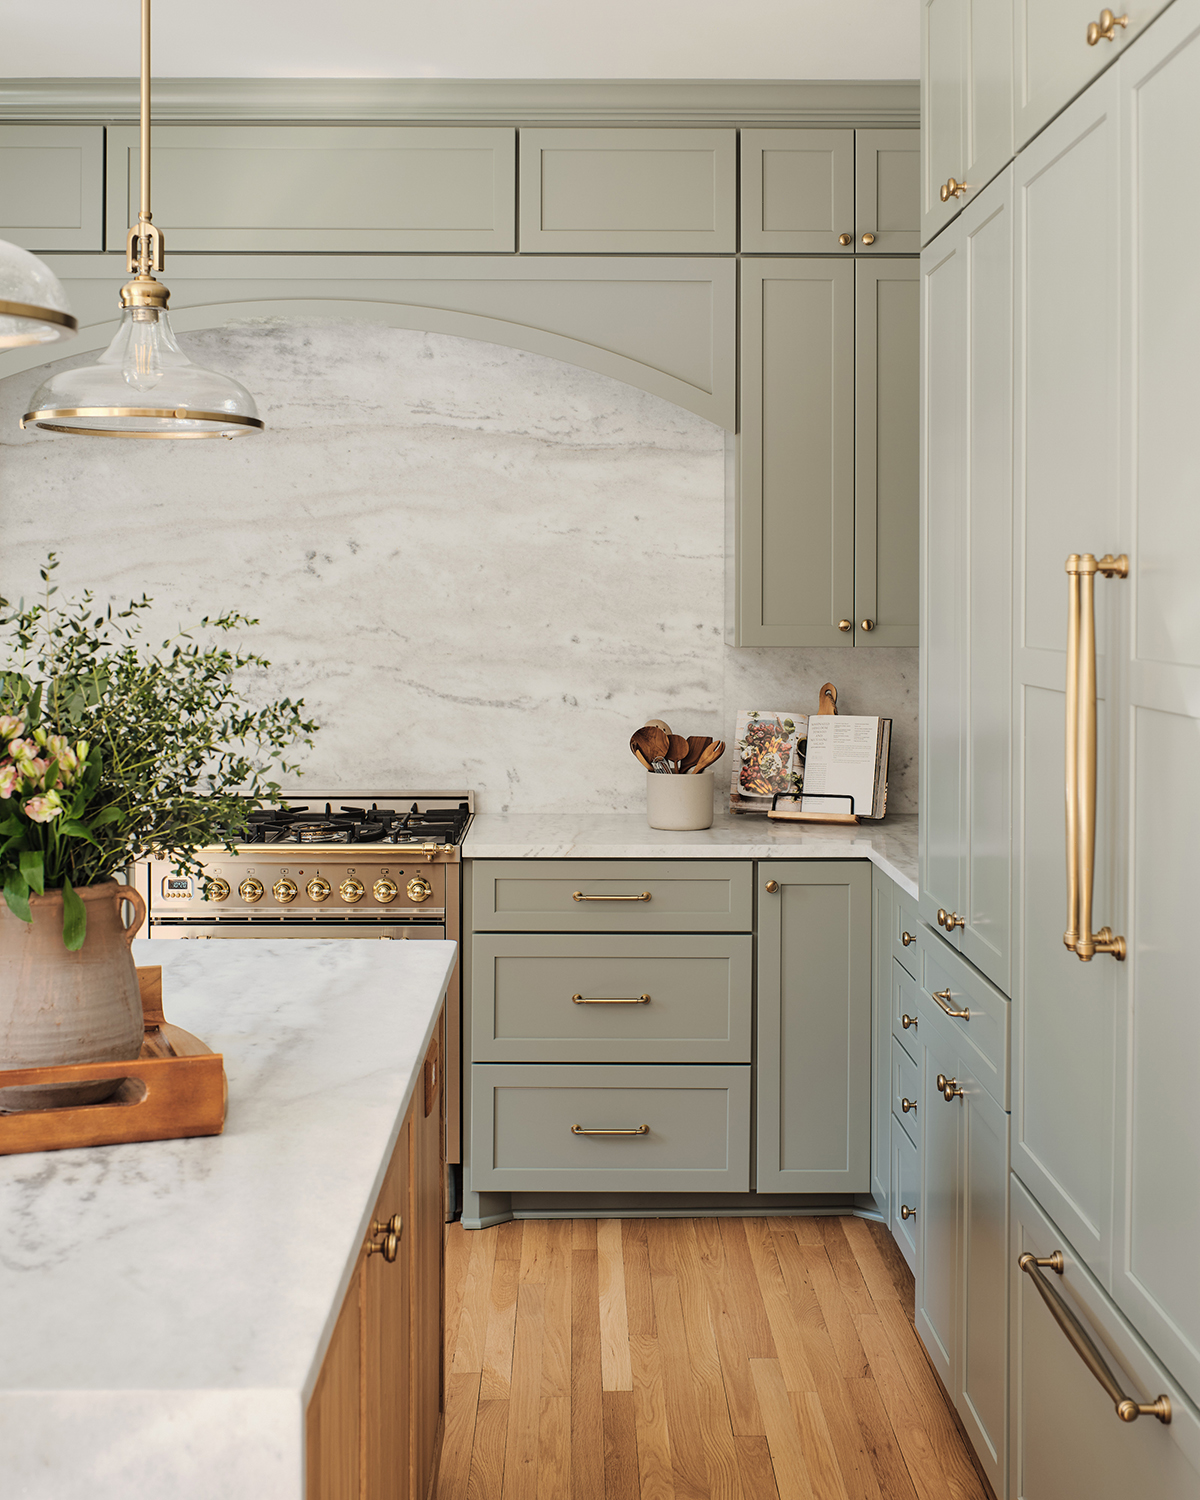
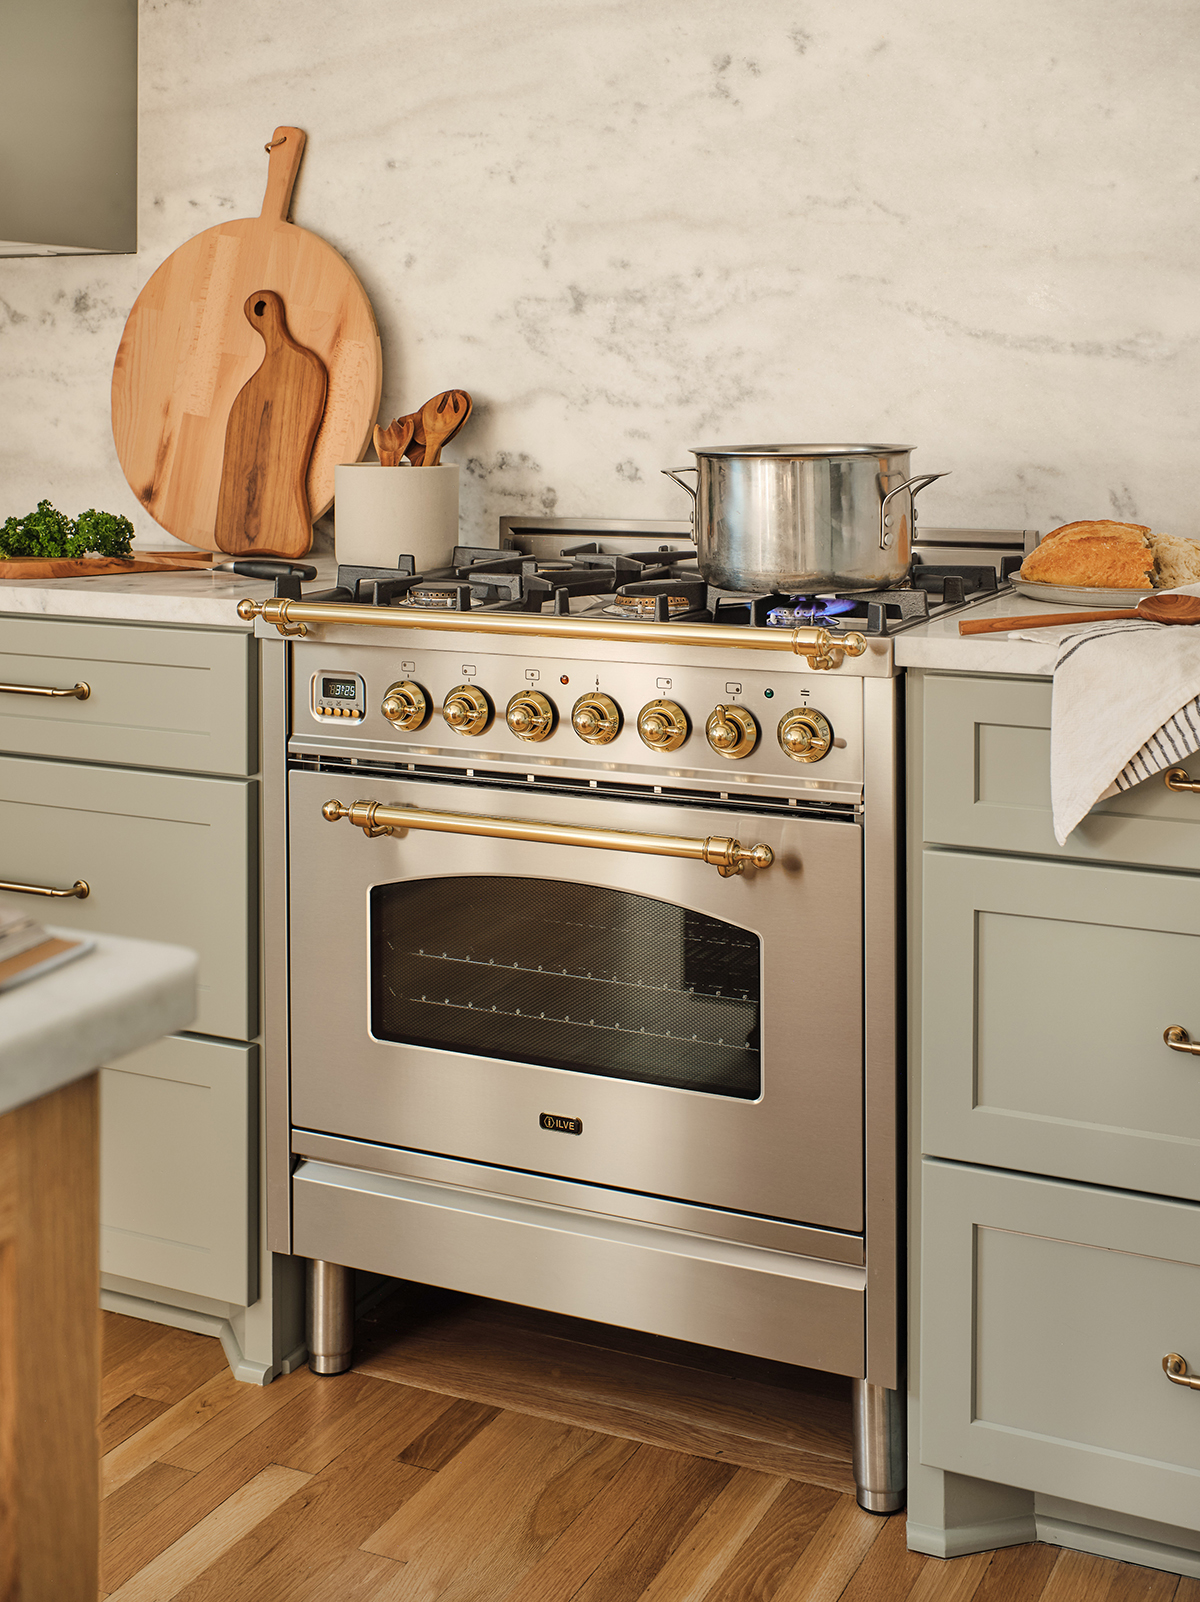
I wrote about the appliances we chose and why in this post, and we are really happy with how they are functioning so far. There is definitely a learning curve with the ILVE gas range burners, but it has several heat settings we are learning for different foods. Even though I didn’t want or need a double stove, I do wish I had gone for a 36 in. which is a tad wider. It is a very well designed and well made gas stove range.
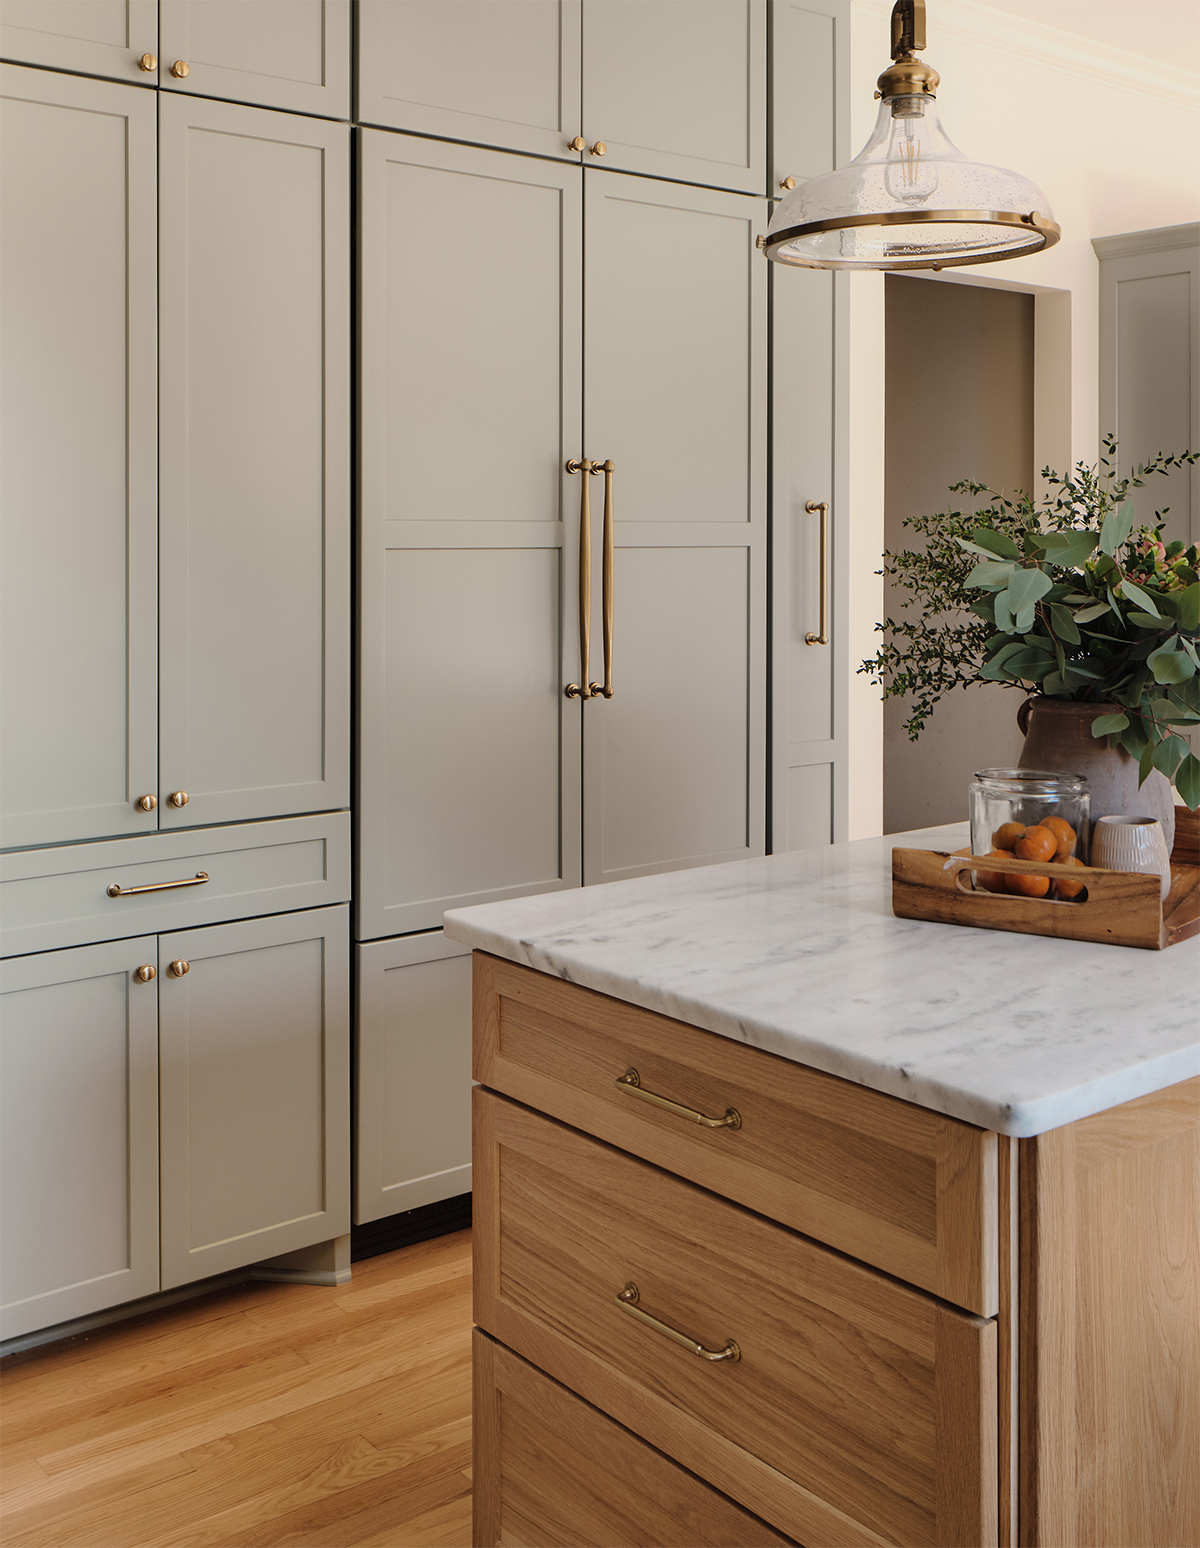
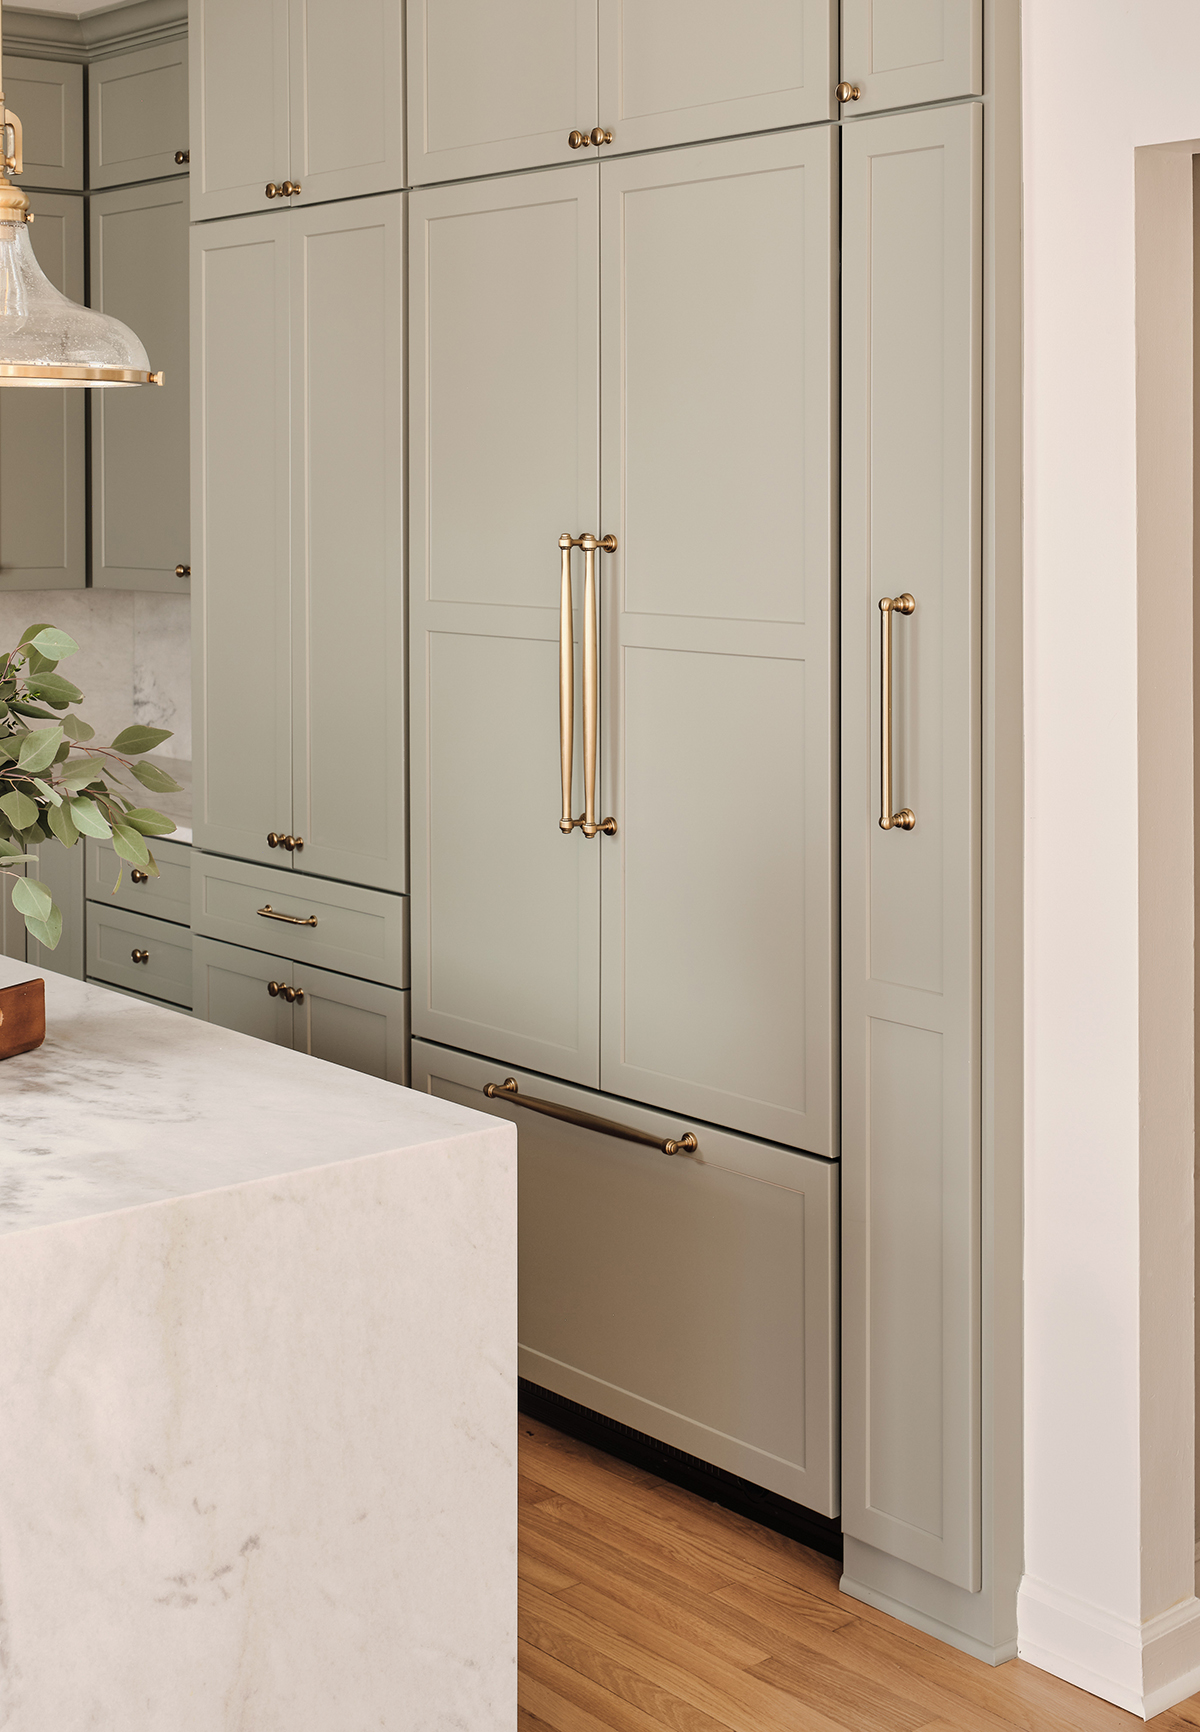
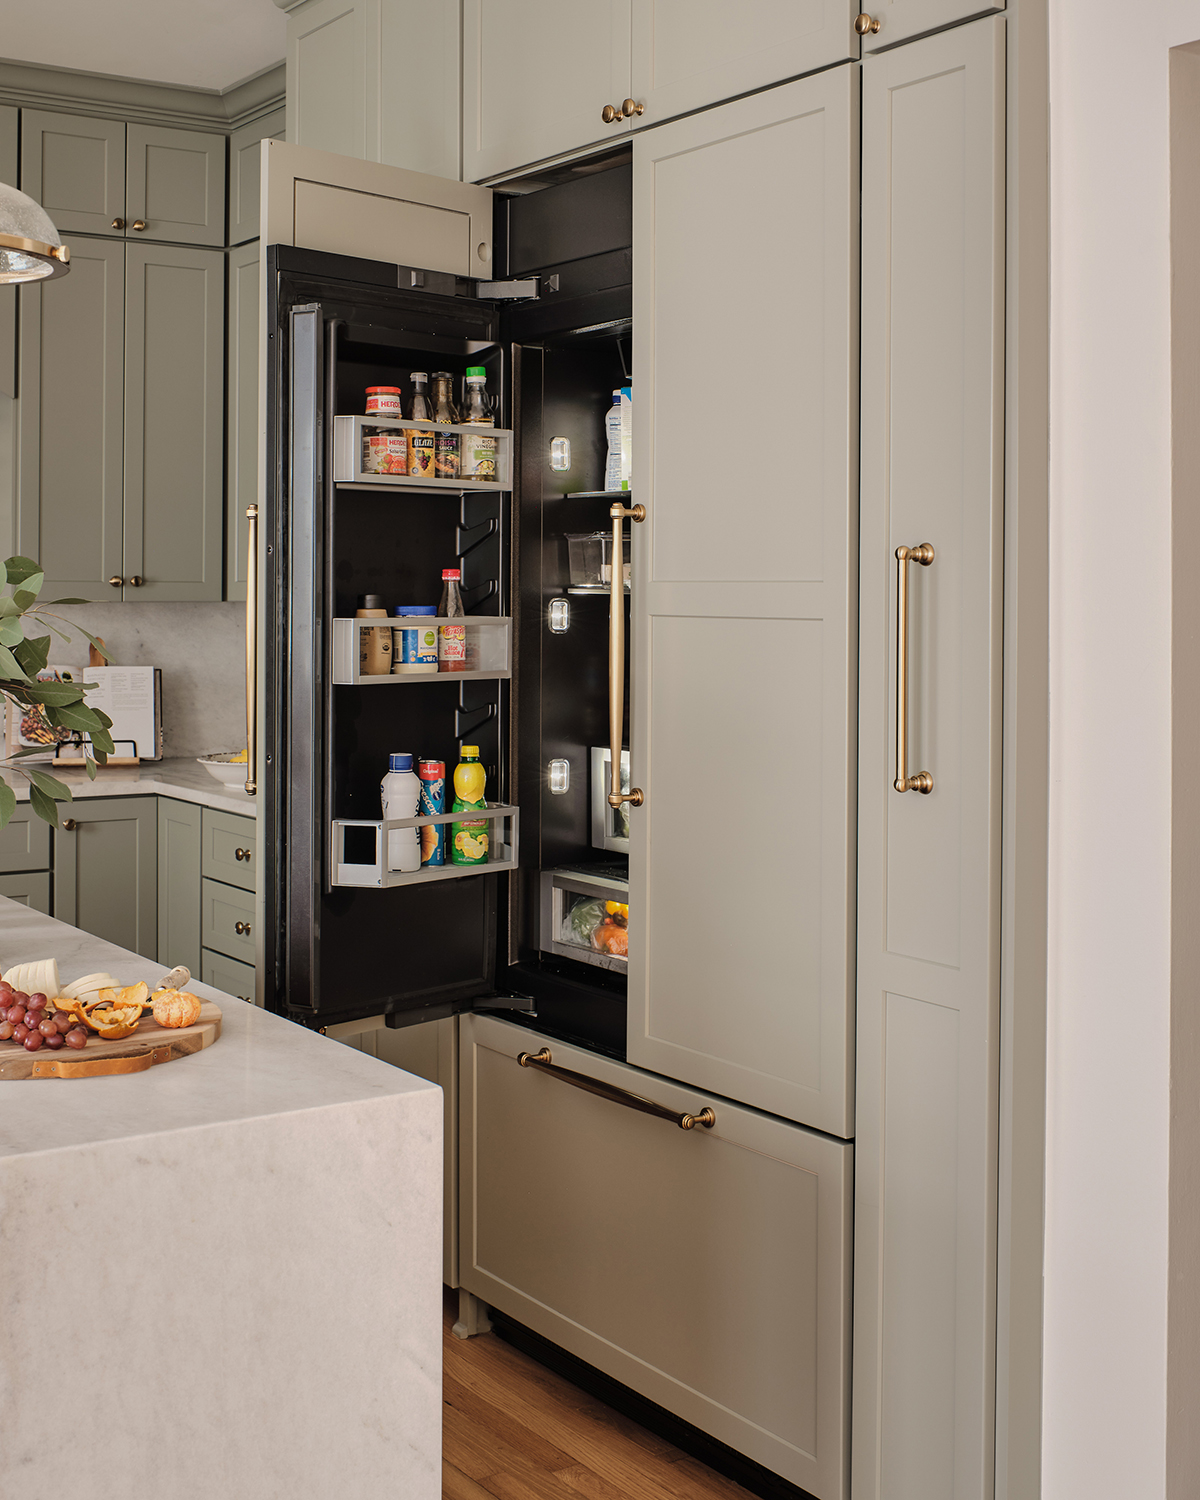
Counter depth fridge – I was initially hesitant to try a counter depth fridge with our large family, but I have loved the wider and more shallow design. We can see everything easier! We still utilize the garage fridge for extra freezer space (and hello midwest friends-drinks!).
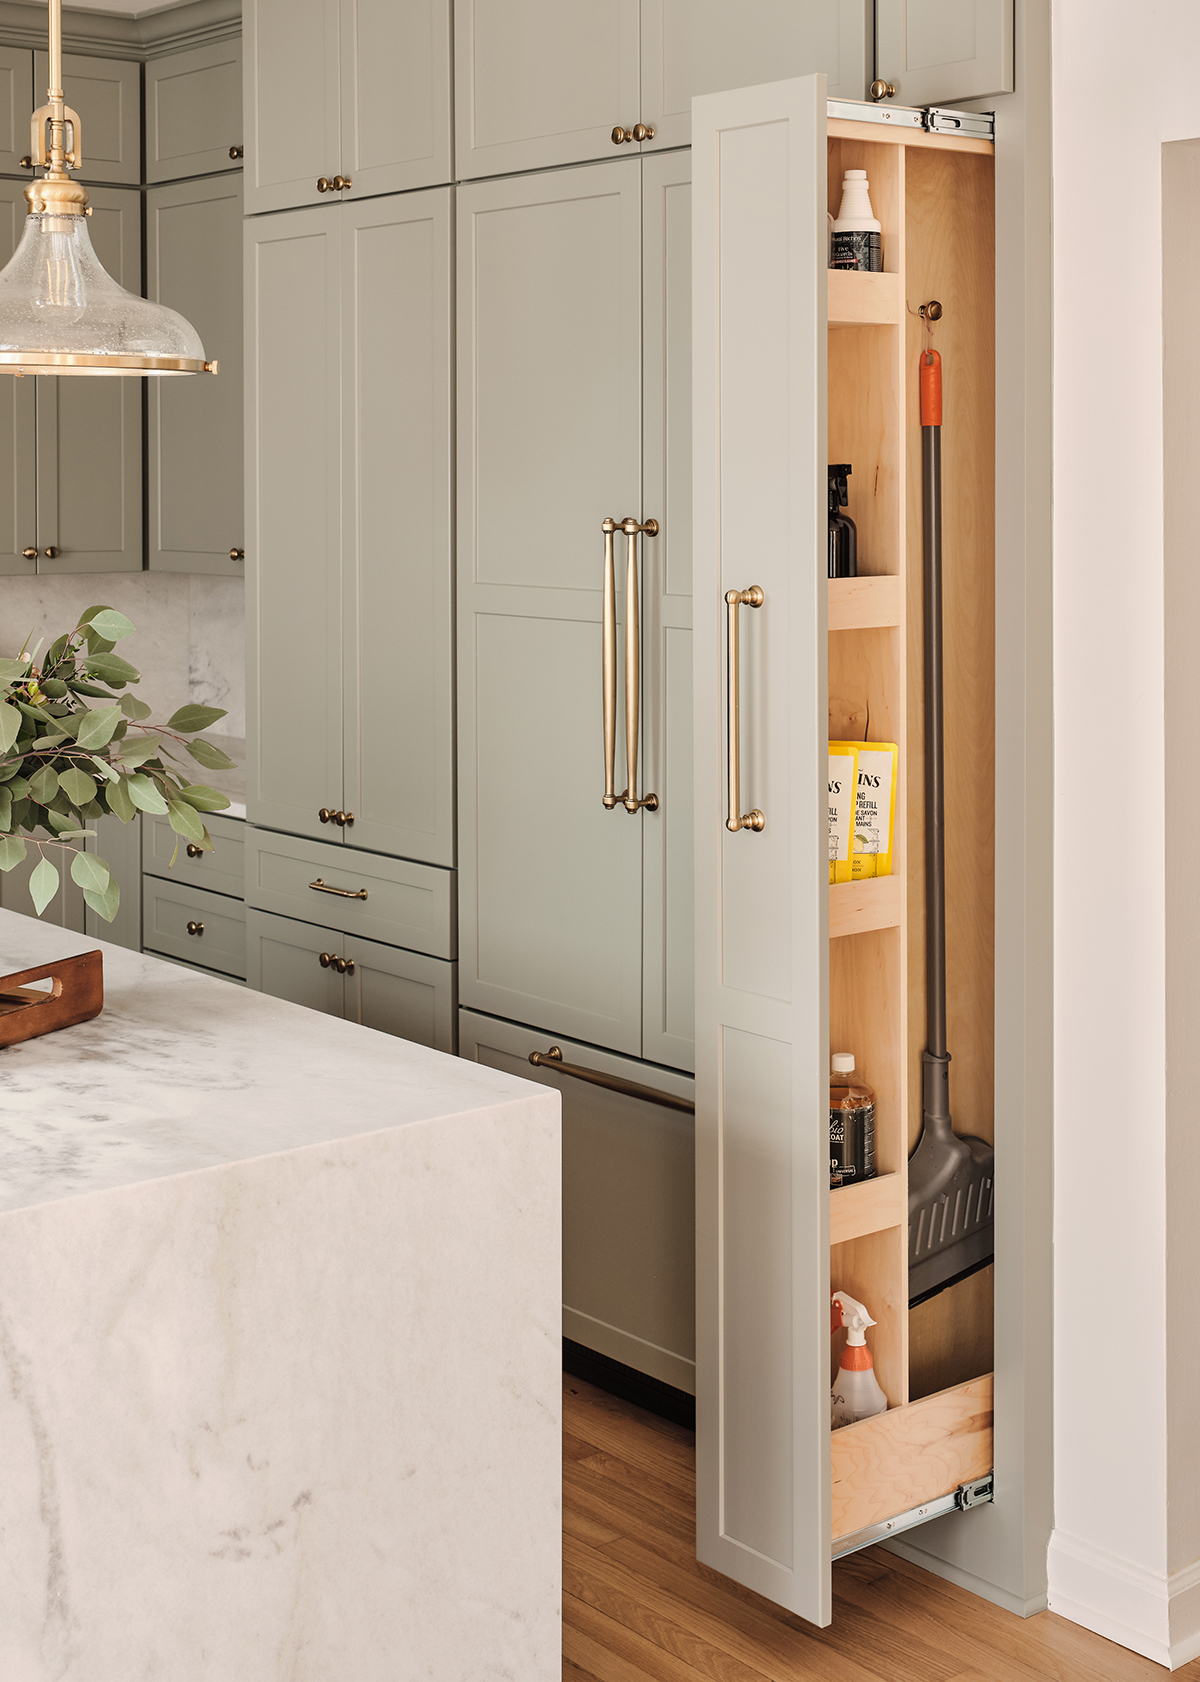
Broom closet – You know you are getting old, when a broom closet becomes the most exciting thing to happen to you all year. We had about 13 inches to work with, and it was just enough space to create a custom pull out cabinet to store cleaning supplies and the broom which we didn’t have a place for (we only have one other small coat closet on the first floor). It’s a heavier tug and a higher handle so the little ones can’t actually pull it open. I want to give credit to Renovate Blog that inspired this idea!
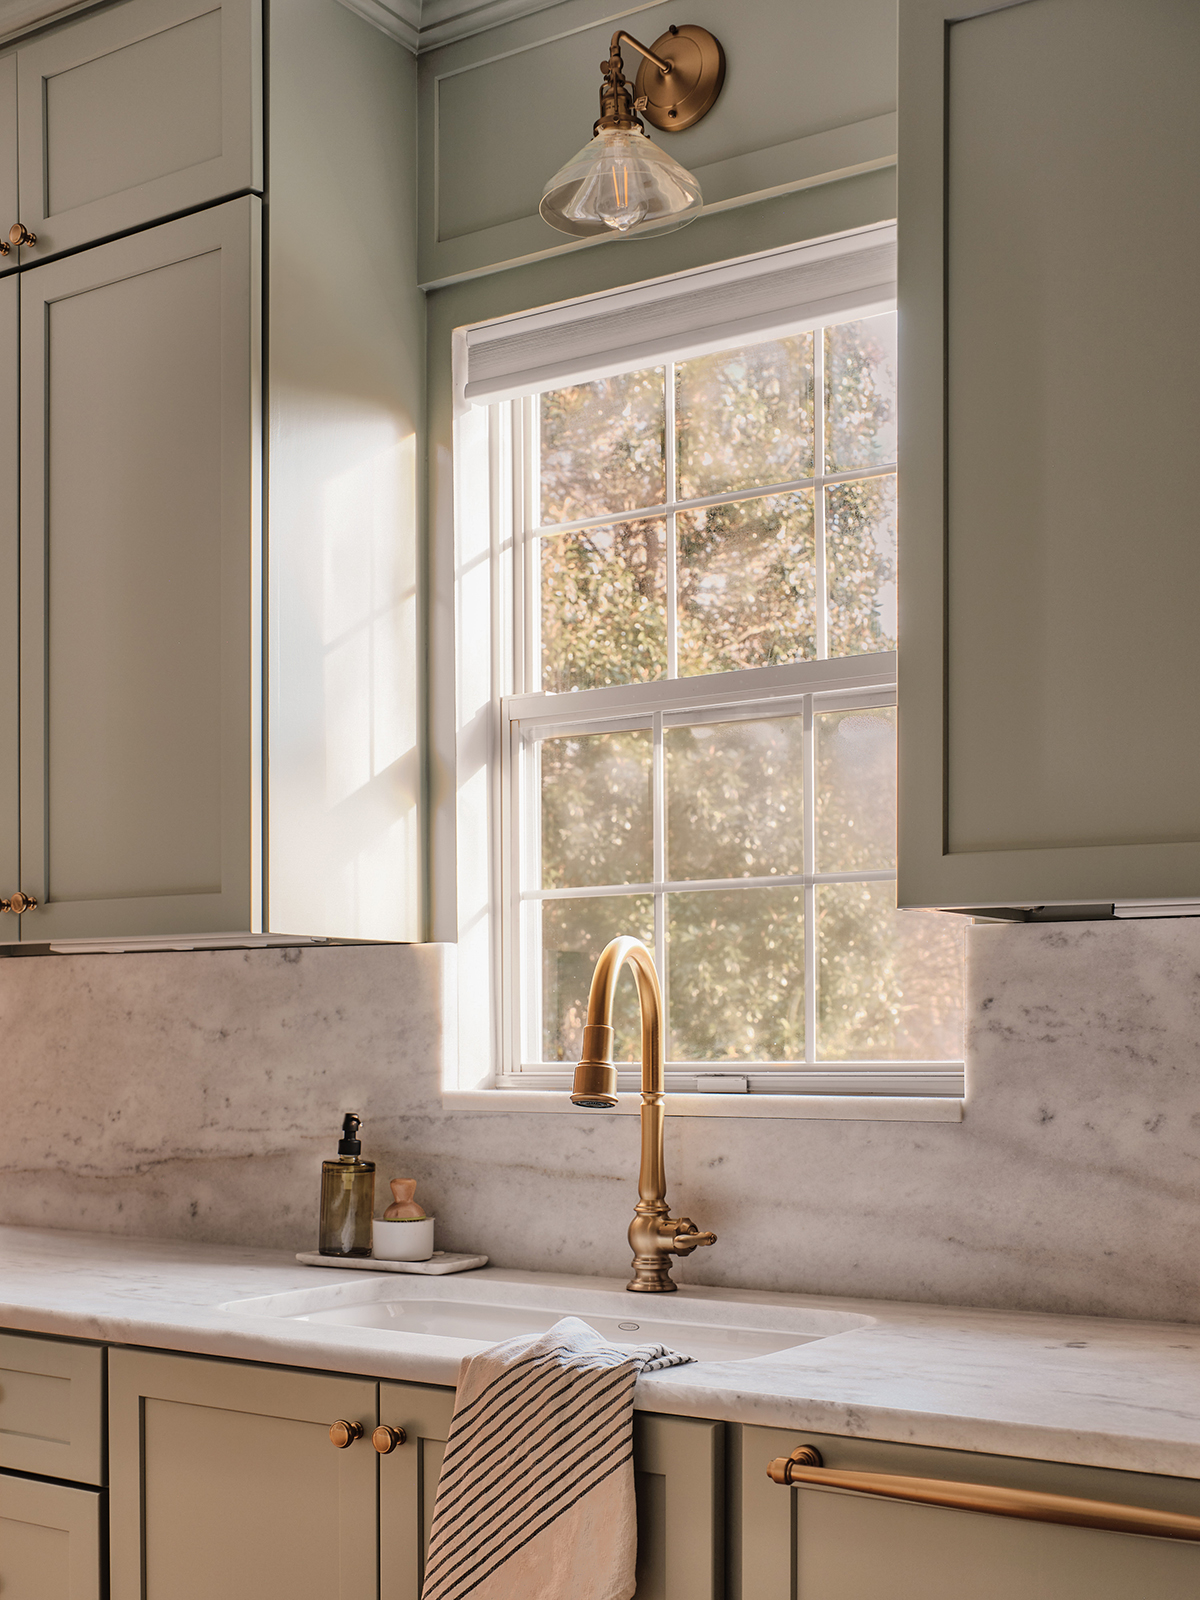
Faucet + Sink – This artifacts faucet has been a workhorse! It is very easy to use with different spray settings and pressure levels. I love that Kohler products are built to last and very well made. It has been quite the power house for my nightly pots and pans wash down. The undermount single bowl ceramic sink was also a choice made with bigger pots in mind. I really liked the seamless look as well. Thank you Kohler for partnering with us on this corner of our kitchen!
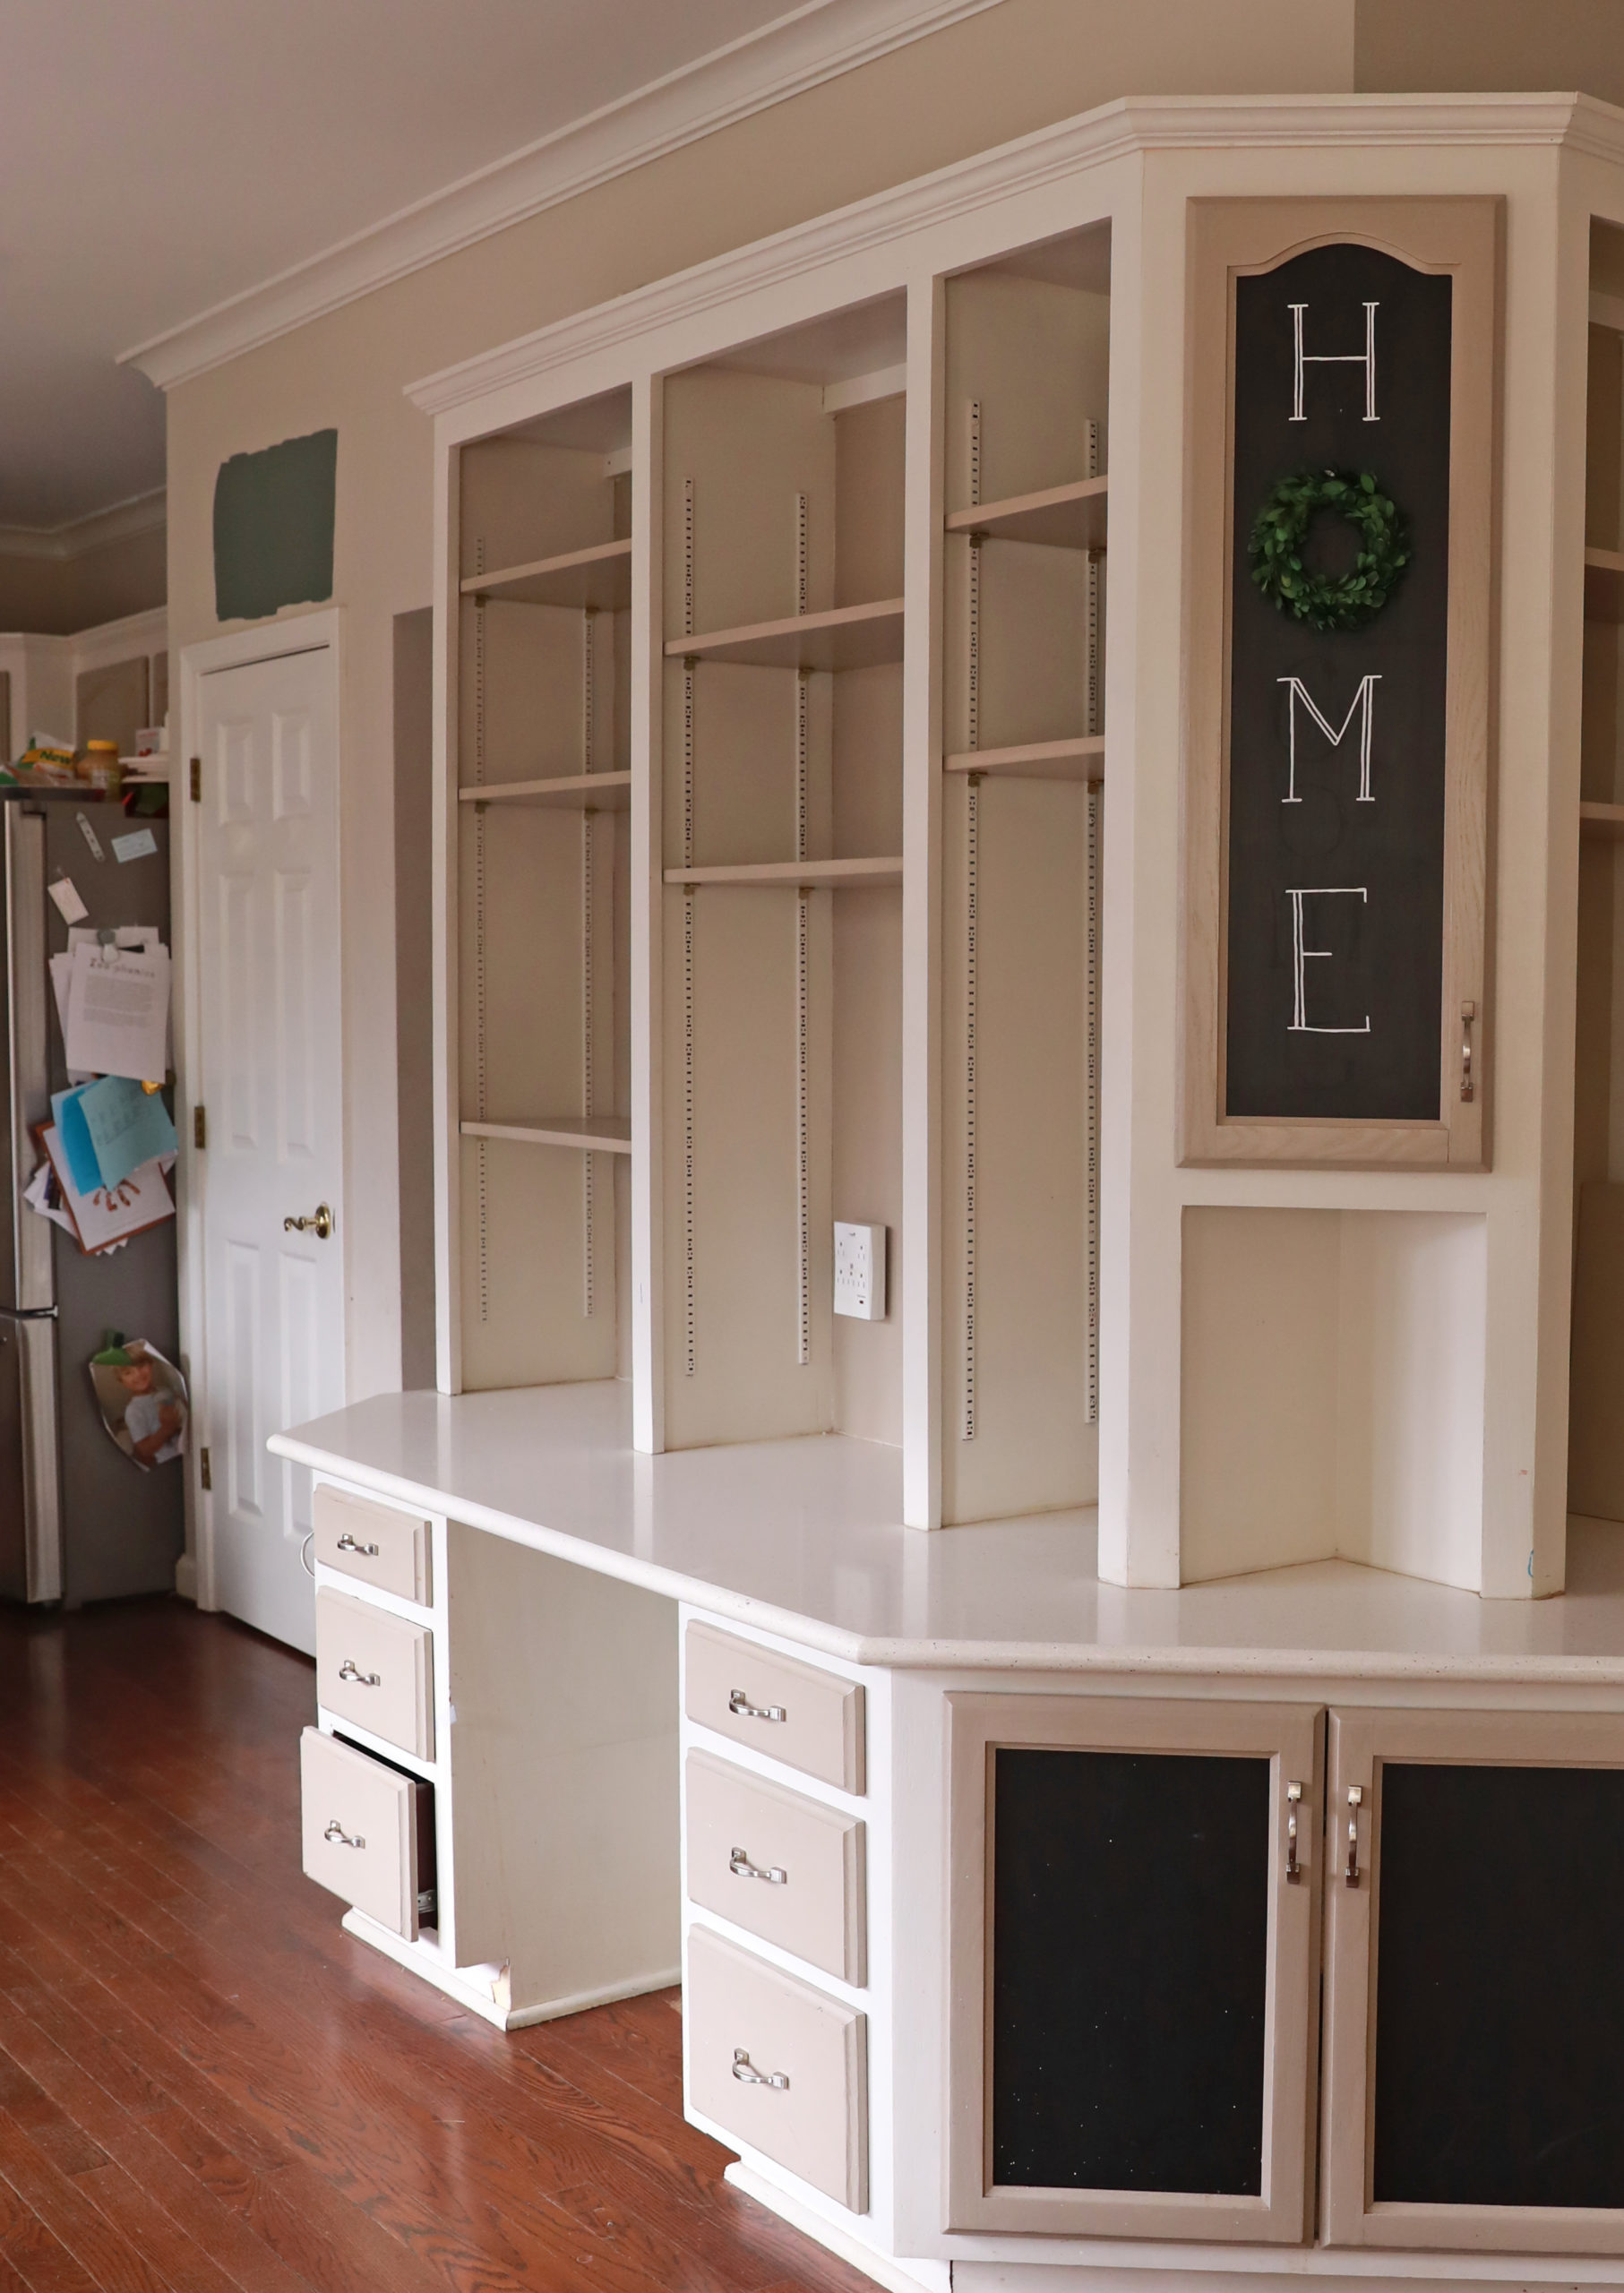
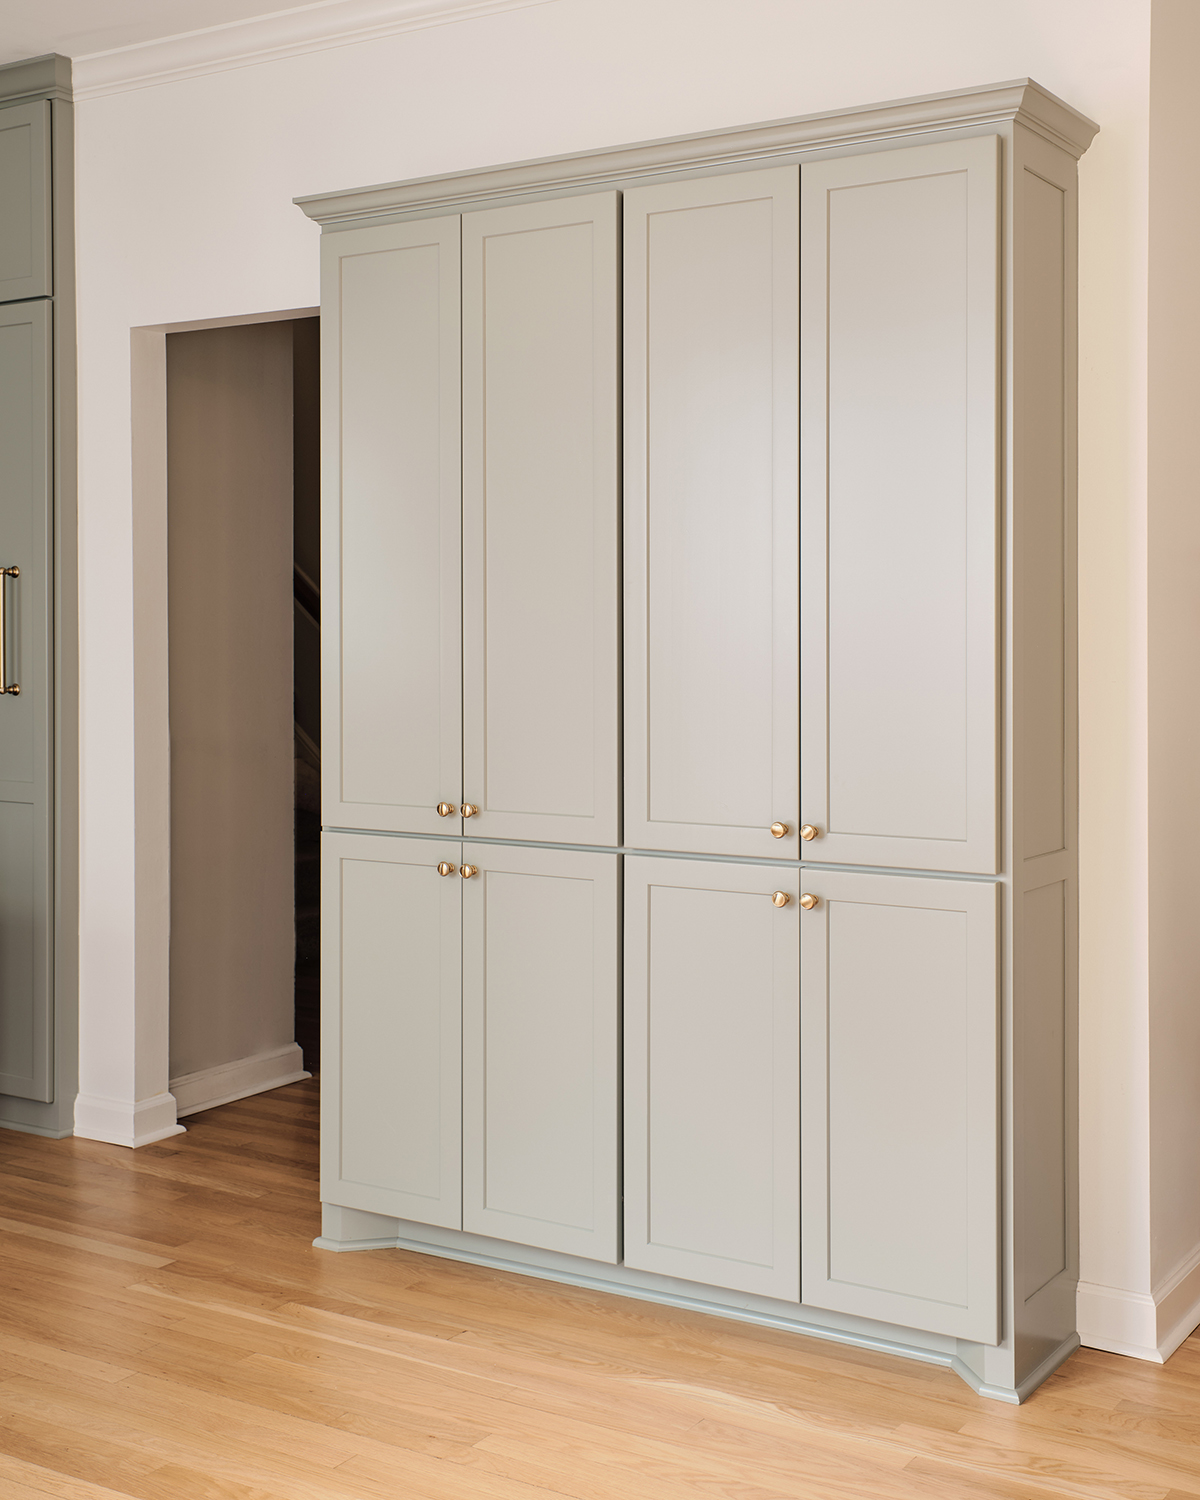
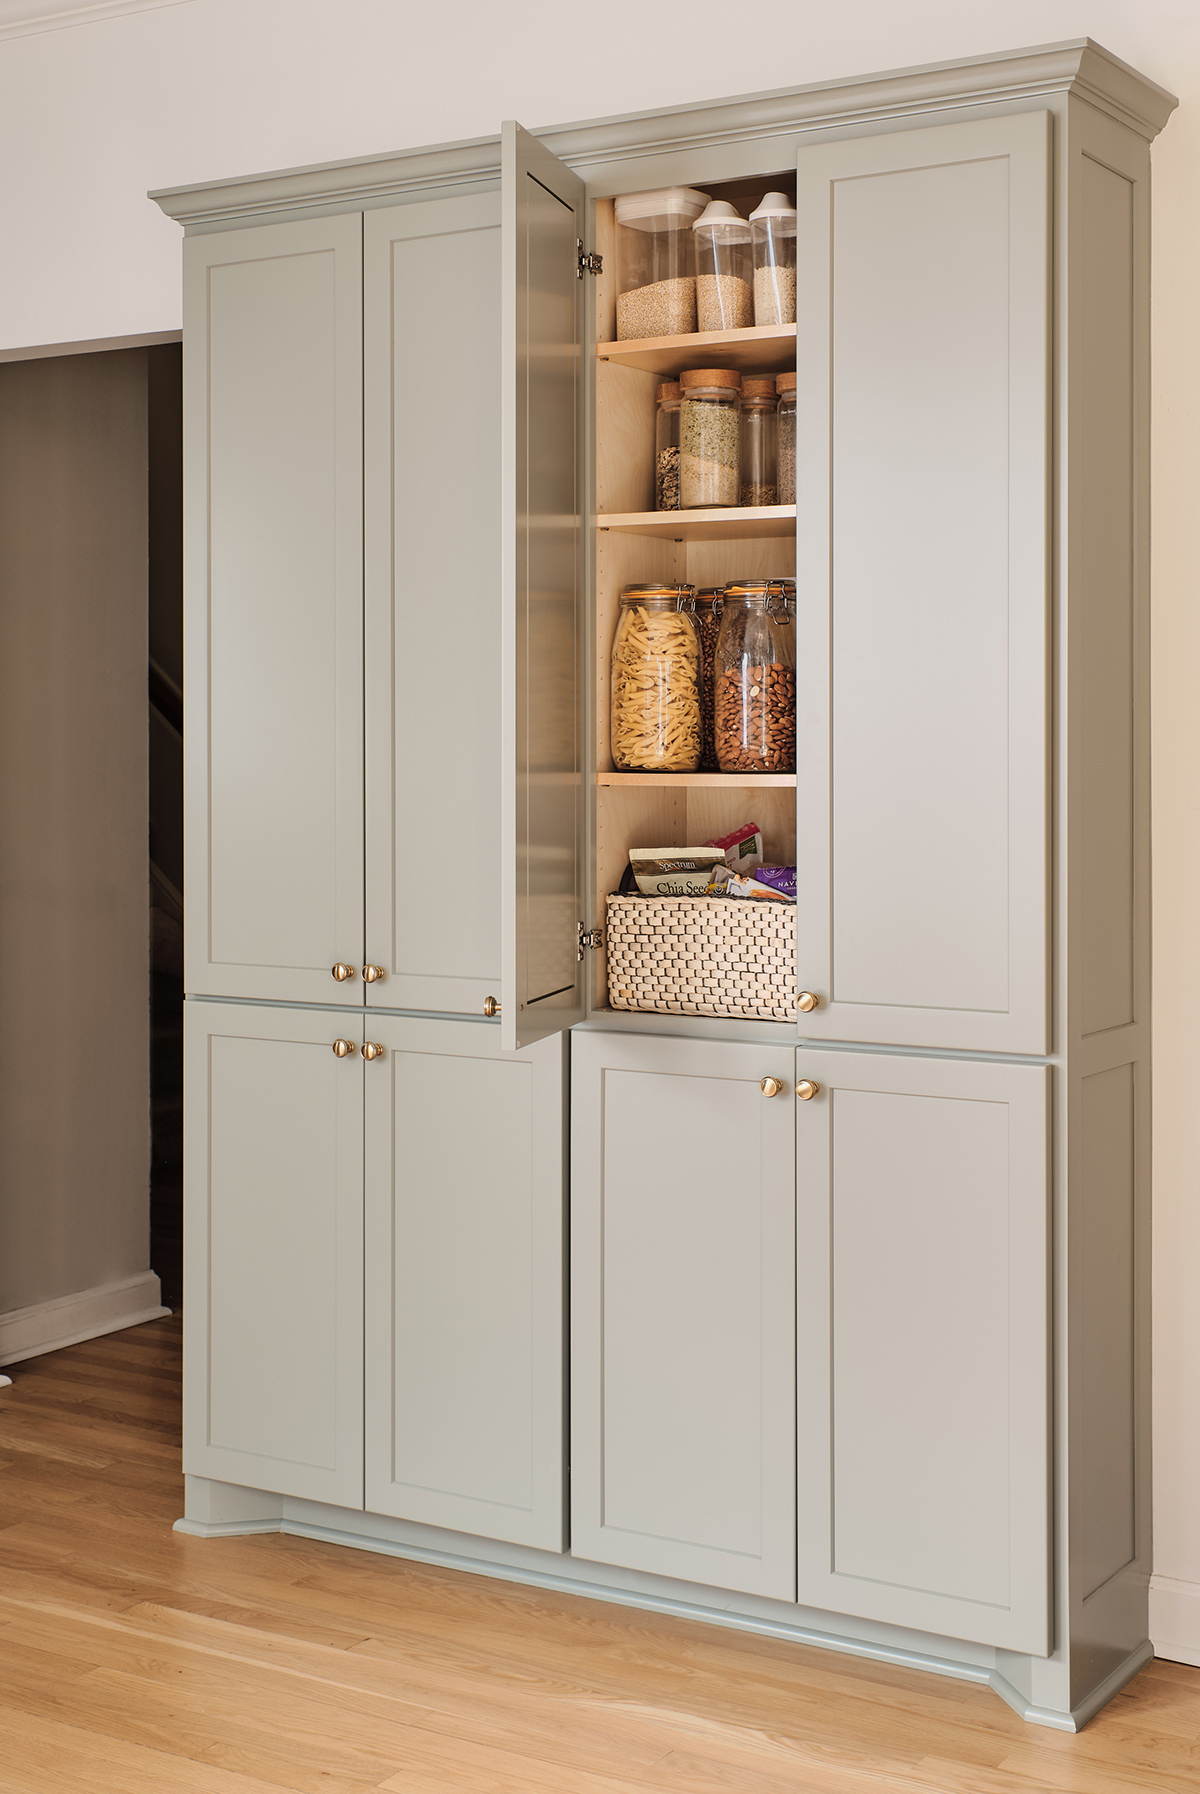
There aren’t many older homes we saw here in Nashville with pantry and closet space, so we had to re-think how to work in the pantry with the new layout. We didn’t need or want the big built in desk and bookcase area since there are two in the adjoining room. This built in pantry has been just the space we needed, and gave us more room in the kitchen to work with. It’s about 13 in. deep.
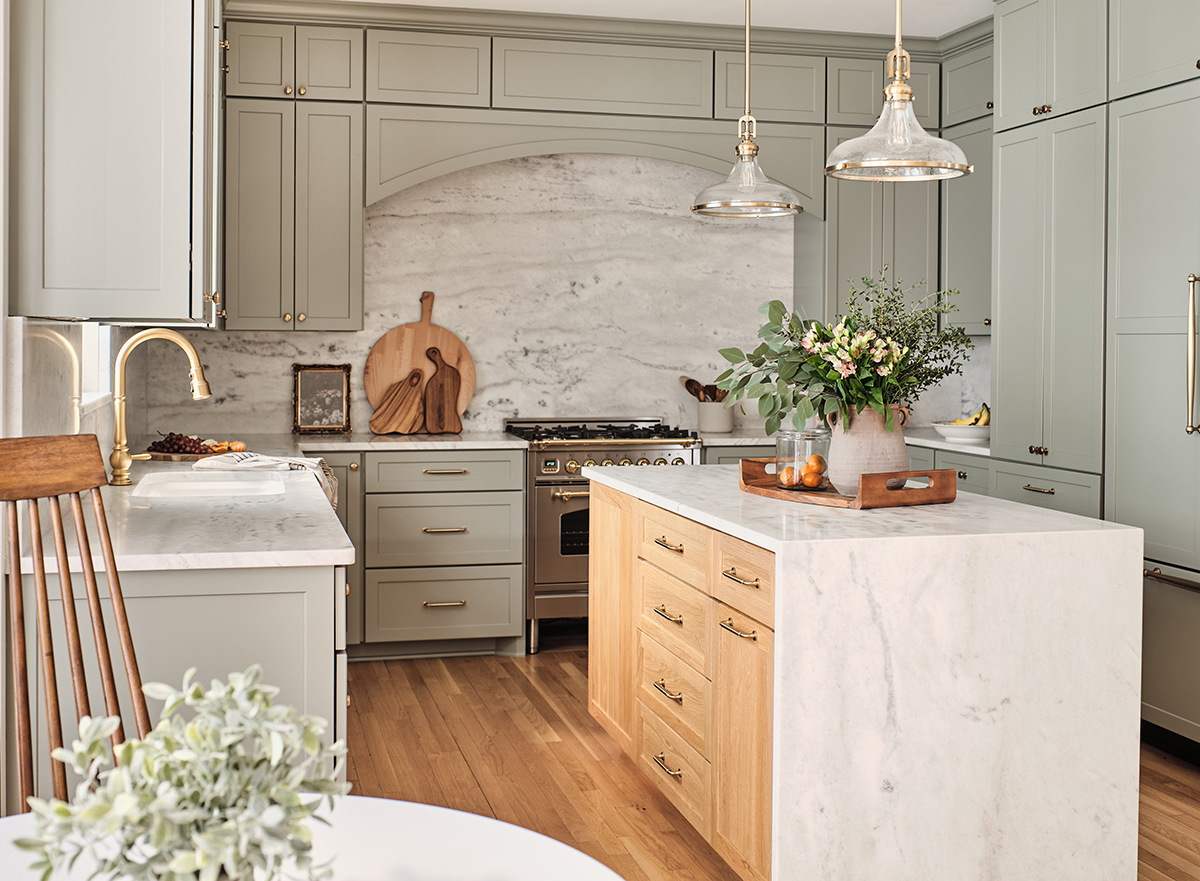
Even though these light pendants were originally backordered for months, I never did find anything that complimented this space better! It took till this month to get some of these final details installed, but I have really enjoyed watching the layers come together one piece at a time.
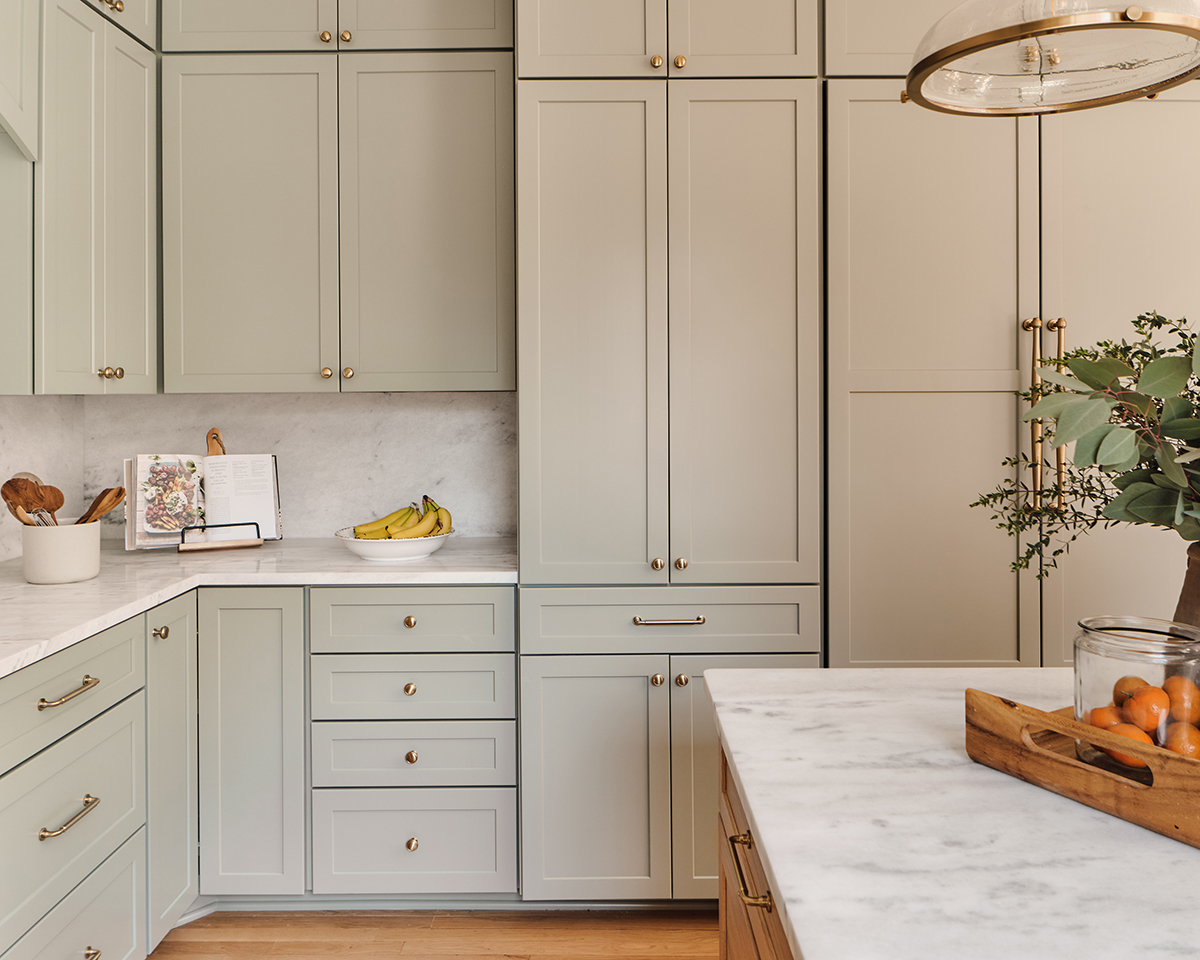
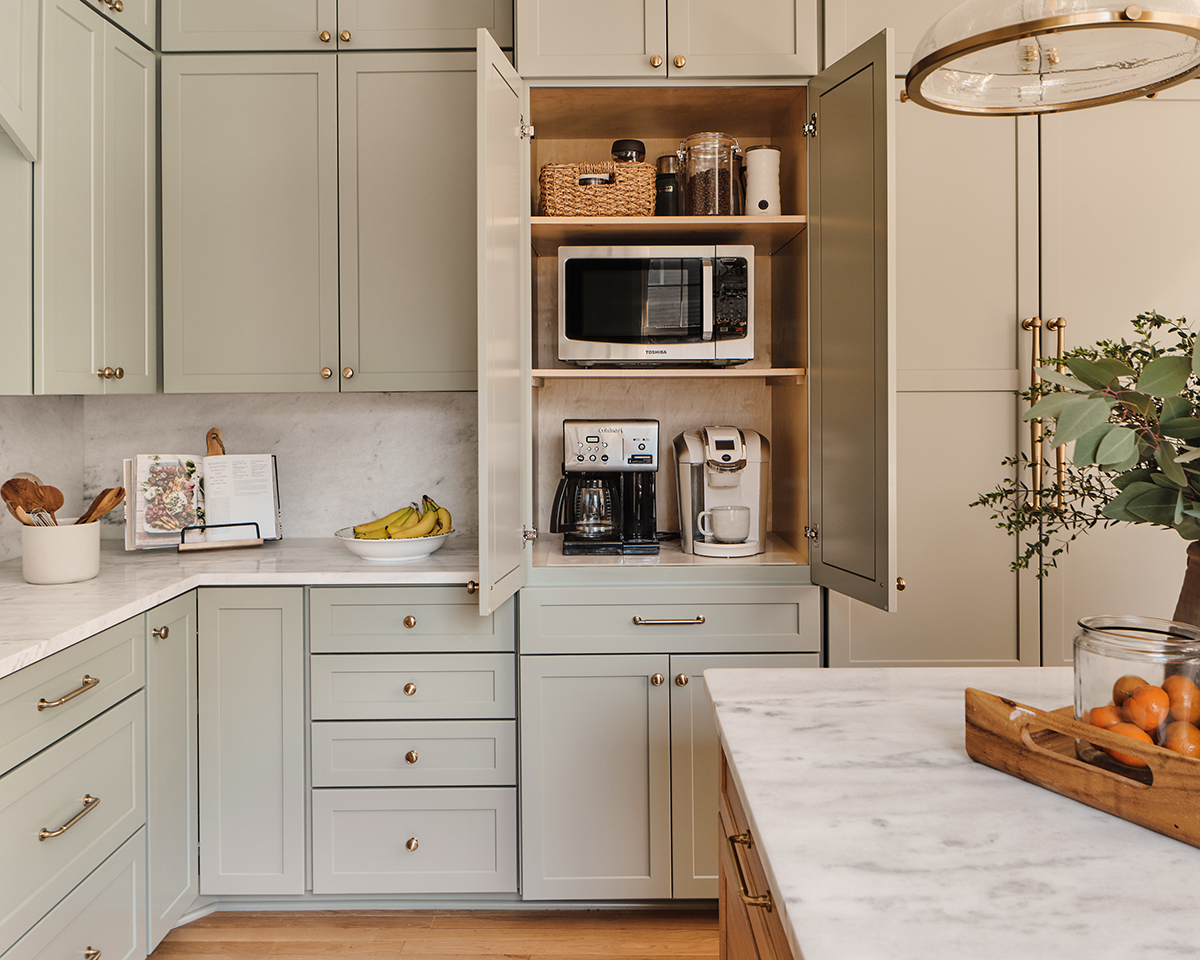
Our contertops are cluttered in approx. 15 seconds every day due to school papers, meals, snacks, etc. that tend to pile up from our busy household. Having the appliances off the counter felt like mental decluttering! We use the lower cabinet for our insta pot and crock pot storage.
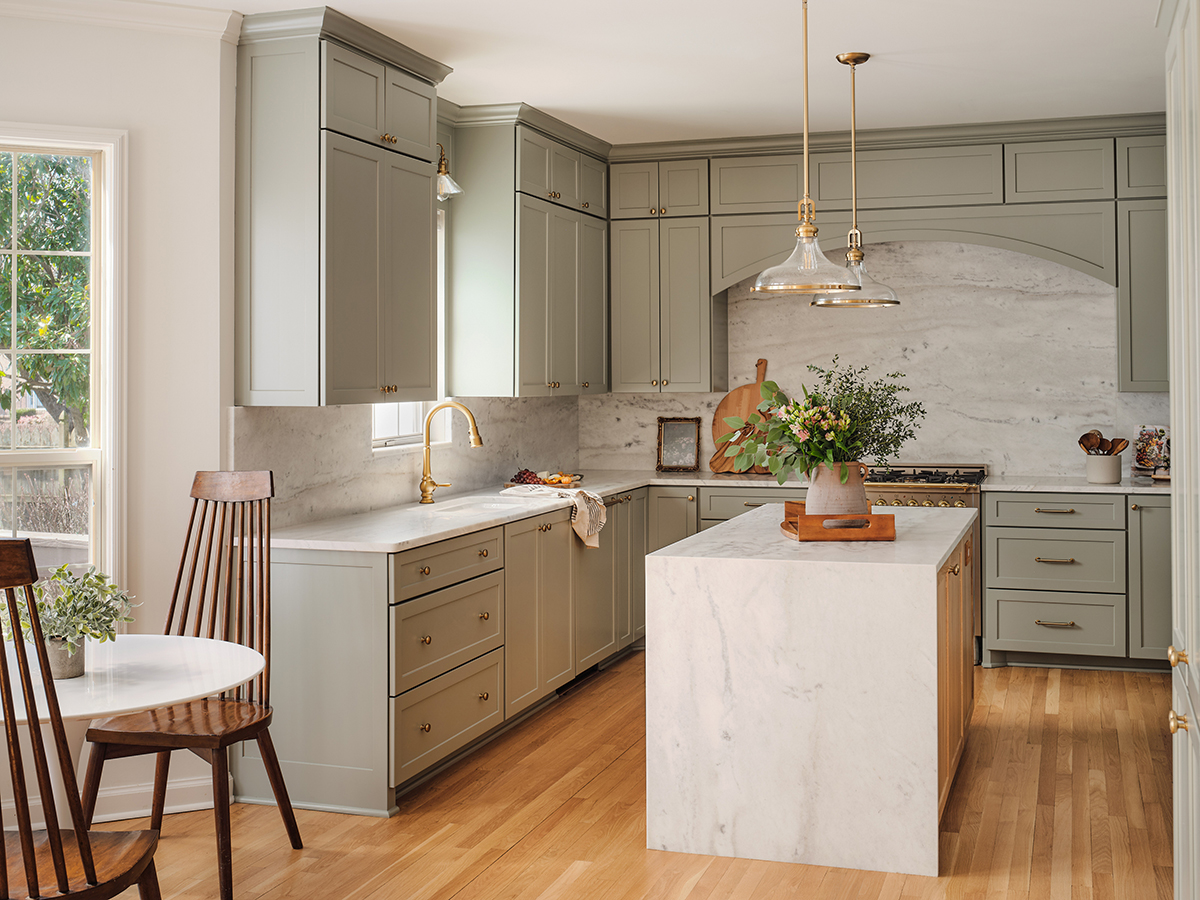
We initially were supposed to do this renovation a year earlier, but there were several things that kept pushing our timeline back. In the end, I am so relieved we took the extra time to really thing through how we wanted to use the space. There is something extremely rewarding to me about seeing a room used to it’s full potential. I appreciate the gift that this space is to our family. It’s been so fun to share it with you all.
Sources:
Appliance Pulls – Perigold
Cabinet Pulls
Cabinet Knobs – sold out (similar here)
Broom closet pull – Wayfair
Island Pendants – Shades of Light
Artifacts Touchless Faucet – Kohler c/o
Undermount Sink – Kohler c/o
Window Sconce – Rejuvenation
Stove -ILVE – 30 in. Stainless Steel
Fridge – Jenn Air (purchased locally)
Dishwasher – Jenn Air (purchased locally at A-1)
Lazy susan for corner cabinet
Cookbook stand
Wooden utensils
Floral Art
Small cutting boards
Breakfast Table
Dining Chairs – old model from West Elm (similar here or here)
I think that covers everything! Let us know if we can answer any questions for you. I admit I will miss the design process of this project, but we enjoy actually using the space much more. I am ready for the next project, but maybe one that is a little tamer to tackle!
Thank you Joseph Bradshaw for capturing this space so well!

